
Techniques · 8 MIN READ
Beaded cross stitch: add beads without distorting your fabric
Plan bead size, test needle and thread combinations, and choose an attachment and finishing sequence that suits the design.
Plan the beads as part of the complete design
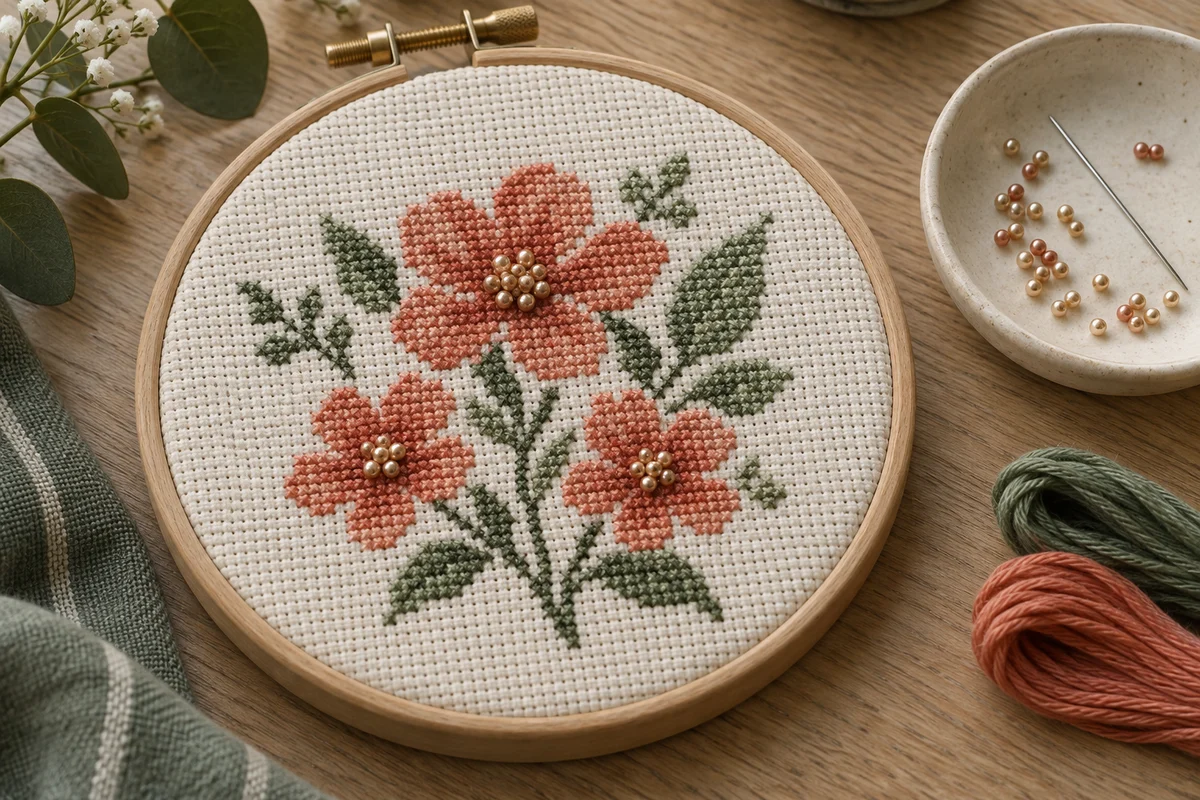
Beaded cross stitch adds raised detail to a counted embroidery project. A few beads can highlight a flower center, punctuate a border, or provide sparkle in an otherwise flat design. Their size and surface change the appearance of the piece, so plan them before starting rather than treating them as an automatic improvement to every empty square. The best addition serves a clear visual purpose and suits the finished object.
Begin with the pattern's bead key and attachment instructions. Check whether a bead replaces a cross, sits over completed embroidery, or follows a separate placement diagram. Those arrangements are not interchangeable. A symbol that resembles a stitch symbol may have a different meaning in the embellishment key. Read the whole instruction before filling an area that is supposed to remain available for beads.
Think about the finish at the same time. A framed wall piece, an ornament, and a bookmark have different needs. Beads add depth and may catch on surfaces that touch the embroidery. A raised design can look attractive in a display that provides room for it, while the same detail may be inconvenient between book pages. Choose the object and its practical requirements before deciding how much embellishment to use.
Start with a small defined accent
For a first experiment, choose one small area such as three flower centers or a short border section. Keep the rest of the chart familiar. This lets you compare bead placement, thread behavior, and the final appearance without learning several new techniques at once. A restrained trial also makes it easier to replace a bead or correct an attachment method before repeating it across a large project.
Check bead size against the stitch scale
A bead occupies physical space rather than an abstract chart square. Compare its dimensions with the actual stitch scale on your selected fabric. A bead that fits comfortably beside one cross on a larger effective count may crowd its neighbors when the same chart is worked at a smaller physical scale. Check a row or cluster, not just one bead held above the cloth.
If changing the fabric from the pattern's specified setup, review the beads as well as the embroidery dimensions. Use the fabric count converter to compare the resulting cross sizes, then test the embellishment on the intended material. Do not assume a bead substitution solves every scaling change. The designer may have positioned a cluster or a long bead to fit a particular distance across the chart.
Look at shape and finish as well as size. Round seed beads, longer bugle beads, and decorative buttons have different placement needs. A transparent bead may show its attachment thread, while an opaque one may hide it. A strongly reflective finish can attract more attention than you expect. Test these effects in the project's palette rather than choosing only from a close-up photograph of the bead packet.
Match the needle and thread with a practical test
Choose a needle that passes through the bead hole with the intended thread. A needle used for ordinary cross stitch may be too wide, particularly at its eye, even if its tip enters the opening. Test the complete threaded needle on several beads from the packet. Avoid forcing it through a narrow hole, since a tight fit can damage the bead or make every attachment difficult.
Follow the pattern's thread recommendation where one is supplied. Matching cotton floss, a fabric-colored thread, or a suitable beading thread can create different appearances. The Woven Rose guide to beads and embellishments notes that some beads need a finer beading needle and that attachment thread choices vary. Test your particular combination rather than treating one needle number or strand count as universal.
Consider the visible thread in a transparent bead. A pale thread can lighten its appearance, while a darker thread may create a line through the center. Compare the actual sample under ordinary light. Keep the chosen needle, thread, and bead details in your project record. If you later replace a packet, those notes help you check whether the new beads behave like the original ones.
Check every pass the method requires
Some attachment methods pass through the bead more than once. A combination that fits on the first pass may not fit after thread already occupies the hole. Test the full sequence before starting the final area. If the second pass is consistently difficult, reconsider the needle or thread according to the instructions instead of repeatedly forcing the same combination through.
Sample the attachment method before working the chart
Use spare fabric of the same type and effective count as the project. Place a few beads according to the method specified by the pattern. Observe their direction, how firmly they sit, and whether the surrounding cloth remains flat. A single diagonal attachment and a cross-based method can leave beads oriented differently, so the intended appearance should guide the choice rather than a general preference.
Work slowly enough to understand the route. Identify the starting hole, pass through the bead as instructed, and place the next fabric entry deliberately. Keep the thread controlled while the bead settles against the surface. Pulling harder is not a substitute for a secure route: excessive tension can tilt the bead or distort the cloth. Compare the completed sample with the pattern's diagram and intended orientation.
Inspect the back and check how the thread is started and ended. A secure finish should suit the thread and fabric without creating unnecessary bulk. Do not rely on a loose tail hidden behind a bead. If the instructions are unclear, ask the designer or kit maker for a clearer explanation of the sequence. A sample is the appropriate place to resolve uncertainty before embellishing a completed picture.
Organize the work so beads do not obstruct stitching
Plan the order of ordinary stitches, any required cleaning or pressing, and the bead stage. Many projects are easier to handle when raised embellishments are added after the surrounding flat stitches, but follow the specific pattern's sequence. Care requirements matter too: the embroidery materials and the bead finish may not all tolerate the same treatment. Decide the sequence from their instructions rather than assuming every completed piece can be washed afterward.
Consider where the hoop or frame will rest. Do not trap attached beads beneath a hoop ring or a clamp when repositioning. If a working area must move across a section intended for embellishment, postpone those beads where the pattern allows, or choose a support that keeps them clear. Check the actual equipment and design layout before adding a raised section that will be difficult to hold safely later.
Keep small quantities of beads in a shallow tray or another suitable contained surface while working. Separate different bead types and return unused ones to labeled packets. Similar colors and sizes can become difficult to identify once mixed. Store the needle securely between sessions and keep the bead area organized so loose embellishments do not disappear into folds of fabric or thread.
Record the stage before packing away
Mark completed bead placements on a permitted working chart or in a detailed note. The project progress tracker can help record sessions, but it does not identify the exact embellishment positions by itself. Note the active bead type, attachment thread, and method. These details make it easier to resume consistently, especially when the project has several different embellishments.
Place repeated beads with consistent spacing
Use confirmed chart references to locate each bead. A repeated border can look uneven if the placement drifts by one fabric hole, even when the bead color is correct. Check the first small group against the chart, then compare subsequent groups with that reference. Do not extend a border from an uncertain placement simply because the spacing looks approximately right.
Keep the intended orientation consistent. If the pattern uses diagonal bead attachments, check which direction they lean. If a method is meant to hold the bead more upright, compare neighboring beads after a short section. Differences in tension or thread route may explain an inconsistency. Correct the method early rather than hoping a long completed row will hide the mismatch.
Allow the design to retain some empty space. A dense cluster can change the visual weight of a motif, particularly near small lettering or a delicate outline. For your own original designs, test a sparse version before filling every possible location. One carefully placed accent can be enough to define a center or corner. Use graph paper to mark an original placement plan and keep bead symbols distinct from thread symbols.
Choose a finish that provides enough clearance
Measure the raised surface when planning a glazed frame. The embellishments need room so the glazing does not press directly against them. A suitable mount or spacer arrangement depends on the frame and the piece; inspect the actual components instead of assuming any deep-looking frame supplies enough clearance. The framing guide discusses support and positioning for a completed embroidery.
Check the backing and edges of an ornament or sewn item as well. The embroidery should sit securely without forcing raised details into an unsuitable fold or seam. If the object will be handled regularly, consider whether the embellishments can catch on clothing or surrounding surfaces. A decorative display and a practical everyday item can require different choices even when they share the same chart.
Follow the care directions for the actual beads, thread, and fabric. If those requirements conflict, ask the relevant maker how to handle the combination before treating it. Do not add an unidentified bead finish to a washable object and assume it will behave like plain cotton thread. Keeping the product details with the project makes future cleaning decisions easier and avoids relying on memory alone.
Inspect the finished piece and keep a repeatable record
Review the chart for missing embellishments and compare repeated sections for spacing and direction. Look at the embroidery from the distance at which it will be displayed. Beads can create attractive highlights, but they should still support the composition rather than obscure its main shapes. Inspect the back for loose thread ends and make sure the chosen finish supports the cloth evenly.
Save a record of the bead type, quantity, needle, attachment thread, fabric setup, and method. Note any substitution and the outcome of your sample. If a later companion piece uses a different fabric count, return to those decisions instead of assuming the original bead arrangement will fit unchanged. A useful first beaded project teaches you how the physical materials interact, giving the next embellishment a clear purpose and a tested method.
Choose an original chart from our free collection, or check your fabric measurements before you begin.
Free cross stitch patterns · Fabric calculator