
Getting started · 8 MIN READ
Aida, linen and fabric count explained
Choose a fabric you can see comfortably and calculate the size before cutting.
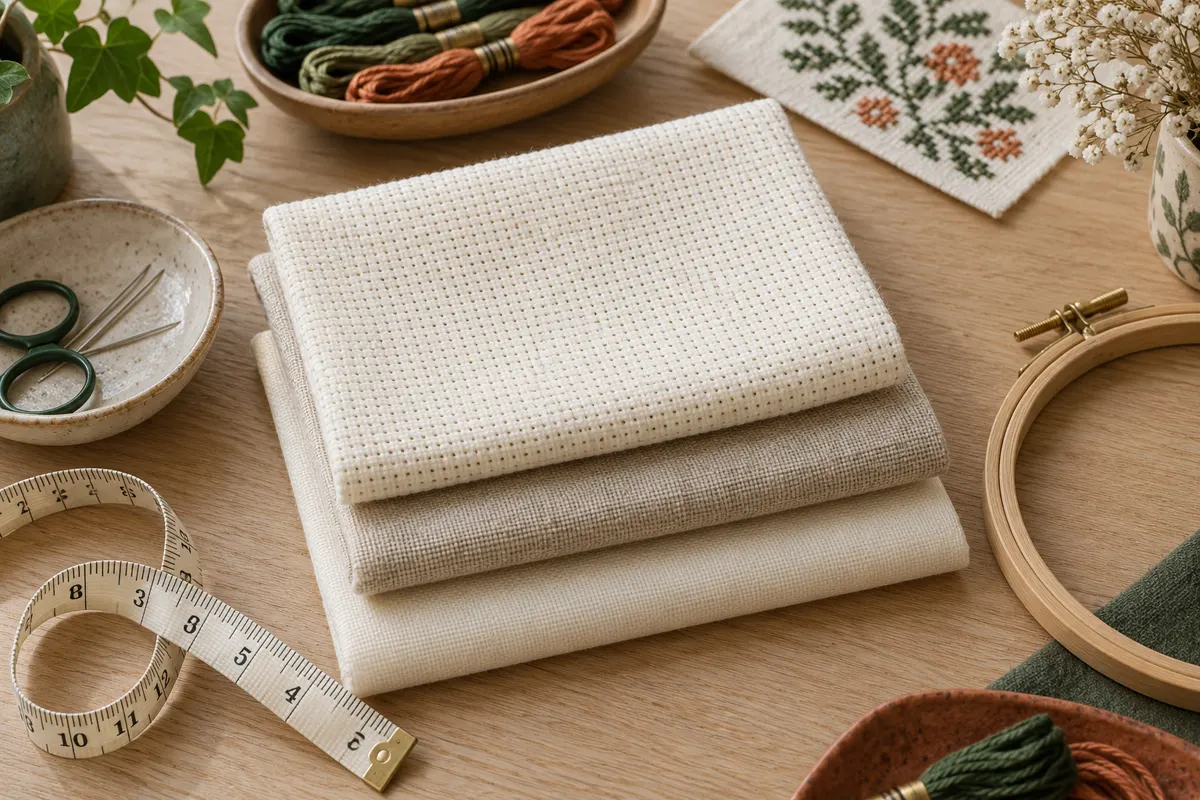
Start with the grid your stitches need
Cross stitch fabric provides the structure that makes a counted chart possible. The weave gives you repeatable positions for each cross, so the same number of stitches can form a recognizable design. Different fabrics change the size, texture and counting experience of that design. Choosing fabric is therefore a practical decision about the project, rather than simply picking a color that looks attractive in a photograph.
Begin with the pattern instructions. Note the stitch dimensions, recommended fabric, working strands and whether the stitches cover one or two fabric threads. These details help you interpret the stated finished size. If you change the fabric, the chart still contains the same squares, but the physical dimensions can change. The fabric calculator can check those dimensions before you buy or cut a piece.
Consider how much unstitched fabric will remain visible. An open sampler shows the weave around its motifs, while a fully covered picture hides much of it. A smooth, regular background may suit clean lettering; visible linen texture may suit a more organic appearance. Both can work, provided the fabric is comfortable to count and suitable for the stitching and finish you intend.
Understand Aida fabric count
Aida is woven in blocks that form an easy-to-see square grid. Its count indicates how many stitch blocks fit into an inch when you work one full cross over one block. On 14-count Aida, fourteen full crosses fit across an inch. On 18-count, eighteen crosses fit across the same distance, so the same chart produces a smaller stitched picture.
For a seventy-stitch-wide design, 14-count gives a width of five inches. At 18-count, the width is approximately 3.89 inches. Multiply inches by 2.54 to convert to centimetres. These calculations describe the design area only. Extra fabric for holding, seams, mounting and final trimming must be added separately; a five-inch picture does not mean you should cut a five-inch piece of fabric.
Lower counts have larger blocks and often make the stitch positions easier to see. Higher counts allow a more compact finish but require smaller movements and closer attention. Neither count determines how skilled a stitcher is. Choose a count that suits the motif, your eyesight, the thread coverage and the amount of detail you want at the finished size.
Measure a scrap when the label is missing
Count a sufficiently long run of blocks with an accurate ruler rather than guessing from one or two squares. Fabric can be slightly uneven or stretched by handling, so compare both directions and avoid measuring inside a distorted hoop. If the result is uncertain, treat the fabric as a sample until you can confirm its count. Buying a labeled piece is easier than planning an important finish around an uncertain measurement.
Understand evenweave and stitching over two
Evenweave describes fabric with a regular thread structure suitable for counted work. Unlike Aida's obvious blocks, you count individual fabric threads to place the stitches. Many cross stitch designs on evenweave are worked over two threads horizontally and vertically. This means a 28-count fabric produces fourteen crosses per inch when stitched over two, because each cross spans two of the twenty-eight threads.
The arithmetic is fabric count divided by the number of threads covered by each stitch. A 32-count fabric worked over two gives sixteen stitches per inch. Worked over one, it gives thirty-two. Always distinguish fabric thread count from effective stitch count. Entering thirty-two as stitches per inch when the design is actually worked over two would make the calculated size half as large as it should be.
Stitching over one creates much smaller crosses and can require a different thread choice and technique. It is not just a way to shrink any chart without further thought. Test whether the thread sits comfortably, whether the stitches remain secure and whether you can see the holes clearly. The fabric count converter helps compare dimensions, while the pattern instructions and your sample determine the practical method.
Follow a consistent starting position
When working over two, make sure each cross spans the same two-thread structure instead of drifting onto a neighboring position. Inspect a few completed stitches against the weave before making a large section. If the grid begins to look uneven, pause and check the placement. A small counted sample is a useful way to learn this rhythm before transferring the technique to a detailed sampler.
What linen changes in the finished piece
Linen offers a visible texture, with threads that can vary in thickness. Counted linen is used for cross stitch, often over two threads, but the irregular appearance can make counting feel different from smooth evenweave or Aida. Some stitchers enjoy the character of that background; others prefer the predictable blocks of Aida. Decide by examining and stitching a real sample when possible.
A printed product photograph cannot reliably show the true fabric color or scale of its weave. View a small piece in the lighting where you intend to stitch and display the finished work. If you order online, check the manufacturer's stated count, composition and dimensions. A decorative fabric described as linen is not necessarily a suitable counted embroidery fabric with the grid your chart needs.
Open designs with fine lettering or fractional stitches may benefit from a fabric whose individual threads allow the required placements. That does not mean linen is compulsory for those designs. The chart, stitch method and your comfort all matter. Read the guide to backstitch and fractional stitches when the design includes positions between the usual full-cross corners.
Match thread coverage to the fabric
A fabric's count affects how much area each cross must cover. Two strands that give comfortable coverage on one count may look thinner or bulkier on another. Follow the chart as a starting point, then stitch a sample with your exact thread and fabric. Examine the result at a normal viewing distance rather than making a decision only from an extreme close-up.
Some visible fabric between stitches is normal in many styles of cross stitch. Full coverage does not automatically require a completely solid surface, and adding extra strands can make holes crowded or tension harder to control. Dark thread on pale fabric may make gaps look stronger than pale thread on a similar background. Compare the design's intended appearance before changing the strand count.
Needle size also affects the experience. A suitable tapestry needle should carry the chosen thread through the holes without force or obvious damage to the weave. A needle that struggles with every stitch suggests that its size, the thread thickness or your tension needs attention. The needle and thread guide explains how to evaluate those variables together.
Choose a background color deliberately
Place several of the design's important thread colors against the fabric before deciding. A pale cream motif can disappear on cream fabric, while a dark navy border may become difficult to distinguish on navy. Strong contrast is especially useful for small lettering and narrow outlines. If your chart leaves the background unstitched, fabric color becomes one of the visible colors in the design.
Colored and hand-dyed fabrics can vary between pieces and dye batches. A mottled background may enhance an open motif, but it can also compete with a detailed picture or make symbols harder to count. Check care instructions and colorfastness rather than assuming the fabric can be washed like plain cotton. Keep any supplier information with the project so you can refer to it at finishing time.
For a first project, a light, relatively plain background often makes the holes easier to see. You can add variety through the thread palette while learning the counting rhythm. Later, test a darker or textured fabric on a small motif before committing to a large picture. The easy pattern guide can help you choose a chart that keeps this experiment manageable.
Calculate margins for the planned finish
Margins serve several purposes: they give your hoop or frame space to hold the fabric, allow you to center the design and provide material for mounting or sewing. Decide what the final object will be before cutting. A framed picture, a hanging ornament and a bookmark can need different allowances even when the stitched motif is the same size.
Consider an eighty-four by fifty-six stitch design on 14-count Aida. Its stitched area is six by four inches. Adding three inches on every side produces a twelve by ten inch fabric piece. Three inches is an example allowance rather than a universal rule; check the actual mount, backing, seams and trimming requirements. More fabric gives adjustment room, while too little can restrict your finishing options.
Keep width and height orientation clear when marking the cut. Some designs are wider than they are tall, and turning the fabric piece does not change the chart dimensions. Measure twice before using scissors. If you are mounting a finished piece, our framing guide explains why centered placement and adequate fabric around the edges matter.
Allow for the actual size of purchased fabric
A product's nominal dimensions may differ slightly after edge finishing, washing or cutting. Check the usable piece in your hands before assuming that the listing's size is available from edge to edge. Avoid planning a design so tightly that a small discrepancy leaves no finishing margin. If prewashing is appropriate for the material, measure after the required preparation as well.
Prepare and store the fabric carefully
Prevent loose edges from becoming a distraction during stitching. Suitable edge preparation may include overcasting or a sewing-machine edge finish, depending on the fabric and your equipment. Keep that treatment outside the area needed for the design and final finish. Avoid adhesives or products that could transfer residue to the part of the fabric you plan to display.
Find the center gently, then check that the design will fit with the chosen margins. If you add guide lines, choose a method intended for temporary use and test its removal on a scrap under the manufacturer's instructions. Our gridding guide covers checking ten-square divisions without treating every pen or thread as interchangeable.
Store unworked fabric clean and dry, protected from direct light, dust and snagging objects. Label scraps with their count, composition and supplier when known. Before resuming a stored project, inspect the fabric and your starting marks rather than relying on memory. Keeping a small sample beside your notes makes later decisions about matching thread, washing and finishing much easier.
Choose an original chart from our free collection, or check your fabric measurements before you begin.
Free cross stitch patterns · Fabric calculator