
Getting started · 9 MIN READ
Cross stitch hoops: choose, position and protect your fabric
Compare hoop sizes, fit the fabric without distortion and manage larger projects through careful repositioning and storage.
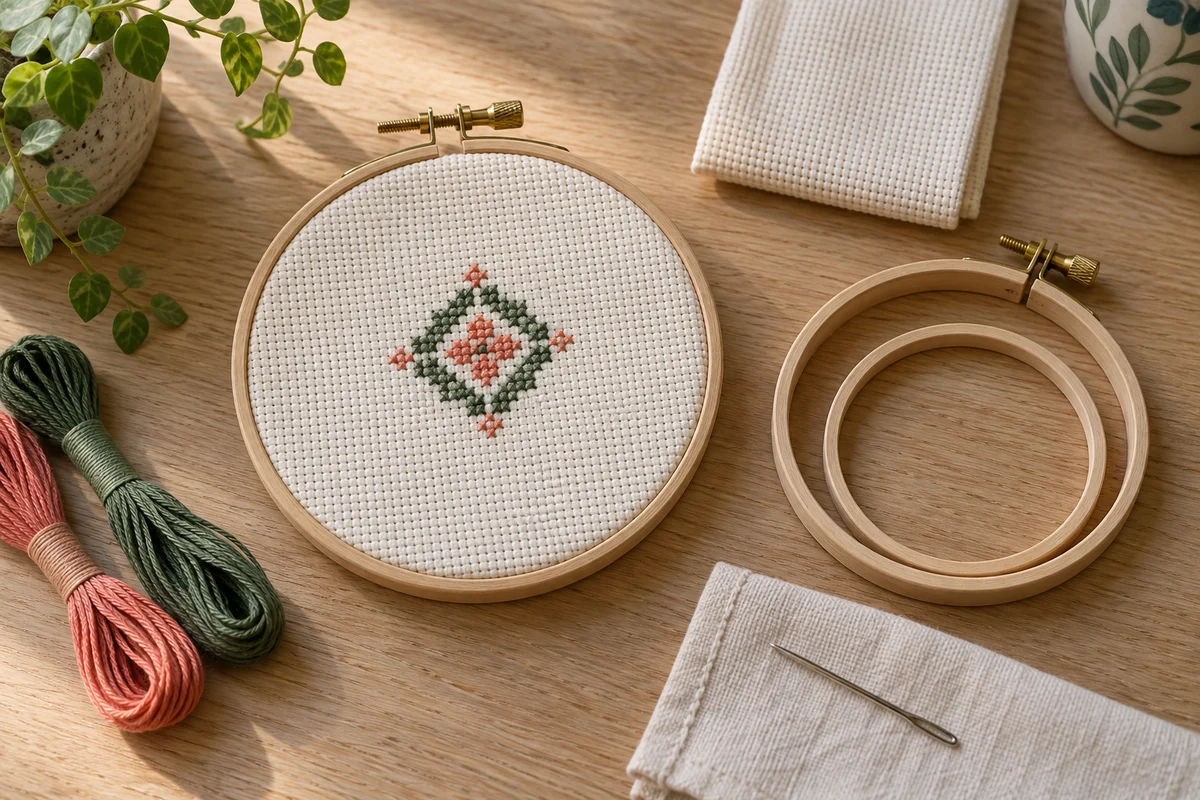
Choose a hoop for the way you will stitch
Cross stitch hoops hold a section of fabric open so you can see the holes and place stitches without constantly supporting the cloth with your fingers. The useful size is not necessarily the biggest hoop that fits your project. It is the size that lets you reach the active stitching area comfortably, keep the fabric controlled, and turn the work over when you need to secure a thread.
A small sampler and a large full-coverage chart can both be worked in a handheld hoop, but they create different handling problems. The sampler may fit inside one working area. The larger piece needs extra fabric managed outside the ring and repeated repositioning. Decide whether you value seeing the whole design at once or holding a lighter, more manageable section. That choice is more useful than buying solely from the dimensions printed on the pattern.
Your working hoop can also be different from your display hoop. A plain adjustable hoop may be convenient while stitching, while a second hoop with a finish you like can suit the final presentation. Keep these decisions separate until you know the completed embroidery's dimensions. Cutting fabric for a particular decorative ring too early can leave you without the margin needed to reposition it or finish the back neatly.
Begin with a reach test
Hold an empty hoop in the position you usually stitch. Imagine placing the needle near its center, then near the far edge. Check whether you can reach those places without bending your wrist awkwardly or squeezing the ring tightly. This is a practical comparison between sizes, not a medical assessment. If a hoop feels cumbersome before any cloth is added, extra fabric is unlikely to improve its handling.
Inspect the rings and adjustment before using good fabric
An adjustable round hoop commonly has an inner ring and an outer ring with a screw. Before using it, separate the rings and inspect their contact surfaces. Look for rough edges, splinters, sharp molding seams, or a screw that catches where your thread will pass. A low price does not tell you whether a particular hoop is usable, and an expensive one still deserves a quick inspection.
Check how evenly the rings meet. They should sit together without an obvious gap on one side or a point that traps the fabric much harder than the rest. Turn the screw through a small range to make sure the adjustment moves smoothly. You are testing the mechanism, not tightening it as far as it can go. A stubborn screw can make every repositioning session harder and encourage unnecessary force.
If you are comparing wood and plastic, judge the individual hoop rather than assuming one material always performs better. Consider its surface, weight, grip, and adjustment. Some alternative designs use a spring mechanism instead of the familiar screw, so follow their own instructions. A technique suitable for an adjustable two-ring hoop may not apply directly to a spring hoop or a clamp frame.
Try a scrap before the project
Use a spare piece of the fabric you intend to stitch on. Fit it in the hoop, make a few stitches, and release it again. This short trial shows whether the hoop slips, leaves a troublesome mark, or feels awkward when you turn it over. It also gives you a chance to practise adjustment before working around a carefully centered design. Keep the trial small and use it to answer specific questions.
Match the working area to the fabric and chart
The diameter printed on a hoop describes the ring, but not every square close to that ring will be equally convenient to stitch. Leave room to guide the needle and manage thread near the edge. If the chart almost fills the circle, you may need to reposition the hoop even though the design's overall dimensions seem to fit. Rounded boundaries and rectangular charts rarely match perfectly.
Calculate the stitched size before choosing the fabric cut. A chart 70 stitches wide on a surface producing 14 stitches per inch has a stitched width of 5 inches. Your cut also needs cloth beyond the embroidery for handling and finishing. Use the fabric calculator to compare dimensions and margins. Do not count the visible empty area inside a hoop as a substitute for the fabric allowance outside the design.
Check where the ring will rest as the work develops. A wide margin makes repositioning easier because the hoop can grip unstitched fabric near the edge. A cut that barely surrounds the chart may be difficult to hold for the final rows. If a kit supplies pre-cut fabric, inspect its available margin before selecting the hoop and your starting position; avoid making an irreversible trim just to reduce loose cloth.
Fit the fabric without distorting the grid
For a conventional adjustable two-ring hoop, loosen the outer ring enough to separate it from the inner ring. Place the inner ring on a clean flat surface, lay the fabric over it, and position the intended working area above the opening. Fit the outer ring over the fabric and inner ring. Tighten gradually while checking that the fabric lies flat. Refer to your hoop's instructions if its mechanism differs.
Look at the weave as well as the surface. The rows and columns should retain their normal alignment rather than leaning diagonally because one corner has been pulled too hard. Smooth slack carefully around the ring instead of dragging repeatedly at one point. If the fabric looks distorted, release the tension and reset it. Starting again takes less time than trying to compensate for an uneven setup through the stitching.
A hoop supports the cloth; it does not decide how hard you should pull each thread. Keep the crosses resting on the surface rather than cinching them into dents. Fabric tension and thread tension are separate things. You can have neatly held fabric and still create puckering by pulling stitches too tightly. The beginner guide explains the basic stitch sequence and how to keep the upper diagonals consistent.
Check after the first few stitches
Pause after a small section and view the cloth from both sides. Check that the surrounding weave remains even and the new stitches do not drag the fabric inward. If the cloth is slipping, adjust the hoop rather than gripping it more tightly with your hand. If the stitches themselves are tight, changing the hoop setting alone will not resolve that habit. Use the scrap test to distinguish the two problems.
Reposition the hoop with a known reference point
On a large project, identify your next working area before removing the ring. Mark your place on the chart and note a completed feature nearby, such as the corner of a border or the end of a stem. A reliable reference makes it easier to resume after the hoop has moved. Do not depend solely on remembering which row was near the screw, since that relationship changes when you reposition the fabric.
Release the hoop rather than forcing the fabric through a tightened ring. Move the cloth to bring the next section into a convenient position, then fit and adjust the rings again. Inspect the existing stitches where the ring now sits. Ordinary flat crosses may encounter the ring during a large project, but raised details, delicate embellishments, and beads need additional planning so they are not trapped or crushed.
Keep the chart orientation consistent even if you rotate the hoop to reach a stitch. It is easy to mistake left for right after turning a symmetrical motif. Find the top of the chart and compare a distinctive completed feature before continuing. A small temporary reference on unstitched margin fabric can help you keep track, provided the marking method is appropriate for that cloth and will not damage the final work.
Manage loose fabric and thread outside the ring
Extra fabric can rest loosely beside your hand, but on a large piece it may obscure the back or catch the working thread. Fold or roll the excess gently and secure it with a suitable clean fabric accessory if needed. Keep the active thread path free. Avoid a tight bundle that pulls against the hoop or conceals the place where you need to end the thread.
Check the back before every new length. A thread can loop around the hoop screw or catch in folded fabric while the front appears normal. Pulling harder may tighten the tangle instead of clearing it. Stop, trace the thread's path, and release the obstruction. This habit is particularly useful when working close to the ring or alternating between several colors in a small space.
Store unused needles and threads away from the loose cloth so they do not become hidden in its folds. Use the project progress tracker to note the section completed before packing the work away. The tracker is a planning tool, not a replacement for marking your chart. A short note about the current color and reference point can make the next session easier to start.
Keep the grip light
Notice whether your supporting hand is pinching the ring throughout the session. Try a position in which the hoop rests securely without a constant hard squeeze. Change your working position when it becomes uncomfortable, and take breaks that suit you. If a handheld hoop consistently feels difficult, a support or a different working frame may be worth comparing. No single size or holding method suits every person and every project.
Release, store, and finish with care
Remove the fabric from the working hoop between sessions when practical, particularly if you are concerned about persistent ring marks. The DMC hoop tutorial also advises taking the hoop off when it is not in use. Keep the released work clean and gently stored rather than leaving it crumpled beneath heavy objects. Follow the care requirements of the fabric and thread when addressing marks later.
Do not assume that washing or pressing will remove every mark. Materials differ, and some threads or embellishments need particular treatment. Avoid making the hoop unnecessarily tight on the assumption that any crease can be fixed at the end. Prevention begins with a sound ring surface, careful setup, reasonable handling, and releasing the work. If you plan to wash the embroidery, check the relevant material instructions before stitching so the finishing plan is realistic.
For a hoop display, center the completed design in the ring and check its appearance from a normal viewing distance. Leave sufficient fabric for your chosen backing method. Test the position before trimming anything, because the center of the stitched rectangle may not be the visual center of an asymmetrical motif. The framing guide offers additional considerations for positioning, support, and protecting a finished piece.
Diagnose problems before replacing the hoop
When fabric repeatedly loosens, examine whether the rings fit evenly and whether you are accidentally pushing the cloth inward while stitching. Check the screw and the amount of fabric caught around the ring. A hoop near the edge of a very small fabric cut has less material to grip. Reset the work on a scrap to see whether the problem belongs to the hoop, the setup, or the way it is handled.
When stitches look uneven, compare their thread tension and direction before blaming the ring. A hoop can make the holes easier to see, but it cannot correct an inconsistent stitch sequence. Work a small square of one color and inspect it after releasing the fabric. If that sample looks good but a busy area does not, investigate counting, crowded thread paths, and color changes in the specific section.
When a hoop is inconvenient rather than defective, identify the inconvenience precisely. Is it too heavy, too small to show a useful reference, too large to reach, or awkward to turn over? That description guides a sensible comparison with another size or a different support. You do not need a collection of hoops to solve every project. Start with a usable one, learn its behavior, and add equipment only when it addresses a problem you can clearly name.
Choose an original chart from our free collection, or check your fabric measurements before you begin.
Free cross stitch patterns · Fabric calculator