
Techniques · 8 MIN READ
Cross stitch on plastic canvas: shape, stitch and finish
Plan a rigid stitched object by checking mesh, counting conventions, thread coverage, cut dimensions and edge finishing.
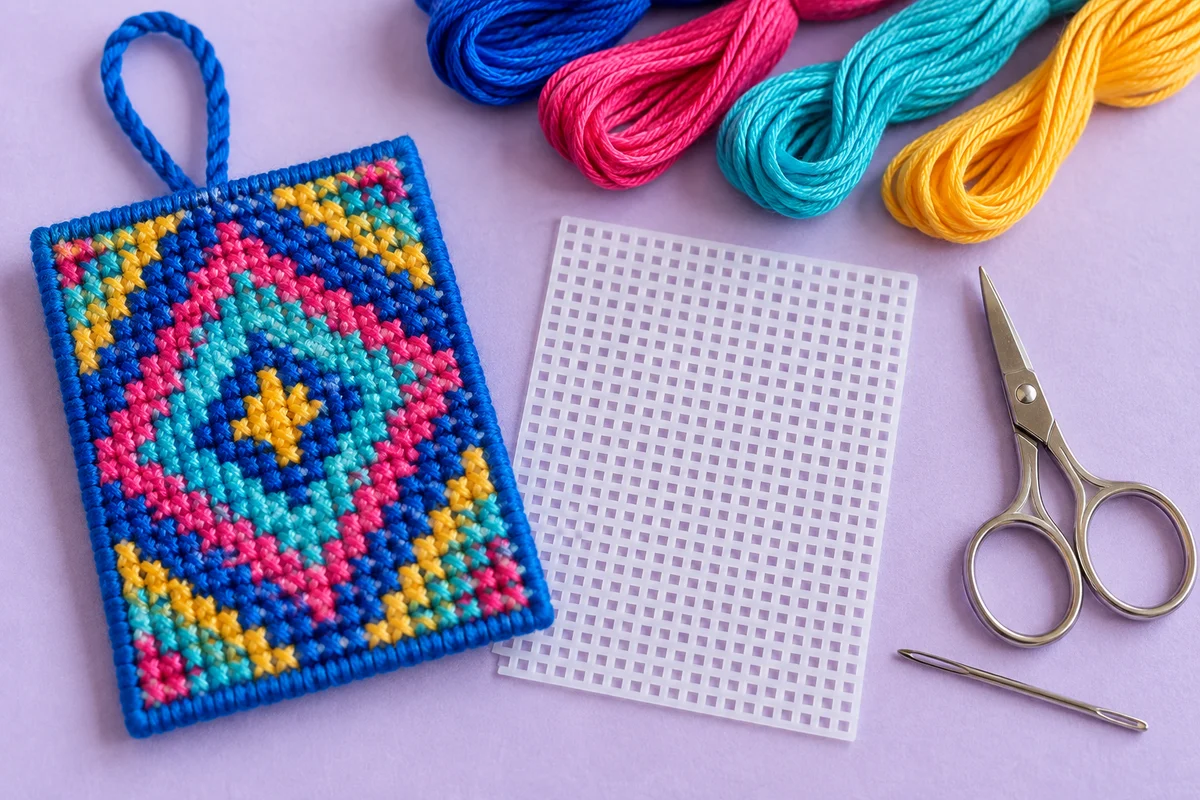
Decide what the rigid surface should help you make
Cross stitch plastic canvas provides a regular perforated surface that holds its shape more readily than ordinary embroidery fabric. It can suit a small ornament, a flat decorative shape, or parts of an assembled object. Its rigidity changes the way you plan cutting, edges, and backing. Begin with the object you want to complete, then choose a canvas and stitch method that serve that purpose.
A simple flat rectangle is a useful first project because it lets you practise placement and edge finishing without also solving a shaped outline or several joins. Choose an original geometric motif or a small clear chart whose permitted use includes your project. A heart, leaf, or diamond can provide enough color changes to learn the material while keeping the design easy to inspect.
Check whether the pattern is written specifically for plastic canvas or is a fabric chart you intend to adapt. A counted chart can provide the motif's positions, but it may not explain the plastic piece's cut dimensions or edge treatment. Those are additional decisions. Do not assume that a fabric margin calculation tells you how many holes or bars to leave on a rigid surface.
Name the finished object first
Write down whether the piece will be displayed, handled, hung, backed, or joined to another piece. A small decoration that hangs freely has different requirements from a bookmark that must fit between pages. Consider thickness, weight, edge texture, and the reverse side. A rigid material can be useful, but it is not automatically the best support for every small cross stitch design.
Read the mesh description and the pattern's counting convention
Plastic canvas products come in different mesh sizes. Inspect the specific product description and the pattern's convention rather than assuming every reference to count describes dimensions in exactly the same way. Some instructions describe cut pieces by holes, while others refer to bars or stitched intervals. Identify what you are counting before marking the sheet or comparing it with a chart.
A full cross uses four corner holes and spans the interval between them. Along a simple uninterrupted row, ten adjacent crosses use eleven corner-hole positions. That distinction matters when a cutting instruction counts holes rather than stitches. Draw a short row on paper and number its corner holes if the relationship is unfamiliar. You can verify the convention on a scrap before cutting the final piece.
For sizing, compare the actual spacing of stitch positions with the product's stated mesh. The fabric calculator can estimate an embroidered motif's size when you enter the correct effective stitches per inch, but it does not determine plastic-canvas cut dimensions or an edging allowance. Treat those as separate parts of the plan. Check the intended material and pattern instructions when converting a fabric chart.
Select thread and needle through a sample
The thread needs to suit the opening size, the planned stitch, and the coverage you want. Fine mesh and coarse mesh may need different combinations. Do not assume that the strand count from a fabric project will cover a larger plastic grid in the same way. Start with the pattern's recommendation where available and sample it on the actual material before stitching a large area.
Test the needle with the complete thread combination. It should pass through the holes without forcing or excessively rubbing the thread. Check a hole that already contains another stitch as well as an empty hole, because shared corners can become more crowded. If the combination is difficult, review the needle and thread recommendation rather than repeatedly pulling harder through the same tight opening.
View the sample from normal display distance. Decide how much of the plastic you are comfortable seeing between stitches and around the motif. Full coverage may be desirable for one design, while another intentionally leaves open areas. The sample should also remain manageable to stitch. Excessive bulk can make shared holes difficult and create a rough reverse even if the front initially looks well covered.
Inspect the back as well as the front
Practise starting and ending thread securely in the sample according to a method suited to the material. Check whether the reverse will need a backing for the chosen object. Avoid relying on a loose tail hidden behind a decorative motif. A rigid surface does not grip and flex exactly like fabric, so evaluate the actual result instead of assuming the same handling will always work unchanged.
Draw the cutting plan before using scissors
Transfer the pattern's cut dimensions onto a planning sketch and identify its counting units clearly. Include the motif, any blank border, and the space required for the edge treatment or joining method. Compare the sketch with the sheet and count twice. Cutting removes material permanently, so this is the appropriate stage for resolving a difference between a chart's stitch width and a piece's specified hole width.
If creating your own design, use graph paper to show both the stitched motif and the planned outline. Mark those boundaries differently. A chart's outermost colored square should not accidentally become the cut line if the finish needs additional material around it. For a shaped ornament, examine narrow points and inward corners carefully so the remaining plastic has enough structure for the chosen finish.
Use appropriate scissors and follow the product's handling guidance. Cut carefully through the intended area without accidentally clipping a bar needed to retain a hole or support an edge. Inspect the piece for projecting plastic ends after cutting. Do not try to hide a badly damaged boundary with more thread before checking whether it still supports the intended object. A scrap trial can help you understand how the mesh behaves.
Work consistent crosses from a verified reference
Locate a reliable starting point on the cut piece and compare it with the chart. Count both across and down before placing an off-center motif. On a small rigid rectangle, the edges can provide convenient references, but only if you have counted the correct units. Verify the first section's position before adding surrounding colors so an initial placement mistake does not spread through the whole design.
Construct full crosses according to the pattern's stitch route and keep the upper diagonals consistent. The Annie's plastic canvas cross stitch guide illustrates full-cross construction on this material. A plastic canvas project can also use other stitches, so check the symbol key instead of assuming every colored position represents the same stitch.
Keep thread tension controlled rather than pulling so hard that the piece bows or the thread abrades at the openings. Work a short connected area and inspect it from both sides. When the thread catches, trace its path before adding force. Shared holes and previous stitches deserve attention because an accidental split or snag can affect the appearance of several neighboring crosses.
Finish one representative corner early
A sample corner can show how the main stitches meet the border and how the edge method turns. Practise that combination before completing the entire object. The result may reveal that you need more space, a different thread combination, or another finishing route. It is easier to change a planned border while the main piece is still a sketch than after its edges have been cut tightly.
Give the edges a deliberate finish
Choose the edge treatment from the project's instructions or develop it through a sample for your own original design. Covering exposed plastic with an appropriate overcast or whip-style edge is one possibility, but the route and coverage depend on the shape, mesh, and thread. Check that the finish protects the outline without making the object excessively bulky or pulling a narrow point out of shape.
Corners need their own attention. A straight run may look tidy while a turn exposes plastic or creates a thick thread bundle. Compare the front, side, and back of the sample. Keep the treatment consistent around the piece and avoid placing so many passes through one opening that it becomes difficult to manage. If joining several components, follow a construction plan that identifies matching edges and the required orientation.
Decide whether to back the object and how that backing will be attached. The back may hide thread routes, improve appearance, or serve a construction purpose. Test the chosen method with the actual materials and follow any adhesive or sewing instructions involved. A neat front does not compensate for a backing that shifts, an edge that catches, or a hanging attachment placed without considering the object's balance.
Assemble and inspect for the intended use
Before joining or backing, compare the completed embroidery with the chart for missing crosses and incorrect colors. Check that the pieces match the planned dimensions and that paired edges align. A counting difference can become obvious only during assembly if you skip this inspection. Correct a stitching error while the reverse remains accessible rather than sealing it behind the final construction.
For a hanging decoration, test the position of the attachment so the piece sits as intended. For a joined object, examine seams and corners without forcing mismatched components together. Use the project progress tracker to note which parts are completed if the project includes several pieces, while keeping the detailed construction sketch with them. Clear labels can prevent a front panel or side piece from being assembled in the wrong orientation.
Check care information for the plastic, thread, backing, and any added components. Do not apply a fabric washing or pressing routine automatically to a rigid plastic piece. In particular, choose treatment from the actual material instructions rather than assuming a heat-based method used on plain cloth is suitable. Keep the product details in your project notes so later cleaning does not depend on a guess.
Save the setup before designing the next shape
Record the canvas product, mesh description, counting convention, thread, needle, cut dimensions, and edge method. Add a note about what the sample showed and any changes made during construction. Those details make it easier to repeat a successful setup and explain why a different sheet or thread combination behaves differently. Keep the motif chart and the cutting plan together because they describe separate but related parts of the object.
For the next project, add one challenge at a time: a shaped outline, a second component, or a more detailed motif. Retain the methods that worked for counting, shared holes, and edges. Plastic canvas offers a useful way to turn counted stitches into a firm object, but the complete result depends on thoughtful construction. Plan the cut, test the stitching, and finish the outline with the same care as the central design.
Choose an original chart from our free collection, or check your fabric measurements before you begin.
Free cross stitch patterns · Fabric calculator