
Patterns · 8 MIN READ
Cross stitch advent calendars: plan 24 small pieces
Plan a coordinated set of 24 stitched pieces with readable numbers, calculated dimensions and a tested assembly method.
Choose a calendar you can actually finish
A cross stitch advent calendar combines several jobs: designing motifs, stitching them, identifying the days and building a display that survives repeated use. The stitching can be enjoyable while the assembly quietly becomes the largest part of the project. Before choosing a chart, decide what your calendar will do. Will each day reveal a stitched ornament, hold a small note, or simply mark progress toward a celebration? Those choices determine the structure, materials and amount of sewing you need.
Twenty-four small motifs do not automatically make a small project. Each piece needs preparation, a finished edge and some way to attach it. A pocket calendar also needs seams, consistent pocket dimensions and a backing that supports its contents. Start with a finish you already understand, then add the stitched details. If this is your first counted project, practise one complete unit using the beginner cross stitch guide before committing to the full set.
Separate stitching from construction
Write two supply lists. The first covers fabric, thread, needles and charts. The second covers backing cloth, lining, attachment materials and display hardware. A hoop can hold a motif during stitching, but it does not explain how that motif becomes a pocket. Buying the first list without planning the second often leaves a beautiful pile of unfinished squares. Make one prototype that includes every layer and attachment, so your calendar plan is based on an actual object rather than a sketch alone.
Compare pockets, ornaments and a single panel
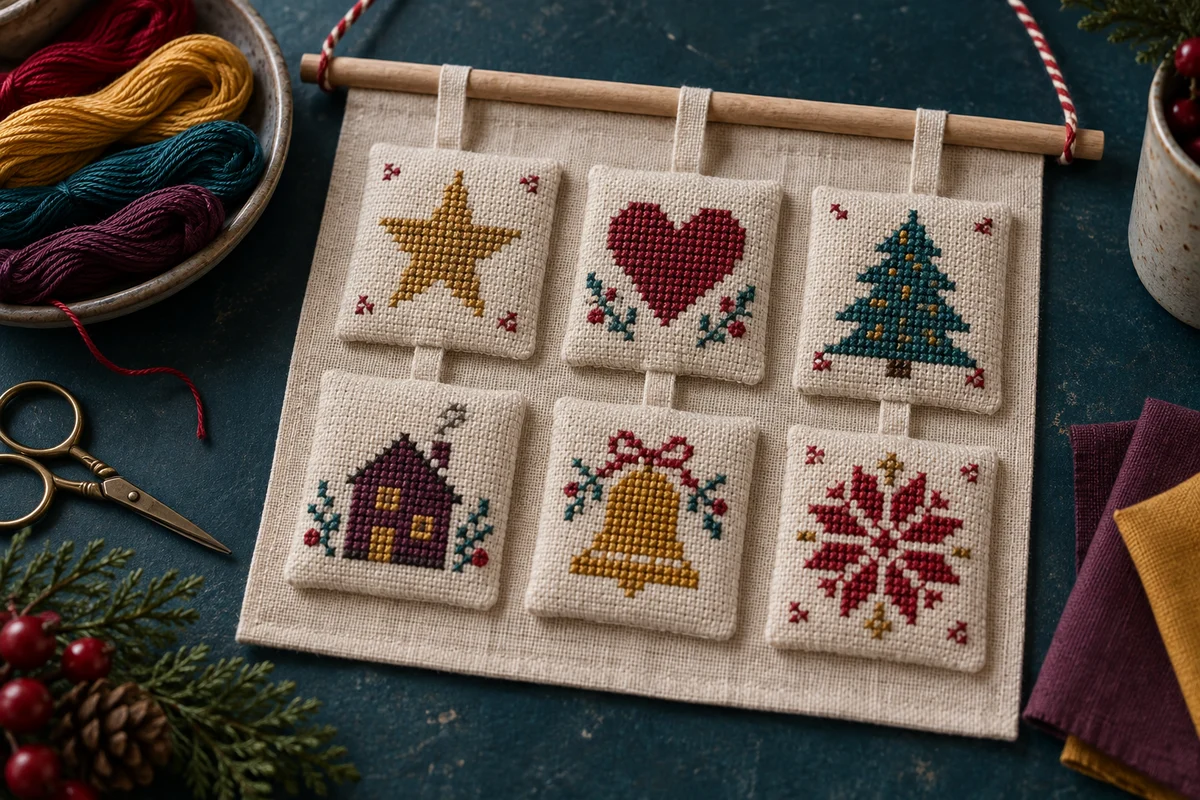
Separate ornaments are flexible because you can stitch and finish one at a time. They can hang from a dowel, ribbon or other suitable display, and you can replace a damaged piece without rebuilding everything. They also create repeated finishing work. Twenty-four identical edges may require more patience than the stitching itself. Choose a simple construction that looks tidy on both sides, especially if the ornaments can turn as they hang.
Pockets create a clear place for notes or small contents. Their capacity comes from the finished inside dimensions, not the size of the stitched front. A thick lining, folded seam allowances and a decorative border all reduce the usable opening. Test the exact object you expect to place inside. Keep heavy items elsewhere, and use the pockets for lightweight notes if your backing and hanging system are not designed to carry much weight.
A single stitched panel avoids finishing many separate fabric pieces. You can mark the current day with a movable marker or reveal a new part of the design through another arrangement. This option needs a chart layout that remains understandable as one composition. Draw a paper mock-up of the complete display and check whether the numbers, motifs and daily action are obvious from the place where people will view it.
Build a repeatable chart system
A set looks cohesive when its pieces share a few deliberate rules. You might use the same outer dimensions, a common number style and a limited thread palette while allowing each central motif to differ. Decide those rules before drawing individual pictures. Otherwise, the first six pieces may be tiny and restrained while later designs grow wider and more detailed, making the final calendar difficult to arrange evenly.
Choose a cell size that accommodates the largest number and motif combination. If each unit is 32 stitches wide and 40 stitches high, every design must fit within that rectangle, including any stitched border. Keep a blank buffer between the number and illustration. Numbers should remain easy to identify even when a decorative element is particularly bright. The grid designer can help you test original shapes, while the name maker offers a place to experiment with lettering arrangements.
Make the numbers a separate design task
Chart every number from 1 through 24 before stitching the first piece. Two-digit numbers need more horizontal space, and a narrow numeral one can look off-centre when treated like a wider character. Decide whether you are centring the visible stitched shapes or a fixed number box. Either approach can work, but consistency matters. Print or draw the full number set at its actual chart scale and check that none of the numbers resembles another when seen quickly.
Calculate fabric and layout before cutting
Fabric count changes the finished size of each motif. A design 32 stitches wide on 16-count fabric measures 2 inches across when one cross occupies one fabric square. A height of 40 stitches measures 2.5 inches. Those figures describe the stitched area only. Add the material required by your chosen construction on every side, including seams, folds and any space between the stitching and the finished edge. Use the fabric calculator to check the design dimensions, then calculate construction allowances separately.
For a panel arranged in four columns and six rows, add the width of four finished units and the three gaps between them. Do the same for six units vertically and five gaps. A finished unit measuring 3 inches wide with half-inch gaps produces a group 13.5 inches wide before outer margins: four times three, plus three times one half. This simple arithmetic prevents a backing from being cut too small after the individual pieces are complete.
Test the actual finished unit
A paper rectangle cannot show how fabric folds, padding or seams affect the finished shape. Stitch a small representative sample, assemble it and measure the object after finishing. Check that a dowel sleeve or hanging loops have enough clearance for the hardware you intend to use. For pockets, test the opening after attachment to the backing, because a neatly finished loose pocket can behave differently once its sides are sewn onto another layer.
Choose motifs and colors that remain readable
Small seasonal motifs work best when their silhouettes are clear. A star, simple tree, heart, house or geometric snowflake can be recognisable with relatively few stitches. Give each design one main idea rather than filling every square. An open background also leaves room for numbers and makes the set easier to read. For more advice on compact charts, see small cross stitch patterns, which considers complexity as well as dimensions.
Choose colors across the complete calendar rather than independently for each piece. A palette of berry red, mustard gold, deep blue and one lighter accent can produce varied combinations without losing unity. Spread the darkest motifs throughout the layout so they do not form an accidental heavy corner. Photograph your arranged paper mock-up in grayscale to see whether the numbers still stand apart from their backgrounds. This is a planning aid, not a replacement for checking a stitched sample in normal lighting.
Use original drawings or patterns whose permissions allow your intended use. A familiar holiday theme does not make every illustration or chart free to reproduce. If you adapt a purchased pattern, check its stated terms before distributing copies or selling finished calendars. Keep the source and permission information with your project notes. You can create a personal theme through colors and simple shapes without relying on a branded character or someone else's distinctive design.
Plan the stitching as a series of small batches
Time one representative motif from preparation through its final edge. If stitching takes 45 minutes and finishing another 20, twenty-four similar units would require about 26 hours before shared assembly and any unexpected corrections. Treat that result as an estimate, because a detailed design can take longer than a simpler sample. The time calculator can help organise a rough stitching allowance, while your prototype provides the best evidence for the construction portion.
Batch repeated tasks when doing so makes the work easier to check. Prepare fabric pieces together, then stitch several motifs, then finish their edges. Keep each piece labelled with its intended day so matching numbers and pictures do not become a memory exercise. Store cut pieces and their charts together in a project folder or bag. The project tracker can record which units are stitched, checked, finished and attached; those are four different stages of completion.
Avoid postponing every finished edge until the final week. Completing a few fully assembled units early reveals construction problems while there is still time to change the method. If a seam is awkward around a bulky stitched area, you can move that seam or adjust the spacing before repeating the problem twenty-three times. Leave spare fabric and thread available until the entire set is assembled and checked.
Assemble, display and store the calendar carefully
Lay the finished pieces on the backing before attaching them permanently. Check the complete order, the spacing and the direction of every motif. Measure from consistent reference lines rather than repeatedly measuring from the last pocket, which can accumulate small positioning errors. Temporary marks should be suitable for the material and removable according to their product instructions. Do not assume that a marking method tested on spare cotton will behave identically on a different backing fabric.
Use an attachment that suits the fabric, the weight and the expected handling. Stitching pockets to a cloth backing creates a different structure from hanging small ornaments on loops. Test one attachment with its intended lightweight contents before assembling the whole display. Keep needles, loose pins and small detachable craft parts away from children, and choose a display position that does not encourage pulling on the hanging system. The calendar is a decorative project; its stitching alone does not establish the strength of the assembled object.
Follow the care instructions for all materials used, including threads, backing, lining and embellishments. If one component cannot be washed like the others, plan cleaning accordingly. Remove detachable ornaments when appropriate and store the calendar dry, supported and protected from dust. Avoid crushing raised details under a heavy stack. A photograph of the finished arrangement and a labelled storage box make next year's setup much easier.
Check all 24 days before calling it finished
Review the calendar as both a stitched collection and a working display. Confirm that each number appears once, no day is missing and the order makes sense. Inspect the reverse sides, loose thread ends, edges and attachments. Put a sample note into every pocket if pockets are part of the design. Check the opening, visibility and removal rather than assuming that identical measurements guarantee identical performance. Small variations in seams can affect how individual pockets behave.
Finally, keep a short record of what worked: the chart dimensions, fabric count, palette, finished unit size and construction sequence. Note the time required for stitching separately from assembly. If you make another calendar, those notes will help you choose a manageable scope and improve the details that took unnecessary effort. A successful cross stitch advent calendar is not simply twenty-four attractive motifs. It is a coordinated set that reads clearly, functions comfortably and can be enjoyed again after thoughtful storage.
Choose an original chart from our free collection, or check your fabric measurements before you begin.
Free cross stitch patterns · Fabric calculator