
Projects · 9 MIN READ
Cross stitch bags: position and protect a stitched panel
Plan the position, fabric dimensions and attachment of a stitched panel for a practical tote or other fabric bag.
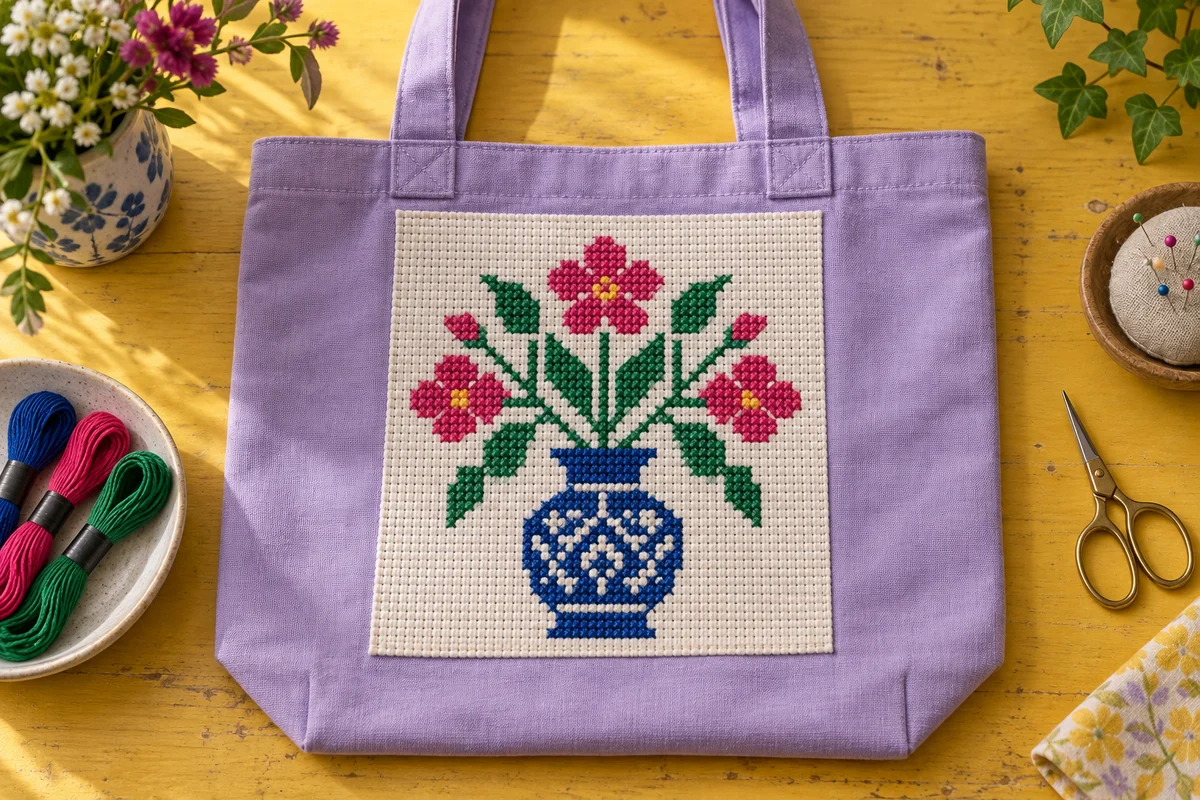
Decide how the stitched design joins the bag
A cross stitch bag needs two kinds of planning: the visible design and the construction that lets you use the finished object comfortably. A chart may look excellent in a hoop but sit too low on a tote, disappear behind a pocket or become distorted near a seam. Begin with the bag shape, then reserve a suitable area for the stitching. Decide whether you will attach a separate counted-fabric panel, stitch through a temporary grid on the bag fabric, or use a bag specifically made with a counted section.
A separate panel is a useful starting point because the stitching and bag construction remain distinct. You can complete the motif on Aida, assess its size and attach it to a prepared front panel. This also lets you choose a sturdy bag fabric without expecting that fabric to provide a regular counting grid. The panel still needs a considered edge finish and secure attachment. Simply placing raw Aida on a tote front leaves an unfinished edge that can fray with handling.
Distinguish decoration from structure
The stitched motif decorates the bag; it does not establish the strength of its handles, seams or base. Those parts need construction suited to the intended contents. A bag for a lightweight notebook presents different demands from a bag loaded with groceries. Work within the instructions for your chosen sewing pattern or blank bag. If you are new to stitching, practise a small motif with the beginner cross stitch guide before combining embroidery with an unfamiliar construction method.
Choose a bag shape and an accessible work area
A flat tote front usually offers a clearer stitching area than a shaped purse with many seams. Check where the handles attach, where the opening folds and whether the bag has an existing pocket. These features reduce the space available for a decorative panel. Lay the actual bag flat and place a paper rectangle on it to represent the planned design. Look at the bag upright as well, because a layout that seems centred on a flat table can appear low when the handles are held.
When making the bag from a sewing pattern, attaching the embroidery to the front piece before assembling the bag often provides better access. You can position the panel on a single layer and sew its edges without working inside a narrow opening. Keep the bag pattern's seam allowances clearly marked and reserve them for construction. Do not place stitching so close to those edges that the motif becomes trapped in a seam or the sewing needle has to pass through thick embroidery unnecessarily.
A ready-made bag can still work, but access deserves a practical test. Can you reach the intended attachment area without sewing the front to the back? Can you turn the bag to finish the inside neatly? An existing lining may hide the reverse of the embroidery, but it can also block access. Check these questions before starting a large design. Choose a smaller accessible panel if altering the lining or handles would make the project more complicated than you want.
Calculate the motif size and reserve margins
The stitched dimensions depend on the chart and the fabric count. A design 70 stitches wide on 14-count Aida measures 5 inches across when one cross occupies one square. If it is 84 stitches high, the stitched height is 6 inches. The attachment panel must extend beyond that stitched rectangle to provide the border and edge treatment. Use the fabric calculator to check the chart dimensions, then add the allowances required by your finishing method separately.
Measure the usable bag front after accounting for seams, folds and handle attachments. A bag front 12 inches wide does not necessarily provide 12 inches of uninterrupted decorative space. If your panel is 7 inches wide, centre it within the area you actually intend to display rather than automatically measuring from the raw cut edges. Record the top and side offsets on your paper mock-up. Those measurements give you a reliable reference when the completed embroidery replaces the paper.
Make a full-size placement test
Draw the stitched area, outer panel edge and nearby bag seams on the same paper template. Fold the template where the panel edges will turn under, if that is your intended finish. Place it on the bag and check the clear space around every edge. This reveals whether a generous fabric allowance has accidentally made the panel too large. It also helps you distinguish the centre of the motif from the centre of the surrounding fabric, which may differ when the margins are unequal.
Select a motif that suits regular handling
A bag is often viewed in motion and from a little distance. Clear silhouettes and a modest number of colors are usually easier to read than a crowded miniature scene. An original geometric flower, bold initial or simple botanical arrangement can keep its character when the bag bends. Choose details that remain understandable without needing to inspect individual stitches. The ideas in modern cross stitch patterns can help you plan strong shapes and useful blank space.
Consider the surface of the finished work. Raised embellishments and long exposed stitches can catch more easily than a relatively flat full-cross design. If the bag will rub against clothing or travel inside another bag, keep the decorative area simple and test how it behaves. This is not a universal ban on embellishments; it is a reason to match them to the expected use. A display bag for occasional light use can support different choices from an everyday carry bag.
Choose an original drawing or a chart whose terms permit the use you intend. A downloadable image is not automatically a reusable pattern, and a purchased chart may have specific conditions for selling finished items. Keep permission information with your project notes when relevant. If you want a distinctive gift, adjust the palette and composition of your own simple motif rather than assuming that a popular logo or character is available to reproduce.
Prepare the counted fabric or temporary grid
For a separate Aida panel, prepare enough fabric to hold comfortably while preserving all finishing allowances. Identify the chart centre and fabric centre before starting. Keep the grid aligned with the intended panel edges so the finished rectangle does not look twisted on the bag. Work with an even tension that allows the fabric to lie flat. Excessively tight stitches can distort the panel, making later attachment harder and changing the apparent spacing around the motif.
If you plan to stitch directly onto ordinary bag fabric using a temporary counted grid, test the entire method on matching spare fabric first. The sample should include stitching, removal of the temporary material and the intended care process. Follow the specific grid product's instructions rather than applying a generic removal recipe. Our waste canvas guide explains the planning questions behind removable grids. Avoid assuming that every fabric, finish and thread behaves the same way when dampened or handled.
Check the reverse regularly. Long loose thread carries can catch on objects inside an unlined bag, while thick clusters of ends can create bumps under a panel. Keep your starting and finishing method neat and appropriate for the material. Inspect the finished stitching before attachment, when corrections are still easy to reach. Use a project note to record the thread colors and fabric count in case you later need to replace a small damaged area.
Finish and attach a separate stitched panel
Choose the edge treatment before trimming the completed embroidery. A turned-under edge, a fabric border and a deliberately constructed patch each require different allowances. Test your chosen method on a small spare piece of the same counted fabric. A narrow fold that seems straightforward on thin cotton may become bulky on Aida. Do not cut close to the stitching until you know how much material the edge finish actually needs and how the corners will be handled.
Check attachment without trapping another layer
Position the finished panel using your measured reference points. Confirm that the design is upright and that the bag front lies naturally rather than stretched flat beyond its normal shape. Secure the panel temporarily using a method suitable for the fabric, then inspect inside the bag. The front, back, lining and pockets should remain separated wherever your attachment is intended to pass through one layer. Check this repeatedly while sewing a ready-made bag, because loose fabric can shift into the work area.
Attach the panel according to the method you tested, keeping the surrounding fabric smooth. Avoid pulling the stitches or sewing thread so tightly that the bag front puckers. If the panel has a backing or border, make sure its corners are held securely and do not curl away from the bag. Inspect the reverse attachment as well as the visible edge. A tidy front can hide tangled thread, loose ends or an accidentally caught pocket on the inside.
Test comfort, care and the finished bag
After assembly, put the intended lightweight contents into the bag and hold it normally. Check whether the decorative panel folds sharply, rubs against a handle attachment or becomes hidden by the shape of the contents. Inspect the bag's construction according to the pattern or manufacturer's guidance. Decoration should not interfere with the opening or prevent a pocket from working. If you find a placement problem, address it before presenting the bag as a finished usable item.
Care depends on all the materials together: bag fabric, counted panel, thread, lining and any interfacing or decoration. Follow their instructions and test a sample where appropriate. A bag fabric that tolerates one washing method does not prove the attached embroidery tolerates it too. Do not promise that a finished bag is machine washable unless its materials and construction support that claim. For a gift, include practical care instructions based on the actual components you used.
Let the bag dry completely before storage if it has been cleaned according to those instructions. Store it without compressing raised details or folding repeatedly through the stitched motif. Keep spare thread and the chart information together for later maintenance. If the panel is designed to be removable, explain the removal and replacement method to the recipient. Otherwise, treat it as part of the assembled bag rather than suggesting it can be detached without affecting the seams.
Keep a record for your next stitched bag
Photograph the bag flat and in its normal carried shape. Record the finished motif dimensions, fabric count, panel allowances, placement measurements and attachment method. Note any change you made after testing the prototype. These details are more useful for a second project than a photograph alone, because they explain how the attractive front connects to a practical object. The project tracker can help distinguish stitching, edge finishing, attachment and final checks.
For your next version, improve one feature at a time. You might adjust the panel height, simplify an edge treatment or choose a palette with stronger contrast against the bag fabric. A successful cross stitch bag does not need a large or complicated chart. It needs a motif that fits the available space, a finish that protects its edges and construction suited to the way the bag will be used. Planning those connections turns an appealing embroidered panel into a considered finished project.
Choose an original chart from our free collection, or check your fabric measurements before you begin.
Free cross stitch patterns · Fabric calculator