
Tools & materials · 10 MIN READ
Cross stitch frame stands: adjust your working position
Match a stand to your hoop or frame, check attachment compatibility and adjust the working position around your chair and workspace.
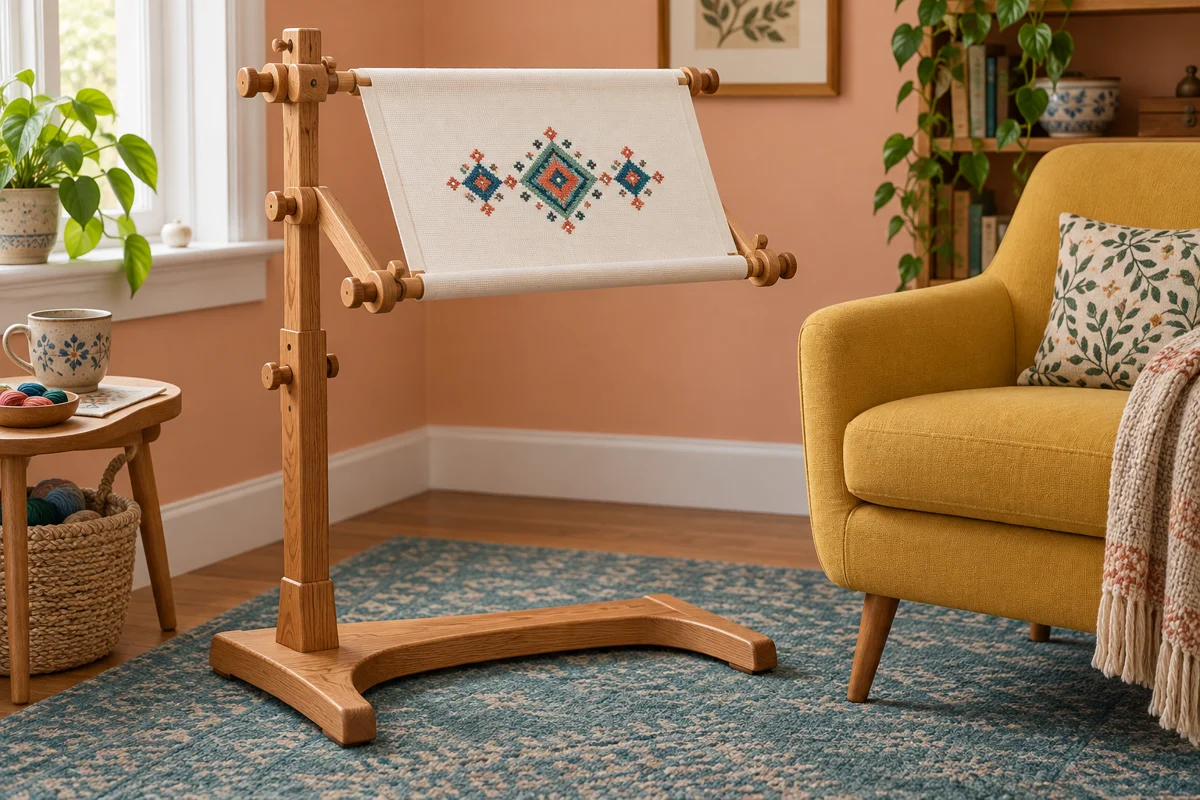
Decide what you need the stand to support
A cross stitch frame stand holds a hoop or frame while you work, giving you an alternative to supporting the whole project with one hand. The stand and the frame have different jobs. The frame manages the fabric; the stand positions that frame relative to your chair, table and stitching reach. A stand cannot correct fabric that is poorly mounted, and a well-mounted project can still be awkward to reach if the support places it too far away. Start by identifying the particular problem you want to solve.
You might want both hands available for stitching, easier access to a broad working area, or a stable place to leave a mounted project during a session. Write down that priority before comparing equipment. A small hoop and a wide scroll frame create different demands, especially when their weight sits beyond the stand's base. Measure your current frame and describe how you normally use it. The scroll frame guide covers mounting choices separately so you can evaluate the support without confusing it with fabric tension.
Make a practical compatibility record
Record the outside width, height and thickness of the frame at the point where it would be held. Include protruding knobs, clips and any fabric rolled around its bars. A product photograph showing a similar frame is not a reliable fit check. Confirm the stand's stated attachment method and size limits with its maker, particularly if you plan to use a frame from another system. Keep these measurements together so you do not compare one listing's working area with another listing's outside dimensions.
Compare floor, table and lap arrangements
A floor stand uses a base on the floor and an upright or arm to bring the work toward you. Its usefulness depends partly on where that base can sit around the chair. Chair legs, a low sofa edge or an uneven floor can prevent the position shown in a catalog photograph. Sketch the available floor space and check whether you can sit down, stand up and move past the setup comfortably. Consider the full footprint when the arm is extended, rather than measuring only the base at rest.
A table arrangement brings the support to a work surface, either resting on it or attaching with a suitable clamp. Check the table edge and thickness if a clamp is involved, and confirm that its contact surfaces are appropriate for that furniture. A lap arrangement uses a different support position and may depend on the shape of the seat or how you sit. These categories describe broad layouts, not identical mechanisms. The manufacturer's instructions should explain the actual mounting and adjustment process for the specific equipment you use.
Choose the arrangement by trying to recreate your real working position. A setup demonstrated on a dining chair may not reach properly over a deep armchair. A table support that fits a straight edge may not fit a rounded or beveled one. Write down the height of the seat or tabletop and the distance from its edge to your usual stitching position. These observations are more useful than deciding that one category must be suitable for every stitcher or every room.
Understand how the frame is held
Some supports grip a frame in a clamp, while others allow it to rest on supporting arms or attach through dedicated fittings. These methods have different implications for fitting, access and removal. Needle Needs describes a floor stand on which a frame rests on adjustable supports, with height and angle adjustments. That is an example of one specific mechanism, not evidence that every floor stand handles a frame in the same way. Read the attachment description before assuming your existing hoop can be substituted for a rectangular frame.
With a clamp, identify exactly which rigid part of the frame it is designed to grip. Fabric, finished stitching and adjustment screws should not become accidental clamping surfaces. Confirm that the jaws open far enough and that their shape suits the frame. With a resting support, check how the frame remains positioned during ordinary stitching and how it is lifted away. With a dedicated attachment, verify that the required fittings are included or available and that their spacing matches your actual frame.
Keep adjustment and attachment separate
Tightening a stand joint should not be treated as a substitute for attaching the frame correctly. One controls the position of an arm; the other secures or supports the work according to its design. Assemble and adjust the equipment in the order specified by the maker. If you cannot identify a knob's purpose, stop and consult the instructions before forcing it. Excess tightening can damage parts without resolving a mismatch, and improvised padding can change the fit in ways the original attachment was not designed to accommodate.
Set up the chair before adjusting the work
Arrange the seat you intend to use before positioning the stand. Sit as you normally would during a short stitching session, with enough room for your feet and the equipment base. Bring the frame into a position where the working area is easy to see and reach, then adjust its angle. Avoid setting the stand first and repeatedly shifting your body to compensate for it. This is a practical fitting exercise; there is no single height or angle that automatically suits every person, chair and project.
Use a small section of the pattern for the initial trial. Stitch a few ordinary crosses, reach for the chart and try the movements needed to start and end a thread. Check whether you can reach both the nearest and farthest parts of the exposed fabric. If the far edge demands an awkward stretch, reduce the working area or reposition the frame rather than assuming you must use its full width continuously. A large frame can hold a broad piece of fabric while you work on a more manageable section.
Test the setup with the room's actual lighting. Changing the frame angle can alter shadows and reflections, especially on pale stitches or shiny threads. Move a separate task light as needed without letting it interfere with the frame's movement. Keep your chart where you can read it comfortably and check that its holder does not obscure the stitching. Treat comfort as something to observe during use, and make changes when a position becomes tiring instead of relying on the appearance of a static setup.
Plan access to the back before a long session
Starting and ending threads may require access to the reverse of the work, depending on your chosen technique. Check that access before filling a large area. Some arrangements allow the frame to rotate, some require releasing a part, and others let you lift the frame from its supports. Do not assume a joint that moves freely is intended to rotate with the full project attached. Use the maker's instructions to establish the permitted movement and any locking steps required afterward.
Try the complete access sequence with an unstitched or lightly stitched sample first. Notice whether rolled fabric, clips or trailing threads catch on the upright or tightening knobs. Move those obstructions before proceeding. If you need to lift the frame away, choose a nearby clean surface large enough to receive it without pressing on the stitches. Keep the needle secure during the transition and avoid leaving an unsecured frame balanced at an angle while you search for a place to put it.
Recheck the working position after turning
Returning the frame to the stand can change its angle or the location of the working section. Verify the attachment and position each time rather than relying on how they looked before turning. Check your chart reference as well, because a rotated frame can temporarily make the top and bottom feel unfamiliar. Mark the project's orientation in your notes if the design has similar shapes at both ends. The project tracker can help record your current section, but it does not replace checking the actual chart and fabric.
Evaluate stability with the intended project
A stand that feels steady with an empty hoop may behave differently with a larger mounted frame. Set up the actual project within the equipment's stated limits and check how it responds to ordinary stitching movements. Look for loose joints, a base that lifts, or an arm that drifts downward. If any of those occur, stop and follow the maker's troubleshooting guidance. Increasing pressure on every knob indiscriminately is not a reliable way to establish stability, and a frame should never be used as a handle to drag the stand across the room.
Keep attachments in the evaluation. A chart holder, lamp or accessory can change the balance and may require a specific mounting point. Use only attachments that are appropriate for the equipment, and check any stated limits for the assembled arrangement. Place thread organizers and loose tools somewhere they cannot spill into moving joints. A stand is a support for the intended needlework setup, not a shelf for unrelated objects. Clear surrounding space also makes it easier to notice whether the equipment itself is moving.
Move the stand according to its instructions when changing rooms or storage positions. Remove the frame first if the design calls for that, and support the equipment at its intended lifting points. Recheck joints after moving rather than assuming transport leaves every adjustment unchanged. On a shared floor, choose a position where the base and projecting arms are visible to anyone passing. The purpose is a predictable craft workspace; a setup that repeatedly obstructs the route through the room needs a different location or arrangement.
Build a session routine around the support
Once the frame is positioned, arrange the supplies you actually need for the next section. Put the chart, selected threads and a small tool container within convenient reach. Keep unused materials elsewhere so they do not crowd the base or attachment. The project bag guide offers ideas for separating the current working set from stored supplies. Opening a session with a clear plan reduces the number of times you need to move a supported frame to find something underneath it.
Pause periodically to check the working area, thread paths and your position. A stand can make hands-free stitching possible, but it does not remove the need to change activity or respond to fatigue. If you notice that you are gripping the frame to stop movement, investigate the support rather than continuing to work around the problem. If you are holding it because a section is difficult to reach, review the angle and exposed area. Different causes require different adjustments, so describe the issue before changing the equipment.
At the end of the session, secure the needle and loose thread ends, then protect the project from dust according to the materials and setup. Keep a cover clear of delicate stitching and moving parts. Follow the frame maker's guidance for releasing or retaining fabric tension during storage; the stand's presence does not settle that separate question. If the equipment must be folded or put away, use a consistent sequence so the frame is supported throughout and small removable fittings have a designated container.
Compare options using evidence from your workspace
Create a short comparison record for any stand you are considering. Include attachment compatibility, reachable height and angle, floor or table footprint, access to the reverse and storage requirements. Record the source of each specification and leave uncertain points visibly unresolved until the maker answers them. A useful comparison does not need dozens of features. It needs the details that decide whether your actual frame and chair can work together in the space you have available.
If you can try a setup before choosing, bring the frame measurements and perform the ordinary movements your project requires. A brief test should include chart reading, reaching both sides of the working section and accessing the back. If you cannot try it, request clear measurements and instructions rather than inferring fit from photographs. The supplies planning guide explains how to turn a project requirement into a precise purchasing question without assuming that an unfamiliar accessory will solve every difficulty.
Keep notes on the adjustments that work for each project after you start using the stand. A small hoop may need a different position from a wide scroll frame, and a change of chair can require another setup. Save those observations alongside your fabric and chart details. The right support is one that fits the intended frame, remains stable in normal use and lets you reach the stitching and reverse in a repeatable way. Those practical results matter more than choosing a particular stand category or copying someone else's arrangement exactly.
Choose an original chart from our free collection, or check your fabric measurements before you begin.
Free cross stitch patterns · Fabric calculator