
Projects & finishing · 10 MIN READ
Cross stitch on crochet: map stitches onto a textured surface
Map an original motif onto a crochet swatch, measure stitch and row spacing separately and test yarn, tension, reverse paths and care.
Understand which kind of cross stitch you are adding
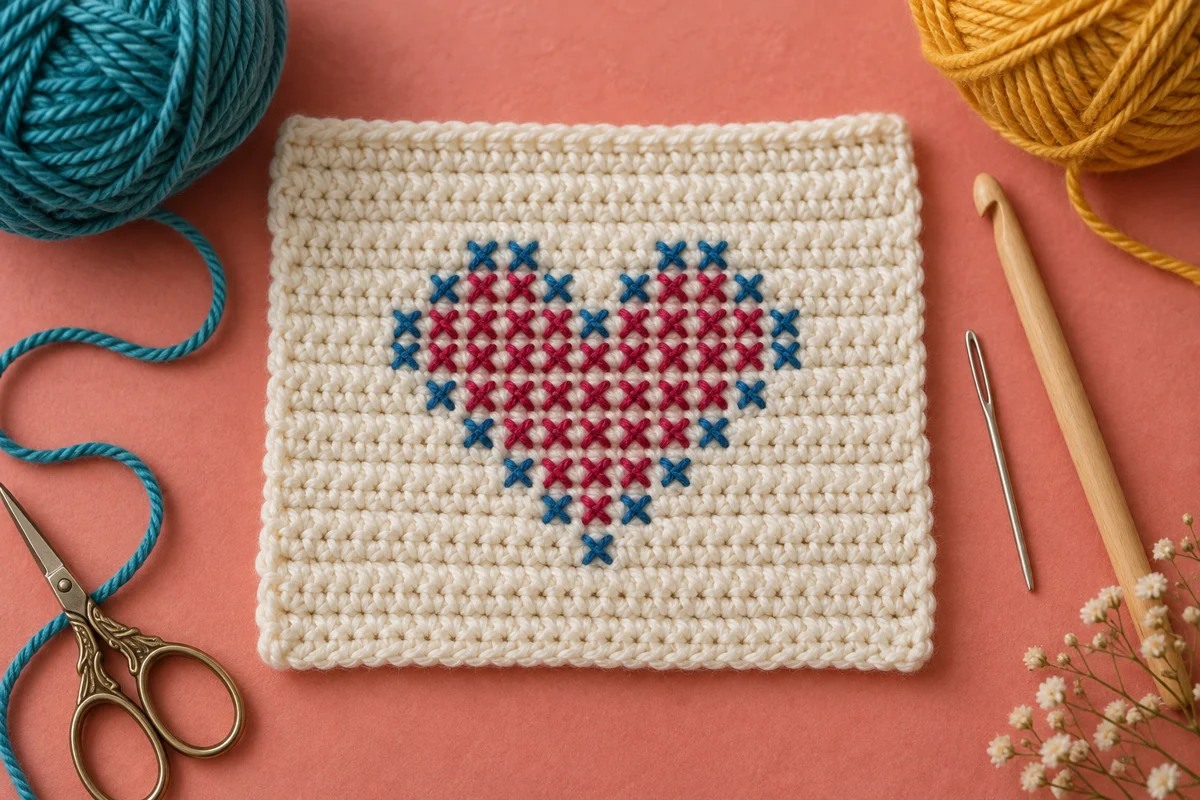
Cross stitch on crochet places embroidered X-shaped stitches over an already crocheted surface. It is a separate step from making the crochet fabric itself. Some crochet instructions use similar words to describe the appearance of a yarn-under stitch, but that does not mean the fabric has received cross stitch embroidery. Establish which technique your project uses before following a chart. This guide concerns adding embroidery with a needle and yarn, using the structure of the crochet as a counted reference.
Begin with a small swatch made from the yarn, hook and crochet stitch you intend to use for the finished object. An attractive embroidery sample on another fabric cannot show how your particular rows and loops will behave. Choose a simple original motif for the first test, such as a small heart or geometric diamond. The heart pattern guide explains how to keep a compact shape readable; the crochet sample will show how that shape changes on a textured rather than a regular woven ground.
Treat the crochet and embroidery as two plans
Keep the crochet construction instructions and the embroidery chart together, but record their roles separately. The crochet plan determines the base material, row structure and finished object. The embroidery chart determines which mapped areas receive crosses and which colors they use. Do not assume the chart supplies the construction of a bag, cushion or garment merely because its motif would look attractive there. Complete that object according to a suitable construction plan and decide when the embroidery can be worked with access to the reverse.
Find a repeatable grid in the actual swatch
Look for a repeatable relationship between crochet stitches and rows before choosing the embroidery placement. Dense, regularly worked fabric can make the mapping easier to identify than a surface with large openings or decorative clusters. That does not establish that every dense crochet stitch creates identical square cells. Inspect your own swatch and choose consistent entry and exit points for the crosses. If those points shift unpredictably across the fabric, reconsider the base stitch or make a smaller motif that you can map clearly.
Scheepjes' crochet embroidery guidance illustrates mapping an embroidery grid onto a single crochet surface in a particular project. It is a useful technique reference, while its pattern, yarn choices and gauge belong to that named design. For your original project, establish the corresponding repeat on your own swatch rather than copying the reference project's dimensions. Keep the fabric relaxed while examining it. Stretching it enough to expose openings may help you understand the structure temporarily, but the embroidery needs to sit properly when the material returns to its ordinary shape.
Mark a small working area with removable stitch markers or another method appropriate to the yarn. Identify its top, bottom and starting reference, then count the repeats across and down. Crochet row ends and turning chains can differ from the central fabric, so begin the trial away from those edges. A regular central area gives you a clearer test of the mapping. Keep a note of how you counted it, because changing the rule between rows can shift the motif even when every individual cross looks neat.
Measure horizontal and vertical gauge separately
A cross stitch chart uses square cells, but the physical spacing of crochet stitches and rows may differ. Measure a representative relaxed or prepared swatch according to the crochet construction instructions. Record how many mapped stitch positions fit across a measured width and how many row positions fit within a measured height. These two rates determine the embroidered motif's dimensions. Do not use one number for both directions simply because a chart is drawn on square paper.
For a measurement example, imagine a mapped area with five positions per inch horizontally and four per inch vertically. A motif ten cells wide and eight cells tall would occupy approximately two inches in each direction under that mapping. A ten-by-ten-cell chart would instead be approximately two inches wide and two-and-a-half inches tall. These are hypothetical calculations, not a promised gauge for a specific yarn. Their purpose is to show why a square chart can become a taller or wider shape on the actual crochet surface.
Adjust the motif rather than forcing the fabric
If the sample looks stretched in one direction, review the chart and the measured mapping before changing tension. Pulling the fabric into a different shape while embroidering may leave it distorted afterward. You can revise the motif's proportions, select another crochet base or accept a deliberate change in appearance. The grid designer can help test a wider or shorter original shape. Save the revised chart and describe its intended base so another version does not depend on guessing which proportions you changed.
Match embroidery yarn and needle to the surface
Choose embroidery yarn that works with the base fabric and the intended care of the object. Its thickness should allow the crosses to remain visible without overwhelming the mapped positions or making the material unnecessarily rigid. Place a few candidate strands on the swatch, then stitch a small area with each suitable option. Loose yarn laid across the surface cannot show how the completed crosses will sit or how crowded the shared entry points become after neighboring stitches are added.
Use a needle suited to the yarn and the chosen entry points. A blunt tapestry needle is often useful when you intend to pass through existing openings rather than pierce the yarn, but the actual fabric and technique should guide the choice. Check that the eye accommodates the embroidery yarn without repeatedly damaging it. Avoid forcing an oversized needle through a small opening or using a sharp point without a reason to split the base material. The test should reveal a path that is repeatable and manageable across the full motif.
Keep the yarn identification and care information with the sample. A soft cotton base and a different embroidery fiber may respond differently to washing, stretching or wear. Do not infer compatibility from their colors alone. If the object will be handled regularly, test the actual combination under the applicable care instructions before committing to the full design. The thread guide explains the value of labeled material tests, even though an embroidery yarn choice on crochet may differ from the stranded cotton used on counted woven fabric.
Work a small original motif with consistent crosses
Establish a checked starting position from your chart and the mapped swatch area. Form each cross using the same placement rule, then inspect how it sits before making a large group. The two diagonal legs should create the intended X without pulling the base loops out of their ordinary arrangement. Keep the upper leg direction consistent throughout the motif. Differences in direction can change how the yarn catches light and make one section look uneven even when the colors and cell counts match.
Work with a manageable yarn length and inspect it for twisting as you go. A long length can create unnecessary tangles and wear while passing through a textured surface. Follow the material's guidance and adjust from the sample rather than assigning one fixed length to every yarn. Let a twisted strand relax when appropriate, and replace a damaged section before it affects more stitches. Keep the crochet flat enough to see the mapped positions while avoiding tension that changes the spacing you measured.
Check shared points as the area becomes denser
Neighboring crosses may use related openings or corners under your chosen mapping. Inspect those places as the motif grows, because they can become crowded even if the first isolated cross passed through easily. Avoid splitting earlier embroidery yarn unintentionally when entering a shared point. If the opening becomes difficult to use, review the needle, yarn thickness and mapping on the sample. Continuing with increasing force can damage the material without correcting the underlying mismatch.
Manage thread paths and tension on the reverse
Plan how the embroidery starts, ends and travels between colored areas. Choose a securing method appropriate to the yarn, crochet structure and intended use, and test it on the swatch. Do not assume a method used on tightly woven Aida will behave identically in a stretchier crocheted surface. Inspect the reverse as well as the front. A bulky or loose end can affect how the object feels, particularly when the embroidered area will sit against another fabric or be handled directly.
Avoid pulling long carries tightly across the reverse. The crochet needs to retain the movement appropriate to its construction, and a tight embroidered path can draw separated areas together. Where colors are widely separated, ending and restarting may be a better choice than carrying the yarn across the whole motif. There is no single distance that settles every case. Compare the effect on the actual swatch, including how the front looks when the fabric lies relaxed and when it moves as expected during ordinary use.
Pause regularly to look at the fabric's outline and the rows around the motif. If the swatch begins to cup, narrow or form puckers, examine the embroidery tension before adding more crosses. A neat-looking stitch can still be too tight for the base material. Remove and rework a small test area when necessary instead of expecting later blocking to correct every problem. The aim is an embroidered shape that rests on the crochet surface without asking that surface to hold an unintended permanent distortion.
Place the motif around seams, edges and use
Chart the complete placement before embroidering a finished object. Mark the area that will remain visible after seams, folds, edging or lining are completed. Keep the motif clear of construction boundaries unless the selected pattern specifically integrates them. A heart centered on a flat panel may no longer appear centered after the panel becomes a bag front with a folded top. Measure the finished visible area and compare it with the embroidered dimensions calculated from your actual horizontal and vertical mapping.
Consider access to the reverse. It may be easier to embroider a panel before joining or lining it, provided that this sequence agrees with the crochet construction plan. If you work on an assembled object, make sure you can pass the needle through the intended layer without accidentally catching another part. Place a suitable barrier or separate the layers as the construction allows. Do not rely only on feeling the needle from the front when another piece of fabric lies directly behind the work.
Evaluate details for the intended object
Raised additions, long decorative stitches and dense embroidered areas can change the handling of a crocheted piece. Test those choices in the context of its use rather than judging them only in a photograph. A decorative panel and a frequently used bag need different practical consideration. The bag guide discusses planning the embroidery and the object together. Keep the original crochet instructions authoritative for structural details, while the embroidery sample establishes what your added motif contributes to texture and flexibility.
Prepare, inspect and record the completed work
Follow the appropriate preparation and care instructions for the combined materials. If the construction plan includes blocking, test the embroidery through the same relevant process on the swatch first. Different fibers and stitch structures may need different handling, so avoid transferring a specific project's blocking recipe to every crocheted item. Inspect the sample afterward for color transfer, changed dimensions, loose ends and distortion. Record what was done and what changed, rather than treating a flat photograph alone as evidence that the materials are compatible.
Compare the completed motif with the chart in good light. Check the number of mapped cells, consistent orientation, missed crosses and the shape of the surrounding crochet rows. Inspect the reverse for unintended catches and ends that still need securing. Then measure the finished visible design and note any difference from the estimate. Those observations are useful for another version, particularly if you change yarn or hook size. A new base may require a new mapping and cannot be assumed to preserve the old embroidered dimensions.
Save the original chart, crochet construction reference, yarn labels, needle choice and swatch notes together. Include a photograph of the front and reverse if it helps explain the placement rule you used. Cross stitch on crochet succeeds when the embroidered design respects the structure and movement of its base. A modest original motif, tested materials and a repeatable grid can produce a clearer result than a complicated chart forced onto an uncertain surface. The sample turns that idea into practical evidence before the finished object carries the full investment of your time.
Choose an original chart from our free collection, or check your fabric measurements before you begin.
Free cross stitch patterns · Fabric calculator