
Tools & materials · 10 MIN READ
Cross stitch threads: compare cotton, blends and special effects
Compare thread construction, coverage, blends, variegated placement and specialty effects using labeled samples on your actual fabric.
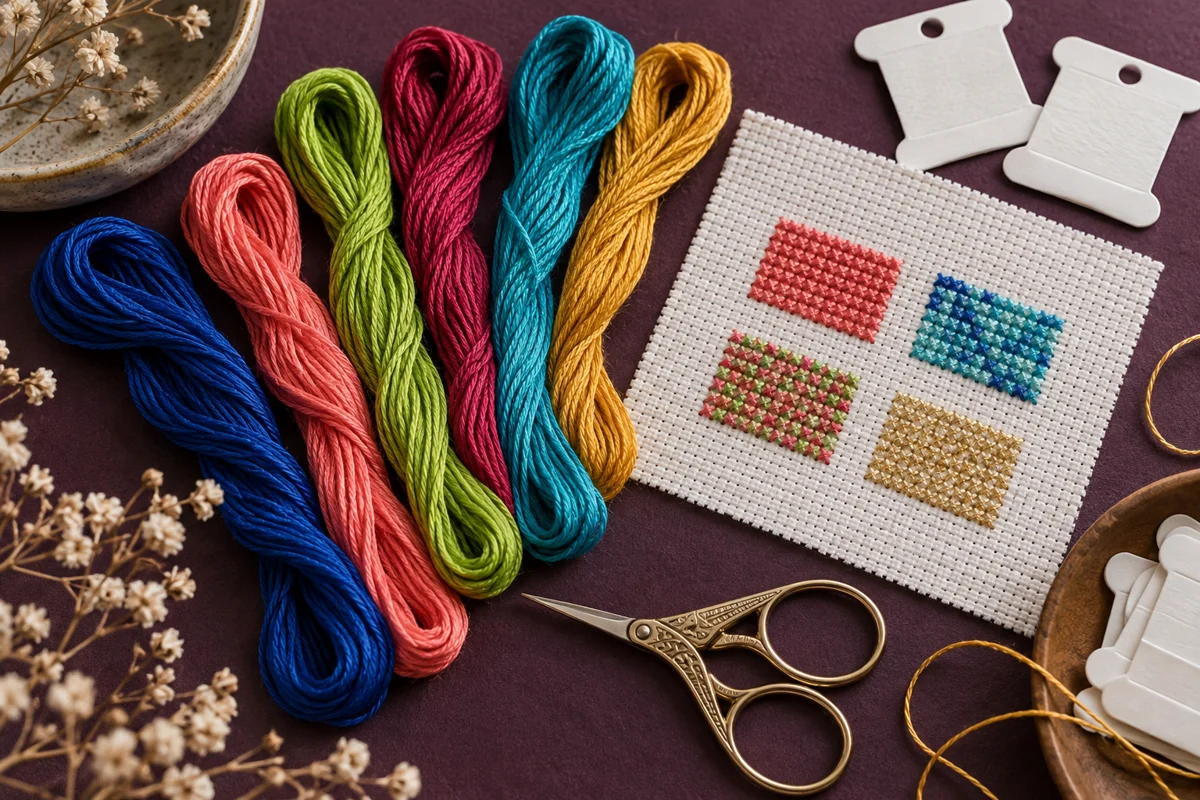
Read the thread type before choosing a color
Cross stitch threads differ in construction, thickness, finish and behavior as well as color. A chart's thread list may specify a particular range, a shade code and the number of strands used for each stitch type. Read those details together before gathering materials. Two skeins with similar colors can produce different coverage or reflect light differently. A color code also needs its brand and range to identify it reliably; a number written alone on a loose bobbin is not a complete material record.
Start with the chart's stated thread rather than assuming every embroidery thread is a direct substitute. If you want a different effect, treat that choice as a planned change and test it on the fabric. The fabric guide explains why the spacing of the material matters to the result. A substitute that looks attractive as a skein may be too bulky for the intended holes, too fine for the desired coverage or inappropriate for the care expected of the finished object.
Separate shade, range and strand count
Make a short record with a column for the chart symbol, the full thread identification and the required strand count. Include separate instructions for backstitch or other details when the chart provides them. A symbol may use fewer strands for a line than for its filled crosses. Do not carry one instruction across the entire design without checking. This record gives you a place to note substitutions and helps prevent a familiar color name from hiding a different thread construction.
Understand divisible cotton and nondivisible options
Stranded cotton is commonly supplied as several separable strands. The number you use depends on the chart, fabric and intended effect, rather than a universal rule for all cross stitch. DMC's stranded-thread guidance describes separating individual strands before recombining the required number. Follow the instructions for your actual thread and prepare a manageable length. Pulling an entire bundle apart in a hurried motion can create tangles before stitching begins, making it harder to judge the material fairly.
A nondivisible thread has a different structure and should not be treated as a bundle you can split simply because it resembles stranded cotton from a distance. Check the label and maker's description. Some embroidery threads are intended to be used as supplied, and their thickness may change the suitability of a chart substitution. Test the needle, fabric and thread together. The goal is a stitch that passes through the holes cleanly and gives the desired surface, without forcing a material into a technique its construction does not support.
Keep prepared strands aligned and identifiable. If you separate several colors in advance, place each working length with its label rather than laying an unlabeled pile beside the frame. Recombine only the strands you intend to use for that section. A short preparation routine can be faster than repeatedly untangling a mixed bundle. It also makes it easier to identify whether a rough stitch came from the thread itself, a twist in the working length or an accidental extra strand added during preparation.
Test coverage on the actual fabric
Stitch a small sample with the intended material and strand count before changing a large pattern. Include a block of ordinary crosses and a short line if the design uses backstitch. Look at the sample in good light, both close up and at the distance from which the finished object will normally be viewed. Some visible ground fabric may be part of the intended appearance. More coverage is not automatically better if it creates bulky crosses, crowded holes or a surface that obscures fine details.
Keep the top leg direction consistent when comparing samples. Different directions can alter reflections and make otherwise similar threads appear uneven. Use the same fabric, stitch area and lighting so the comparison answers one question at a time. If you change strand count, label the sample immediately. An unmarked collection of appealing stitch blocks gives little useful information later when you are trying to remember which arrangement produced the texture you liked.
Check isolated stitches and dense areas
A thread can behave differently in a single scattered cross and a tightly filled block. Test both if your design contains them. Inspect the holes where several stitches meet, and notice how easily the needle passes through after the area becomes denser. Do not evaluate only the first cross in empty fabric. If a sample feels crowded, review the material, needle and strand choice together. A change that helps one dense section should still be checked against the fine details elsewhere in the design.
Plan blends as a deliberate material choice
A blended stitch combines specified strands of different colors in the same needle. Charts that use blends should identify both colors and their proportions clearly. Keep that information attached to the symbol rather than recording only a general description such as blue mix. A blend using one strand of each color is a different instruction from another proportion, and the result depends on the threads' construction as well as their shades. Follow the chart's intended combination unless you are deliberately testing an alternative.
Prepare the blend with the required strands and inspect their alignment before stitching. If one strand forms a loose loop or becomes noticeably longer at the needle, pause and correct it instead of continuing until the difference creates several uneven crosses. Work with a manageable length and check the surface regularly. A blend should read as the intended combined effect, not as a sequence of stitches where one color has disappeared because its strand was accidentally omitted or left trailing behind the fabric.
For an original chart, sample the blend next to the neighboring solid colors. It may bridge two shades, soften a transition or create a distinct mixed texture, but it should have a visible purpose. A digital color swatch cannot fully predict that texture. If you share the chart, provide the actual material identification and proportions rather than a screen color alone. The palette tool can help organize a visual starting palette, while the stitched samples establish how the real threads work together.
Use variegated thread with a planned stitch sequence
Variegated thread changes color or shade along its length. The placement of those changes depends partly on how you cut and stitch it. DMC describes Color Variations as a six-strand thread with changes within a color family and notes that the stitching approach can produce different effects. Treat that as guidance for the named range, not proof that every multicolored thread has the same repeat length or color sequence. Examine the actual material and make a sample before planning its role in a design.
Completing each cross individually can create a different distribution from laying a row of first legs and returning with the second legs. Test the approaches side by side if the effect matters to your motif. Keep the top leg direction consistent within each test. Neither approach automatically fits every design; choose according to the appearance you want and record the decision. A border of repeated leaves may benefit from one distribution, while a broad filled shape may need another way of arranging the changes.
Decide whether matching repeats matters
If two wings, flowers or border sections should look similar, examine how the thread sequence would need to begin for each one. Exact matching may be difficult with the chosen material and should not be promised without a tested method. You can also design for intentionally varied areas, making the changing shades part of the motif's character. The butterfly guide distinguishes structural balance from identical color placement, which is useful when a variegated palette is involved.
Treat metallic and textured effects separately
Metallic and other decorative threads can add a distinct surface, but their handling instructions depend on the actual product. Read whether the material is intended to be used alone, combined with another thread or divided into strands. Do not assume that instructions for one metallic range apply to another. Try a short sample with the specified needle and fabric before filling an important focal area. Note whether the thread twists, catches or loses its appearance during use, and consult its maker's guidance when those problems occur.
A shorter working length may be useful for some materials, but avoid presenting one fixed length as a rule for every specialty thread. Test a manageable length and adjust according to the material's instructions and behavior. Letting a twisted working thread relax can help you see whether twisting is the problem, while a damaged or repeatedly fraying length may need replacement. Do not add an unverified coating or conditioner simply because another stitcher uses it with a different thread; check compatibility before changing the material's surface.
Use specialty effects with the finished object's purpose in mind. A framed ornament and a frequently handled cushion make different demands. Raised or glittering details can also compete visually with small lettering or a delicate outline. Sample the effect in its surrounding colors and inspect it under the lighting where the piece will be displayed. The pillow kit guide discusses why decorative stitching and the practical finish need to be planned together rather than judged only as an attractive patch of fabric.
Organize substitutions and estimate the working supply
When substituting a thread, record the original chart specification and the replacement separately. Include brand, range, shade, strand count and any change in technique. Compare the replacement against the neighboring colors on the fabric, because a close match in isolation may not preserve the contrast between adjacent areas. Keep a labeled sample if the substitution affects texture or coverage. These notes make the decision reproducible and prevent a later stitcher from mistaking your altered material list for the chart designer's original instructions.
Estimate the supply with the pattern's guidance and the way you actually stitch. The floss estimator can provide a planning estimate, but starts, ends, carrying distances and test samples affect the amount used. Specialty threads or blends may not follow the same assumptions as a simple cotton example. Keep the estimate's inputs with your notes and allow for the project-specific work you know you will do. Do not describe a calculator result as a guarantee that one skein will complete every version of a pattern.
Keep unused lengths with their identification and separate them from damaged or uncertain remnants. A bobbin should preserve enough label information to distinguish similar ranges. If several skeins are needed for a large matching area, examine them together before beginning and retain their labels. Organizing by code can be useful, but also keep the current project's set together so you do not repeatedly borrow its materials without recording the change. Clear inventory notes reduce the chance of discovering a missing shade halfway through a section.
Choose care from the complete finished project
Thread care is one part of caring for the completed embroidery. Check the fabric, threads, backing, decoration and finishing materials together. A care statement for one cotton thread does not automatically apply to a blend, metallic accent or assembled object. Keep the relevant instructions and test uncertain combinations on a representative sample before the final project needs cleaning. Inspect the sample for color transfer, changed texture and dimensional effects under the process you intend to use, following the applicable material guidance.
Store threads in a clean, dry place protected from unnecessary direct light and keep their labels readable. Avoid placing loose needlework tools where they can snag skeins or prepared strands. For a working project, secure the needle and keep the selected materials in a designated container between sessions. The project bag guide offers practical ways to separate the active set from general storage. Organization should preserve identification as well as neatness; a beautiful box of unlabeled colors is difficult to use accurately.
Review the finished stitches against the chart and your material notes. Check for missing blend strands, inconsistent substitutions and areas where a specialty effect did not behave as expected. Save a photograph and the useful samples with the final thread list. Choosing cross stitch threads thoughtfully means matching the material to the fabric, technique and intended object, then confirming that choice with actual stitches. Color attracts attention first, but reliable identification, tested coverage and a clear care plan make the palette usable from the first cross to the final finish.
Choose an original chart from our free collection, or check your fabric measurements before you begin.
Free cross stitch patterns · Fabric calculator