
Patterns · 8 MIN READ
Cross stitch heart patterns: symmetry, borders and color
Draw an original heart on a grid, check symmetry, calculate its size and plan readable colors, lettering and borders.
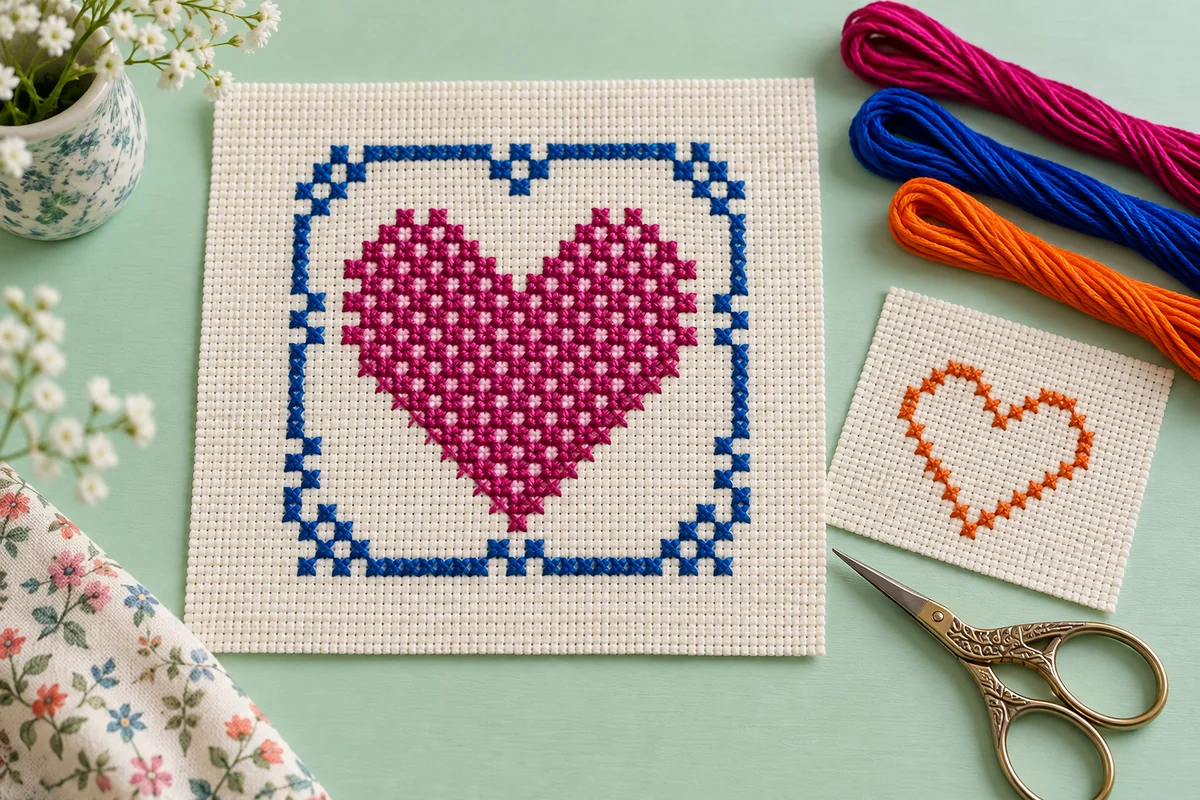
Start with the heart's silhouette
A cross stitch heart pattern can be very simple, yet a few misplaced squares can change its appearance considerably. The top curves, central dip and lower point all contribute to whether the shape reads as a heart at a glance. Begin with a plain silhouette before adding initials, borders or shading. If the basic outline is unclear, decorative details usually make the problem harder to identify rather than solving it. A small original drawing on a grid gives you a manageable place to experiment.
Choose the intended finish early. A heart for a greeting card needs different margins from a heart placed in a hoop or on a fabric bag. The chart can remain the same while the surrounding fabric changes, but the finished object needs space for its construction. Make a paper mock-up of the whole project and mark the stitched area within it. This keeps a compact motif from becoming crowded when the card opening or finishing border is added.
Decide what the design needs to communicate
A solid heart creates a bold, easily recognised shape. An outline leaves room for initials or another small detail, while a geometric fill can make the motif more decorative. Choose one main role before drawing. Combining a patterned fill, dense lettering, shading and several borders inside a very small chart can make each feature less readable. The grid designer lets you test an original arrangement before committing thread and fabric to it.
Choose odd or even width deliberately
A symmetrical chart needs a clear centre. With an odd number of columns, the centre passes through a column. With an even number, it passes between two columns. Neither option is inherently better, but the choice affects the lower point, central dip and placement of lettering. Sketch a small heart using each arrangement and compare the results. A single-column point looks different from a two-column base, even when the overall width changes by only one stitch.
Draw one side and mirror it across the chosen centre if you want strict symmetry. Count the distance from the centre to corresponding edges on several rows rather than checking only the widest part. The curves can match at the top while an intermediate row is accidentally one square wider on one side. Use the horizontal grid lines to compare the shoulders, middle and taper separately. This makes an uneven outline easier to correct while the chart is still small.
An intentionally irregular heart can be attractive too. In that case, make the difference clear enough to look deliberate and examine the silhouette from normal viewing distance. A tiny accidental imbalance may simply look like a counting error. Keep your design notes explicit: either a mirrored shape with checked coordinates or a deliberately free arrangement. Those notes help you preserve the intended character when you revise the motif later.
Shape the curves and lower point on a square grid
Rounded forms become stepped outlines in counted cross stitch. The heart's upper lobes need a gradual sequence of horizontal and vertical changes, not a sudden rectangular corner. Draw several possibilities and compare the negative space around them. You do not have to imitate a smooth printed curve exactly. The grid is part of the design language, and a clean geometric heart can be more successful than a crowded attempt to reproduce every detail of a curved drawing.
Check the central dip independently. If it descends too far, the lobes may look disconnected; if it is shallow, the top may resemble a single rounded block. The right depth depends on the width and style of your own motif. Compare it with the distance to the widest row and the length of the lower taper. These relationships are more useful than applying one fixed rule to every heart size.
Make the point support the whole shape
The lower point should connect naturally to the narrowing sides. A long narrow tail can make the heart seem stretched, while an abrupt wide base can blunt it. Revise the final few rows and look at the complete silhouette each time. Avoid inspecting only the last square, because the point's effect comes from the taper leading to it. Save alternative drafts rather than repeatedly replacing one chart, so you can compare the versions after a short break.
Calculate the stitched and finished dimensions
The same chart changes physical size when the fabric count changes. A heart 42 stitches wide on 14-count Aida measures 3 inches across when one cross covers one fabric square. A height of 38 stitches measures about 2.71 inches. These are the dimensions of the stitched motif, not the cut fabric. Use the fabric calculator to confirm the figures, then add the allowances required by your chosen card, frame or textile finish.
If you add a border, include it in the full chart dimensions. A heart that is 42 stitches wide can become a substantially wider composition when blank spacing and a decorative border surround it. Calculate from the outermost stitch on each side. Leave a separate allowance beyond that outer stitch for finishing. Confusing the blank space inside the design with the fabric margin outside it is a common reason for cutting too close to the finished embroidery.
For an opening in a card or mount, check the visible area using a full-size paper template. Place the template over the planned design and confirm that neither the point nor the upper lobes disappear beneath the opening. Small adjustments to the motif position can change the balance significantly. If the finish has unequal margins, centre the visible stitched composition within the intended opening rather than assuming that the middle of the cut fabric is the final visual centre.
Build a palette with readable contrast
A heart does not have to be red. Magenta, cobalt, orange, plum or another deliberate palette can create a personal result. Consider the fabric color as part of the composition. A pale outline on pale fabric may be difficult to see, while a very dark fill can overpower thin lettering inside it. Sample the actual threads on spare fabric before buying supplies for a large set of matching gifts.
For a filled heart, start with one main color and introduce additional shades only where they contribute a clear shape or pattern. Random isolated color changes can make a simple motif slower to stitch without improving its readability. A small geometric band, alternating blocks or a restrained highlight can create variation while preserving the outline. The palette extractor can suggest a starting palette from your own reference image, but a digital color preview is not a guarantee of an exact thread match.
An outline needs consistent visual weight around its steps. Check whether a single row of full crosses gives the effect you want at the selected fabric count. Backstitch produces a different line and needs its own instructions; it is not automatically interchangeable with a full-cross border. If you adapt a chart, record which stitch types you changed and test the result. Keep the key clear so the completed pattern is understandable when you return to it later.
Add initials, small motifs or a border carefully
Lettering should be planned as a separate block with known dimensions. Count the full width of the initials or short word, including the spaces, before placing it inside the heart. The interior narrows toward the lower point, so a text line that fits at the widest row may not fit farther down. The name maker can help you compare letter arrangements, and the alphabet guide explains why complete text layouts need checking before stitching.
Preserve space around the extra detail
Leave blank grid squares between lettering and the heart edge so the elements remain distinct. A letter that touches the outline may become difficult to recognise, especially when both use the same thread color. Check the whole motif at normal viewing size, not only an enlarged chart. If you need to squeeze the lettering into every available square, a slightly larger heart or a separate text line may produce a clearer composition.
Borders also need planning at the corners and centre lines. A repeating motif may fit the horizontal edges but leave an awkward partial repeat near a corner. Count the available length and decide how the repeat ends before stitching the first side. A simple stepped frame with generous spacing can support the heart without competing with it. The ideas in modern cross stitch patterns can help you use strong shapes and open space deliberately.
Stitch a sample and check the chart as you work
If the design is small, a complete sample is a useful test of both the chart and palette. For a larger composition, sample the central dip, a portion of the curve and the lower point. These areas reveal the outline's character more clearly than a rectangular block of fill. Use the actual fabric count and intended thread coverage so the test represents the project you will make. Review the key and prepare the materials using the beginner guide if needed.
Choose reliable reference points for counting. The centre, widest row or completed border can help you place new stitches, but check them against the chart rather than treating an unverified stitched section as automatically correct. A mistake on one side can be copied to the other if you mirror the fabric instead of consulting the pattern. Pause after important outline sections and compare their coordinates before filling a large area that would be inconvenient to remove.
Keep your top diagonals consistent if the pattern uses full crosses throughout. Inspect tension and coverage without pulling the fabric out of shape. If the outline looks uneven, first determine whether the cause is the chart, counting, tension or the fabric grid. Those are different problems with different remedies. Changing the design unnecessarily will not correct a misplaced stitch, and tightening every stitch will not correct an asymmetrical chart.
Finish the heart for its intended use
Inspect the finished motif before trimming or mounting it. Confirm that the shape, lettering and border match your final chart, and secure the thread ends appropriately. Follow the care instructions for the actual fabric and threads before cleaning or pressing. For framing, use the planning advice in how to frame cross stitch, including the space needed around the stitched area. For cards or patches, test the construction on spare materials before cutting the only completed motif.
Keep the final chart, thread list and finished dimensions together. If you share an original pattern, provide a clear key and distinguish the stitched size from the required fabric size. If you used someone else's chart, follow its permissions rather than treating a common heart theme as permission to reproduce their particular design. A successful cross stitch heart pattern combines a recognisable silhouette, a readable layout and a finish suited to its purpose. Thoughtful choices in a small grid can produce a personal project without unnecessary complexity.
Choose an original chart from our free collection, or check your fabric measurements before you begin.
Free cross stitch patterns · Fabric calculator