
Getting started · 9 MIN READ
Stamped cross stitch: follow the print and check the finish
Understand printed guides, match thread symbols and follow product-specific preparation and finishing instructions for stamped work.
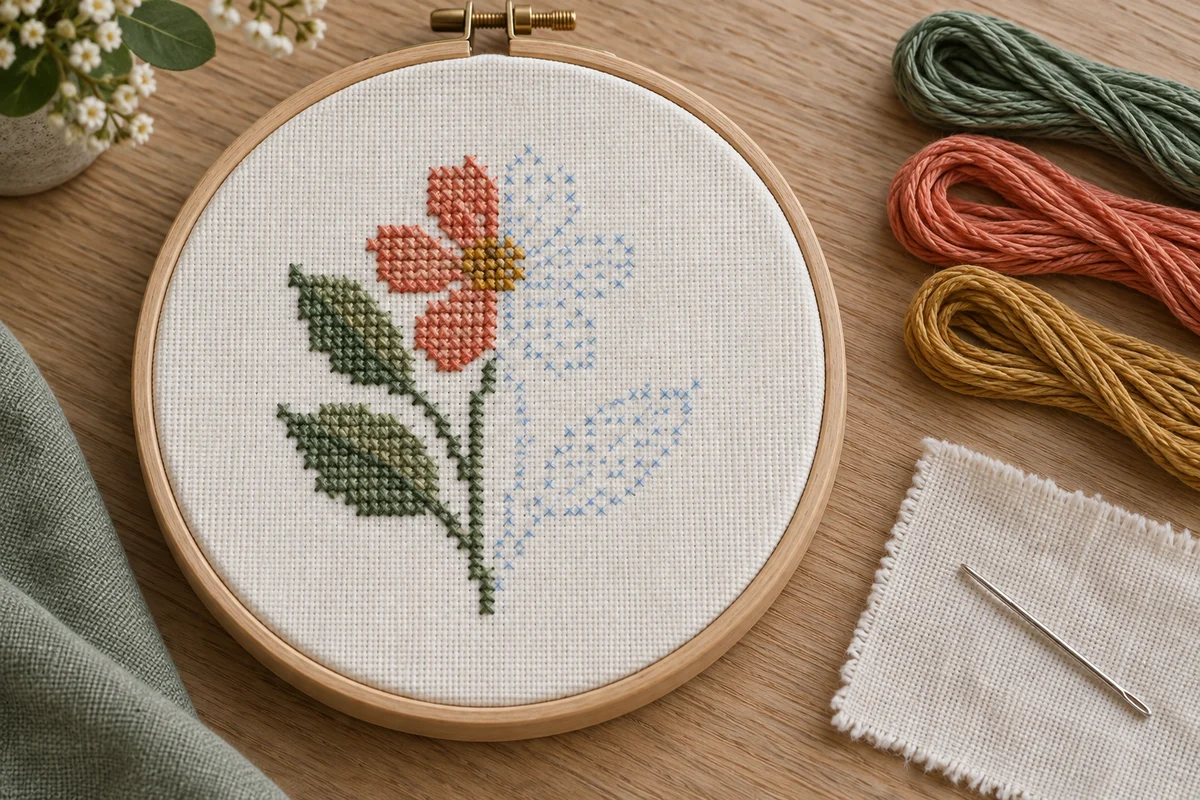
Understand what the printed marks are telling you
Stamped cross stitch places a stitching guide directly on fabric. That guide might consist of printed X marks, colored areas, symbols, or a combination of these. The print helps you locate the design, but you still need to understand the stitch instructions and thread key. Begin by inspecting your particular product rather than assuming that every stamped kit uses the same materials, symbols, or care method.
The distinction from counted cross stitch is the location of the guide. In counted work, you normally transfer the chart's positions by counting the fabric. In stamped work, printed marks provide a reference on the cloth itself. Some stamped products use Aida with visible holes, while others use a different fabric and expect you to follow printed stitch positions. Identify which system you have before choosing a needle or deciding how to place the crosses.
Printed colors do not necessarily represent the final thread colors. A strong blue or orange area may simply make a symbol easy to distinguish while stitching. Read the key and match each printed symbol or region with its specified thread. The finished photograph, the printed fabric, and the chart can look quite different from each other during the work. Use the supplied instructions to establish the intended relationship between them.
Separate guide marks from permanent decoration
Find out whether the print is intended to wash away, remain visible, or serve another purpose. Do not infer that from its color. Keep the packaging and instructions until the piece is finished, because they may contain the only product-specific explanation. If the information is missing, contact the maker before treating the cloth. Removing the guide too early can leave you without a reliable way to place unfinished stitches.
Check the contents and instructions before starting
Lay out the fabric, thread, needle, chart, and written instructions on a clean surface. Compare the contents with the package list. Check whether the threads are already sorted and whether their labels clearly match the key. If you need to sort them yourself, do so before starting the first stitch. Similar shades become much harder to distinguish once loose lengths have been separated from their original labels.
Read the instructions from beginning to end, including the finishing section. Note the strand count, stitch types, starting guidance, and any special care directions. A kit can include backstitch or other details even when its main design is stamped crosses. The supplied needle may be chosen for the fabric, so do not replace it with another type solely because you used that needle on a different project.
Inspect the printed guide for clarity. Look for missing areas, ambiguous symbols, or a section where marks appear difficult to relate to the intended stitching surface. Keep a record of any concerns before sewing over them. A photograph can help explain a problem to the manufacturer, but it is not permission to publish the complete copyrighted pattern. Ask for clarification if an important section is unreadable rather than improvising a large part of the design.
Choose a manageable first project
A compact design with distinct colors and clear marks makes it easier to learn the product's system. Do not judge the task only by the finished dimensions. A small dense image with many isolated stitches can require more thread handling than a larger simple border. Look at how often you will change colors and whether the instructions introduce unfamiliar techniques.
Decide what you want to practise. You might focus on consistent crosses, careful use of the thread key, or a tidy finish. Keep other aspects familiar where possible. The beginner cross stitch guide explains the basic cross sequence, although the printed placement and fabric instructions for your particular stamped project still take priority over a generic counted-work method.
Check what remains to be done after stitching. A stamped pillow panel, table linen, or quilt block may need additional assembly. A kit described as an embroidery project may not include the materials or instructions for every possible final object. Plan the intended use early so the embroidery does not become an unfinished panel simply because the backing, sewing method, or display arrangement was overlooked.
Plan time for the whole object
Leave separate time for organizing threads, checking the completed design, following its care directions, and constructing the finish. If you want a rough embroidery schedule, use the stitching time calculator with your own measured pace. A new fabric or unfamiliar printed guide can change that pace, so treat the result as an estimate. Avoid scheduling the final stitch and the gift delivery for the same evening.
Prepare the workspace without losing the guide
Keep the project clean and dry while you work, especially when the instructions identify the print as removable by water. Put drinks and other liquids away from the fabric. Do not prewash a stamped piece unless its maker specifically directs you to do so. The preparation used for plain fabric may be inappropriate when the printed guide is necessary to complete the design.
Choose a working support that suits the material and the product's instructions. A hoop can hold a useful section open, but it should not distort the cloth or make the printed positions harder to interpret. Try a gentle setup and check that the weave remains aligned. If the instructions specify a different approach, follow that rather than forcing the project into equipment selected for another fabric.
Arrange the thread key and chart where you can compare them with the cloth. Keep labels attached to unused thread and identify the active color before each new length. This small routine reduces the chance of stitching a large printed area with the wrong shade. Good light helps distinguish both fabric holes and printed marks, but a clearer view does not replace checking what a symbol means.
Make consistent crosses using the specified positions
Follow the product's placement system carefully. On stamped Aida, relate the printed guide to the fabric grid as the instructions describe. On another fabric, the printed X may indicate the points that form each cross. Do not force one approach onto the other. If the marks and the weave appear to disagree, pause and check the instructions or ask the maker for clarification before building a large area from an uncertain first row.
Keep the upper diagonals of full crosses facing the same direction unless the pattern calls for a different stitch. Pull each thread to rest on the surface without cinching the fabric into a dent. Printed guidance can make positioning easier, but it cannot control thread tension for you. Check the area after several crosses and compare its appearance with an earlier completed section.
Work manageable lengths and inspect the back when thread catches. A knot or a loop around the hoop can tighten if you simply pull harder. Trace the thread and release the obstruction before continuing. When switching colors, return to the key and verify the next shade. The printed region may be a convenient locator, but its color alone is not a reliable substitute for that match.
Verify one small section first
Finish a representative area before progressing across the entire design. Choose a section that includes a clear boundary or a change between two colors. Check placement, strand count, stitch direction, and the match with the key. If something is wrong, a small section is easier to correct. Once the system is confirmed, use it consistently rather than changing your method halfway through the project.
Track progress and resolve unclear marks carefully
Mark completed sections on a permitted working copy of the chart or keep a short project note. Avoid adding untested markers directly to the fabric. Another ink may behave differently from the manufacturer's print and could remain visible after finishing. Use the project progress tracker for totals and sessions if useful, while retaining enough chart detail to identify exactly where to resume.
When a printed mark is partly covered, compare nearby completed stitches with the chart and key. Do not guess solely from the appearance of the remaining ink. Find a confirmed reference and check the intended next position. If the guide has become unreadable before a section is complete, contact the maker about replacement instructions or a chart rather than washing more of the design away in an attempt to improve the view.
Keep track of corrections. Record which color or position you changed so you do not repeatedly question the same area. If the issue appears to be a printing error, retain the product details and describe it precisely to the manufacturer. An isolated unclear square and a whole section that does not align are different problems and may require different guidance. Clear notes make the request easier to answer.
Follow the product's finishing and washing sequence
The finishing sequence can matter. As one manufacturer-specific example, the Jack Dempsey Needle Art FAQ says its removable blue guide should be kept until stitching and the required assembly and quilting are complete. This is guidance for that maker's products, not a universal sequence for every stamped kit. Read your own package and follow the instructions for its fabric, print, thread, and final object.
Do not use a generic washing recipe to remove an unidentified print. Temperature, detergent, soaking, drying, and pressing directions should come from the relevant product instructions. If the kit has no clear care information, ask for it before treating the finished piece. A recommendation for one brand's water-removable ink does not establish what will happen to another product's print or to substituted specialty threads.
Before any required treatment, check the completed embroidery for missing stitches and unfinished details. If the guide disappears during finishing, those positions may become harder to identify afterward. Keep the chart and key available until the final inspection is done. Plan the display or assembly according to the completed object's requirements; the framing guide offers considerations for a flat framed finish when that suits your project.
Decide whether stamped or counted work suits the next project
After finishing, note which parts of the printed guide helped and which required extra attention. You may find direct placement convenient, or you may prefer the flexibility of a separate counted chart. These are different ways to organize the task, not a ranking of the stitcher's skill. Choose the format that suits the design, the instructions available, and the experience you want.
If moving to counted work, start with a small clear chart so the new challenge is counting rather than several unfamiliar techniques at once. If continuing with stamped work, use what you learned to evaluate the next kit's marks, key, materials, and finishing directions. Keep a record of the completed project and any substitutions. That information helps you choose a realistic next step instead of assuming all stamped products behave alike.
A useful stamped project combines clear guidance with careful stitching. Keep its print intact for the required stages, match symbols with thread deliberately, and verify the placement system early. Give finishing instructions the same attention as the first row. Those habits let the printed guide serve its purpose while the final piece reflects your own consistent stitches and thoughtful handling.
Choose an original chart from our free collection, or check your fabric measurements before you begin.
Free cross stitch patterns · Fabric calculator