
Patterns · 8 MIN READ
Cat cross stitch patterns: turn a simple silhouette into stitches
Plan an original cat silhouette or a personal photo chart with readable features, useful color contrast and a realistic stitched size.
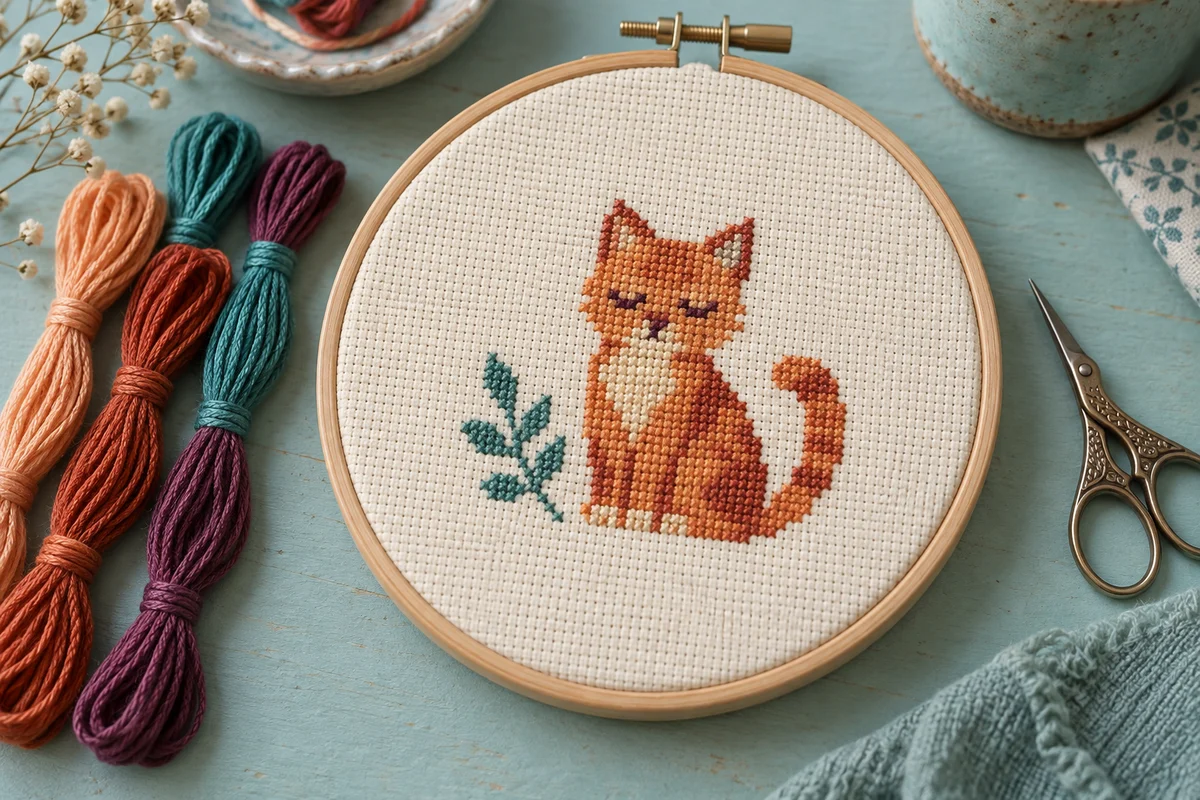
Choose between a simple motif and a personal portrait
Cat cross stitch patterns can range from a small silhouette to a detailed chart made from a photograph. Start by choosing which result you want. A simple sitting cat can suit a card or ornament, while a personal portrait may need more space, colors, and stitching time. The subject is familiar in both cases, but the charting decisions and practical workload are quite different.
For an original small motif, identify a few features that communicate the pose: pointed ears, a rounded body, and a tail with a clear direction. You do not need to show every whisker or patch of fur. For a portrait of your own cat, choose the details that make that animal recognizable, such as a distinctive face marking, ear shape, or coat pattern. Keep those priorities visible when simplifying the image.
Decide on the finished object before drawing or converting. A narrow bookmark needs a different arrangement from a square framed portrait. A circular hoop may suit a curled pose but crowd a long upright tail. Make a rough paper layout of the intended display and place the cat within it. This helps you judge scale and empty space before committing to a chart that cannot fit comfortably.
Use a reference you are permitted to use
Your own photograph or sketch is a practical starting point for a personal chart. If using another image or a purchased pattern, check its permitted uses. A generic cat subject does not make another person's illustration or chart freely reusable. Build original silhouettes and arrangements for designs you intend to share, and avoid recognizable licensed characters or copied commercial artwork.
Build a silhouette that reads without facial details
Draw the outer shape in one color first. For a seated cat, establish the ear points, the width of the chest, the broader lower body, and the tail. Compare the shape with and without internal details. If it is only recognizable because you have added eyes and whiskers, refine the outline before moving to shading. A strong silhouette remains useful even in a small chart with very few colors.
Keep the pose physically understandable. The head should relate clearly to the body, and the tail should attach in a plausible place. A tail that almost touches the ear or merges with the back can confuse the outline. Leave a deliberate gap or change its route. Review the shape at a reduced size so individual grid squares do not distract you from the overall animal.
Use graph paper to compare two versions at the same width and height. One may have a straighter tail and another a curled tail, while both use the same basic body. Label the dimensions and choose the version that suits the finish. Do not enlarge the motif accidentally while solving one detail; a slightly longer tail can change the entire fabric and framing plan.
Select a photograph that supports a readable chart
For a personal portrait, choose a sharp photograph with the cat clearly separated from its background. An uncluttered setting and even light help you identify the important shapes. If the face is hidden in shadow or the ears blend into a dark wall, a chart conversion may need many colors without recovering the features you want. Compare several of your own photographs before choosing the reference.
Crop thoughtfully around the subject. Keep the ears and any tail section essential to the pose, but consider whether the background adds useful meaning or just extra stitches. A close face crop and a full-body portrait tell different stories. Decide which one serves the final object and available time. A smaller crop can preserve important facial details without charting a large area of unrelated furniture.
Use the photo pattern maker to explore an image you own or are permitted to use. Treat the generated chart as a starting point that needs review. Color reduction and grid size affect the result, and an attractive original photo does not guarantee a readable small chart. Inspect the features that matter to you before deciding that the conversion is ready to stitch.
Compare previews at the intended size
Look at both an enlarged grid and a preview near the expected finished dimensions. The enlarged view reveals individual symbol and color decisions, while the smaller view shows whether the cat remains recognizable. If the eyes or face marking disappear, increase the useful detail or choose a better crop. Adding colors alone may not solve a feature that occupies too few stitches.
Give eyes, ears, and markings enough space
For a small stylized motif, place the facial features on a temporary chart copy and adjust them one square at a time. Compare their spacing with the head width. Eyes too close to the outer edge may change the expression, while an overly large mouth can dominate a tiny face. A sleeping pose with simple closed eyes may read more clearly than a miniature open-eyed portrait.
For a photo chart, examine the relationship between the eyes and nearby dark fur. The darkest pixels may merge into one block after reduction. Review whether a selective change in the chart can preserve the distinction without inventing a different expression. Work from the reference and keep alterations intentional. A personal portrait should retain its distinctive features rather than gaining random high-contrast accents.
Treat coat markings as shapes, not scattered dots. A connected patch on the cheek or chest often communicates more clearly than several isolated shade changes. Inspect whether a marking has shifted during the conversion or now touches a feature it should not. In an original small motif, simplify the patch until its boundary makes sense within the grid instead of attempting every strand of fur.
Choose a palette that works with the cloth
Assign thread colors by role. A stylized cat may need a main coat shade, a darker accent, and one contrasting detail. A portrait may use more shades to preserve form and markings. Start with the smallest palette that keeps the important features readable, then add a shade only when it improves a particular boundary or transition. More colors also mean more thread changes and key entries to manage.
Compare physical thread on the intended fabric where possible. Cream fur can disappear against ivory cloth, and a dark outline can blend into a deep background. The unstitched fabric is part of the visual result. Check important boundaries on a sample rather than assuming the screen preview precisely matches physical thread. The image palette tool can help explore image colors, but it does not guarantee an exact manufacturer-thread match.
Keep a clear symbol key. Adjacent grays, browns, or creams should have distinguishable symbols even when they look similar in the color preview. If you substitute a shade, record the change and compare it with its neighbors. A replacement that suits a chest patch may also appear in the face, so check every important area using that color before changing the entire chart.
Sample the most uncertain feature
Stitch a small test of the eye area, a pale cheek edge, or two close coat shades on spare fabric of the same type. View the sample at ordinary distance. This can show whether the contrast is enough and whether the chosen strand count gives the appearance you want. A focused sample answers a specific question without requiring another complete project.
Calculate the size and workload before cutting fabric
Find the chart's stitch width and height, then divide by the effective stitches per inch. A portrait 140 stitches wide measures ten inches at 14 stitches per inch. At the same count, a 42-stitch-wide silhouette measures three inches. These measurements describe the embroidery only. Include separate allowances for handling and finishing when planning the fabric cut.
Use the fabric calculator to compare dimensions and the fabric count converter to explore a different scale. Check the portrait's small features again if changing the count. The chart still contains the same symbols, but each eye and marking becomes physically smaller or larger. Do not choose a finer scale merely to fit an existing frame without considering the resulting working view.
Estimate time from actual stitched coverage and your own pace. A small outline and a dense photo portrait can have very different workloads. Use the stitching time calculator with a realistic estimate and leave room for thread changes, corrections, and finishing. If making a gift, keep the deadline separate from your first optimistic estimate and choose a scope that you can complete carefully.
Stitch from confirmed features and check the expression
Establish a measured starting position and verify the first connected section against the chart. Count horizontally and vertically before placing an off-center motif. Keep the upper diagonals of full crosses consistent and the thread tension controlled. The beginner cross stitch guide explains the basic sequence if you need a refresher before working detailed facial areas.
When stitching the face, compare completed boundaries with the chart at useful stopping points. An error near an eye can have a stronger effect on recognition than the same error in a plain background. Count from a confirmed nearby feature rather than an uncertain unfinished edge. Check a complete small area before building the next color from it, so one misplaced row does not distort the entire expression.
Mark completed stitches on a permitted working chart and record the current color when pausing. The project progress tracker can note totals and sessions, while chart marks identify the exact squares finished. Detailed coat shading may contain many similar small areas, making memory an unreliable progress system. Keep labels and the key together so the next session begins with a clear reference.
Finish and keep the portrait's context in your notes
Inspect the completed embroidery for missing accents, incomplete facial details, and accidental color changes before mounting or backing. Check its visual center within the chosen finish. A curled tail or a strong marking on one side can affect balance even when the stitch rectangle is centered mathematically. Test the position before trimming fabric or fixing the mount permanently.
Follow the care instructions for the fabric and thread if cleaning or pressing is required. Use the framing guide for support and measured positioning when a flat frame suits the piece. Choose a surrounding finish that lets the animal remain the focal point. A strongly patterned mount can compete with delicate shading or a small silhouette, so compare it with a simpler option before deciding.
Keep the final chart version, reference image, palette, fabric count, strand count, and alterations in your project record. For an original personal portrait, a short note about the cat and the photograph can make the finished piece more meaningful. A successful cat design combines recognizable shapes with practical chart decisions: clear features, useful color contrast, a measured size, and enough care in the stitching to preserve the expression you chose.
Choose an original chart from our free collection, or check your fabric measurements before you begin.
Free cross stitch patterns · Fabric calculator