
Patterns · 10 MIN READ
Coding cross stitch: plan original binary and pixel motifs
Create original pixel motifs and a checked binary message with clear group boundaries, readable colors and a measured finishing layout.
Choose what the coding theme should communicate
Coding cross stitch can turn a small technical idea into an original stitched motif. The idea might be a short binary message, a pair of geometric brackets or a pixel design you draw yourself. Choose the meaning before choosing the colors. A decorative arrangement of squares does not need to perform a computing task, but any claim that the squares encode a particular message should be checked. Keeping those two intentions clear makes the finished project easier to explain and prevents attractive decoration from being mistaken for a verified code example.
Start with a small concept that fits the object you intend to make. A framed gift can carry a short phrase with space around it, while a bookmark or patch may need a compact emblem. Sketch several arrangements on paper before developing one in the grid designer. Give each filled square a clear purpose. If the motif depends on several tiny details that disappear when viewed at its finished size, simplify the idea or increase the grid rather than adding more colors to disguise the problem.
Keep the artwork original
Draw your own geometric forms instead of tracing a recognizable game character, software logo or branded icon. A coding theme can be expressed through grids, brackets, repeated squares and original lettering without those references. If you use a chart or reference image made by someone else, check the permission that applies to it. Calling a design pixel art does not establish that it is free to reproduce. Keep the origin of your design in the project notes so you can distinguish your own chart from any external material you consulted.
Decide whether you are encoding text or drawing pixels
A binary text design represents information using two states, commonly written as zero and one. A pixel motif represents a picture using cells with chosen colors. Both can be charted on squared paper, but they need different checks. For text, verify the encoding and the grouping of values. For a picture, verify the silhouette, color placement and occupied grid dimensions. Combining the two is possible, but each part should remain readable on its own before you place them in the same composition.
Choose a visible distinction between the two binary states. You might stitch zero and one as actual small numerals, use two colors in equal-sized squares, or use filled and empty cells. Each approach requires a key if you want another person to decode it. Empty fabric can be ambiguous when gaps also separate letters or rows. A two-color cell system avoids that particular ambiguity but adds stitching. Decide which rule you will use and apply it consistently across the complete message.
For pixel art, define the cell as one full cross or as a repeated block of crosses before drawing. Enlarging every pixel into a two-by-two block changes both dimensions and stitch quantity. Keep that scaling rule separate from changing the fabric count. If you mix one-cross pixels with larger blocks unintentionally, edges and spacing become hard to compare. The mini pattern guide explains why a compact design benefits from a silhouette that remains understandable without many internal details.
Verify a short binary example before charting
Use a precisely named encoding for a message rather than writing that all text becomes one eight-bit number per character. For a simple example, the uppercase ASCII letter A has decimal value 65. Written in an eight-bit group with a leading zero, it is 01000001. The uppercase ASCII letter B has decimal value 66 and the corresponding group is 01000010. You can verify these values using the place values 128, 64, 32, 16, 8, 4, 2 and 1, reading from left to right.
In the group for A, only the 64 and 1 positions are set to one, so their sum is 65. In the group for B, the 64 and 2 positions are set, giving 66. The leading zero preserves a consistent eight-cell group; it does not change the numeric value. A decorative chart for the two-letter message AB can therefore place those two verified groups on separate rows, with a key explaining which stitched state means zero and which means one. Preserve the group order exactly when transferring it to the chart.
Do not generalize the example to every character
This example uses two basic uppercase letters and a stated representation. Accented letters, emoji and other characters need an appropriate encoding and may occupy more than one byte in UTF-8. Do not extend the eight-cell-per-character rule to them without checking. If you want to encode a longer or multilingual message, generate the values with a trusted tool using a specified encoding, then independently verify the output before charting. Keep the original text, encoding name and grouped values together so the chart can be reviewed against a clear source.
Build the grid with unambiguous grouping
Chart the binary groups in a way that makes their boundaries obvious. Separate rows can work well for a short message, while several groups across one row need deliberate gaps. Do not let a decorative border use the same cell arrangement immediately beside the message without a clear separation. A viewer should be able to identify where the information begins and ends. Number the working chart's rows or mark reference lines if they help you count, but keep those planning labels distinct from the cells intended to be stitched.
For a two-color eight-cell group, count all eight cells even when some share the same color. It is easy to miss a repeated zero when drawing a long block from memory. Compare each row with the saved binary values after charting, then check it again before stitching. Use a separate verification mark outside the design area rather than modifying the cells themselves. A beautiful border should be added only after the message grid has passed that check, so decorative changes do not obscure the information you are trying to preserve.
Keep spacing separate from encoded cells
Record the number of blank columns or rows between groups. Those spaces belong to the layout, not to the binary value unless your encoding rule explicitly says otherwise. If you choose empty fabric to represent zero, consider stitching a subtle enclosing outline or another clear group boundary. Test the result on paper at the intended size. A decoder should not need to guess whether a wide empty area contains several zeros, a separator or unfinished stitches. If the distinction remains unclear, revise the visual system before proceeding.
Design an original pixel motif with a small palette
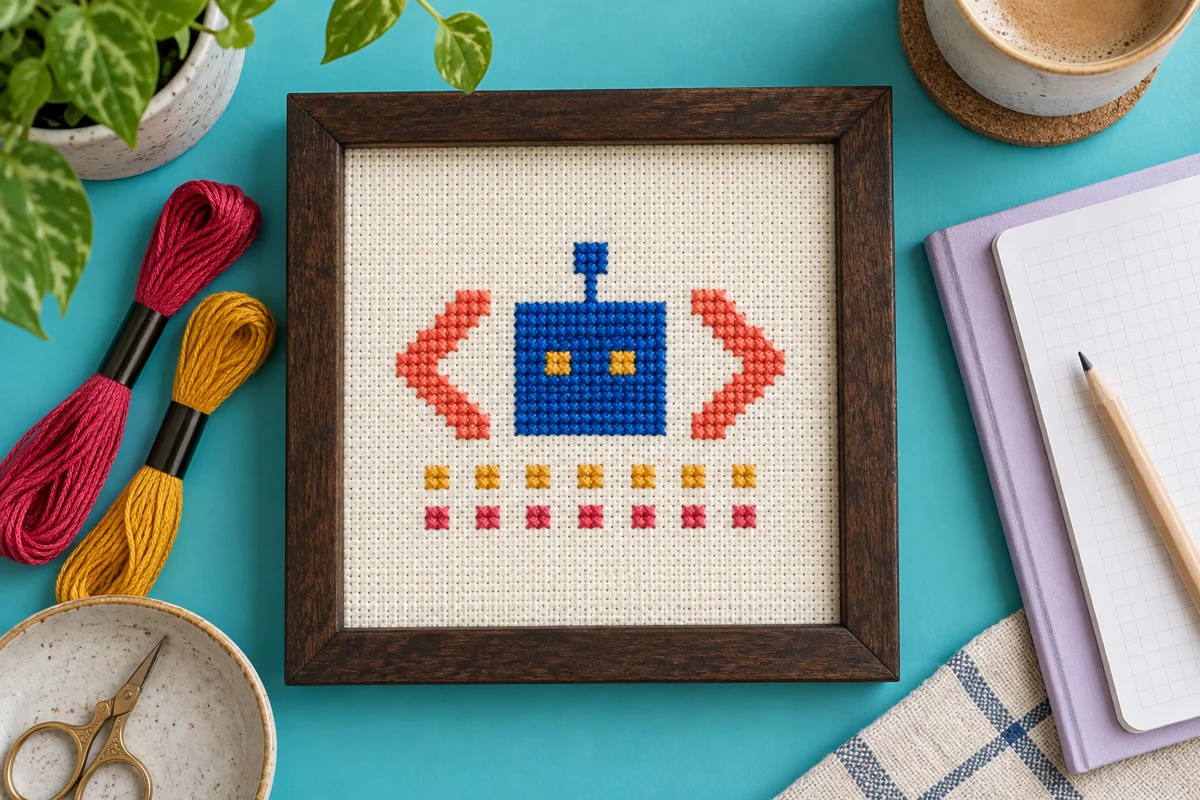
Draw the motif as a solid shape first, then add internal features. An original abstract face, a geometric flower or a small arrangement of brackets can provide a coding-inspired appearance without depending on a recognizable commercial character. Keep the main silhouette readable in one color. Then use a second color for a feature that matters, such as two eyes or a central accent. If every added color creates scattered isolated crosses, the design may become unnecessarily slow to stitch and harder to read at a distance.
Choose contrasting values as well as appealing hues. Cobalt and turquoise can sit attractively together but may need a lighter or darker accent to separate a small detail. Place the actual threads on the chosen fabric and stitch a few sample crosses. The thread guide explains why a screen swatch does not establish the coverage or texture of the real material. Keep the thread identification in your chart key so a later version can reproduce your choices rather than approximate them from a photograph.
Review the motif without zooming in. A design that looks clear at twenty times its stitched size may merge into an indistinct block on a small patch. Check the distance between eyes, the width of a bracket and the thickness of a border using actual grid cells. A single extra square can change an expression or close a gap. Save successive chart versions when testing alternatives so you can return to the strongest outline instead of rebuilding it from memory after several decorative changes.
Calculate size and arrange the complete composition
Count the occupied width and height of the whole design, including message cells, separators, motif and border. Divide those counts by the number of stitches per inch you will actually make. A forty-two-stitch-wide design worked over one square on 14-count Aida has a stitched width of three inches. That result does not include the fabric margins required for holding and finishing. Use the size calculator to compare materials, keeping the chart unchanged while you evaluate how the finished dimensions vary.
Combine the pixel motif and encoded message on one complete layout before cutting fabric. Centering each element independently can produce an arrangement that feels unbalanced when their widths differ. Try aligning their center lines or using a shared left edge, then inspect the whole design. Leave enough space that the decorative motif cannot be mistaken for another group of encoded cells. If you add a readable text label below the binary message, chart that lettering too; a handwritten placeholder cannot establish how many stitched squares the actual letters require.
Choose the finish early. A frame opening, card window or sewn edge can hide part of the fabric and change the apparent spacing around the design. Draw that boundary on a paper mockup and compare it with the outermost stitches. Keep antenna-like details, brackets or isolated dots comfortably inside the visible area. The framing guide provides considerations for a displayed piece. A patch or other sewn object requires a suitable construction plan in addition to the chart, especially if it will be handled or washed.
Stitch with references that protect the message
Start from a checked chart reference and establish its corresponding location on the fabric. For a binary message, count each group against its saved values rather than treating the row as a generic stripe. Work in a sequence that lets you verify the complete group before moving on. If the same color appears in several separated cells, inspect the count between them before carrying thread. A one-cell shift can alter the message even when the stitched row still looks orderly and the colors remain attractive.
Keep the chart readable as you mark progress. Heavy marks can hide whether an unstitched cell represents zero, a different color or a separator. The printed chart guide describes progress methods that preserve the underlying instructions. Maintain a separate record of completed groups if necessary. Check the top leg direction of the crosses and the intended thread count as well, because consistent stitching helps the two binary states remain visually comparable throughout the design.
Perform a second check before finishing
Read the stitched message back from the fabric using the key, group boundaries and original encoding record. Compare each group with its source values. For the AB example, confirm both eight-cell rows in the correct order and check that no decorative stitch has entered the information area. Then inspect the pixel motif against its chart. This second pass is useful because the message and picture have different failure modes: one can contain an incorrect value while the other remains visually recognizable.
Save the key and explain the finished piece accurately
Keep the completed chart, thread list, fabric details and encoding record together. If the design is a gift, include a short key explaining the two states and how the groups are read. You can also include the plain message so the recipient does not need to decode it to understand the gesture. Describe the object as a stitched representation of information or an original coding-inspired motif. Decorative needlework is not executable software, and a small binary message does not need exaggerated technical claims to be interesting.
Record any changes made while stitching. If you shifted the motif, altered the border or substituted a thread, update the final chart so it matches the completed work. Save a clear photograph and the final dimensions after finishing. Those records help you make another version, change the fabric size or explain a repair later. They also distinguish the verified message from an earlier draft that may have contained a mistake, preventing an appealing but incorrect working chart from being shared as the final pattern.
An effective coding cross stitch design brings a clear idea, a readable grid and a checked representation together. Keep the artwork original, use a named encoding when the design carries text, and verify the stitched result before finishing it. A small well-planned message or geometric motif can be more satisfying than a crowded chart filled with unrelated symbols. The purpose is a piece whose visual choices and meaning you can explain confidently, from the first occupied square to the final fabric margin.
Choose an original chart from our free collection, or check your fabric measurements before you begin.
Free cross stitch patterns · Fabric calculator