
Patterns · 8 MIN READ
Mini cross stitch patterns: design with fewer squares
Simplify original motifs into fewer grid squares, preserve their silhouettes and calculate the dimensions of a miniature finished piece.
Define the miniature by its grid dimensions
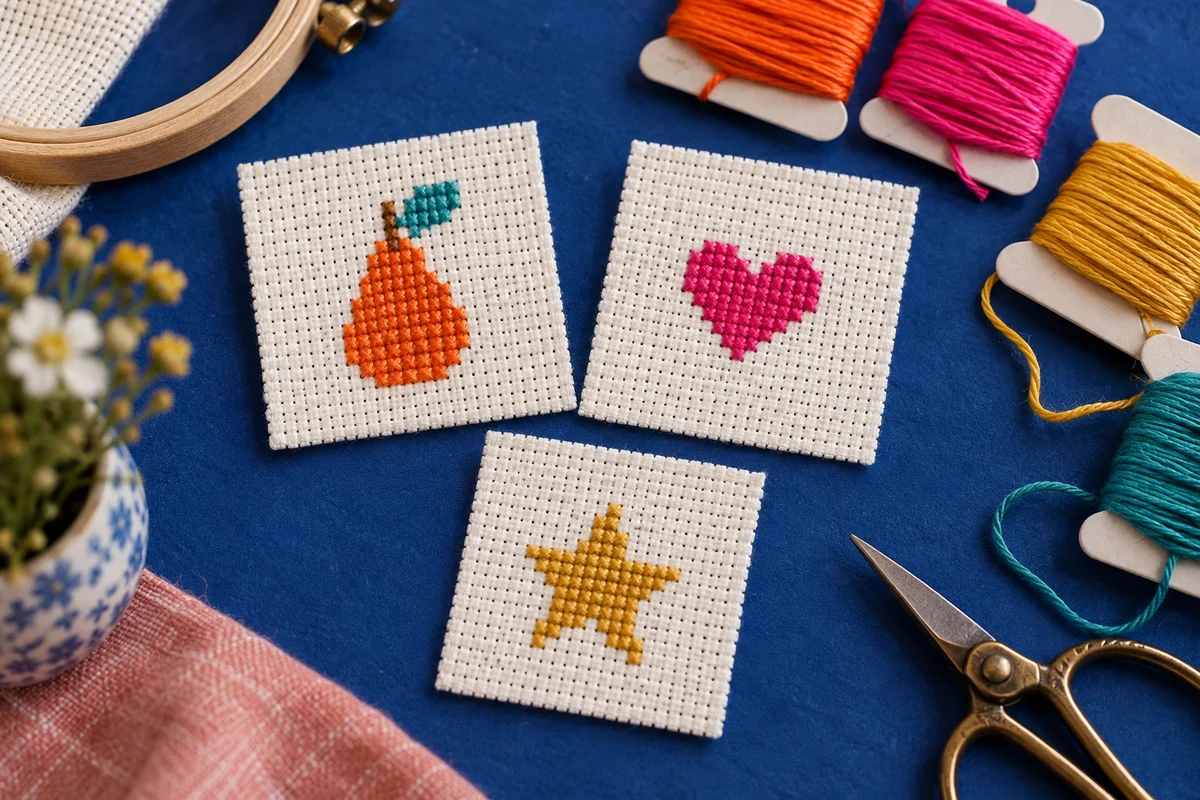
Mini cross stitch patterns use a compact grid to express a clear idea with relatively few squares. The challenge is deciding which details are essential and which can disappear. A tiny pear may need a rounded lower shape, narrower top and one leaf; it does not need every highlight visible in a photograph. Begin by naming the motif's distinguishing features. Those features give you a practical guide when you reduce a drawing to a small counted chart.
Record the maximum width and height in stitches before designing. A limit such as 16 by 20 stitches creates a different task from a physical-size limit such as one inch across. Fabric count connects those two measurements, but they are not interchangeable. Work with grid dimensions first when your aim is a simplified chart, then calculate how the design will fit the intended finish. The grid designer provides a place to develop an original compact motif.
Distinguish a small chart from an easy project
A miniature can still involve many color changes, fractional stitches or an awkward finishing method. Few grid squares do not guarantee that the completed object is quick or simple. If you want a straightforward first design, limit both the chart dimensions and the techniques required. The small pattern guide considers project complexity and scheduling, while this guide focuses on preserving a recognisable design when the grid itself is small.
Choose a silhouette that survives simplification
Start with a motif that has a strong outer shape. Hearts, pears, stars, small houses and geometric leaves offer useful opportunities to explore the grid. Draw the silhouette in one color before adding shading or interior decoration. Look at it from normal viewing distance and ask whether the subject remains recognisable. If the outline is unclear, adding more thread colors usually makes the chart more complicated without solving the basic problem.
Use an original drawing or source material whose permissions allow your intended adaptation and use. A small size does not remove the rights associated with a commercial chart, logo or character. Keep relevant source information with your notes if you are adapting permitted material. Drawing a simple motif yourself also makes it easier to change the proportions without trying to preserve every feature of someone else's distinctive illustration.
Compare several silhouettes with slightly different proportions. A pear with a broad base and narrow top reads differently from an oval with a stem. A house may need a clear roof break rather than a dense block of squares. Keep the distinguishing feature visible even if the rest becomes geometric. The heart pattern guide explains how small changes to lobes, a central dip and a lower point affect a familiar silhouette.
Simplify curves and isolated squares deliberately
A smooth curve becomes a stepped edge on a counted grid. Choose steps that support the shape rather than trying to reproduce every tiny movement in the original outline. A few well-placed changes in row width can create a readable rounded form. Inspect the complete shape each time you alter a row. A local improvement at one corner can make the whole motif appear too wide, too narrow or tilted.
Look for isolated squares that do not contribute a clear detail. Each isolated stitch may require extra counting and thread handling, especially if it uses a separate color. Remove or combine unnecessary marks when doing so preserves the intended shape. This is a design decision, not a rule that every single stitch must disappear. A single eye or star highlight can be meaningful when its placement and contrast are deliberate.
Change one feature at a time
Save a version before revising the outline, then alter one feature and compare the result. You might shorten a stem, widen the lower point or remove a detached highlight. Changing several features simultaneously makes it harder to understand which adjustment helped. Label useful drafts in your notes so you can return to an earlier solution. Once you select the final chart, identify that version clearly before stitching.
Limit the palette without losing contrast
Choose a small set of colors that distinguish the motif from its background and separate important internal details. A single bright shape on ivory fabric can be effective, while a second color may help identify a leaf or centre. More shades do not automatically create more recognisable depth at low grid resolution. If two shades are nearly indistinguishable on the actual fabric, their separate symbols can add complexity without a visible benefit.
Test the physical threads beside one another and against the intended fabric. A digital preview or colored pencil sketch helps with planning but does not guarantee a thread match. The palette extractor can suggest a starting arrangement from your own image, while the final thread choice needs a real-material check. Keep the fabric color in the composition rather than treating it as an invisible background.
Assign clear symbols in the key even when the chart also uses color. Similar small marks can become difficult to distinguish in a reduced printout. Check that every symbol identifies the correct thread and strand count. If you revise the palette, update the chart and key together. The graph paper guide explains how drafting marks become readable instructions rather than simply a colored picture.
Add tiny details and lettering cautiously
An eye, flower centre or short initial can change a miniature's character significantly. Check its position against the silhouette and the available blank space. One square placed too close to an edge may look like a break in the outline rather than an interior feature. Evaluate the design at its intended physical size as well as on an enlarged chart. That comparison helps you distinguish a useful detail from one that only works when zoomed in.
For lettering, chart the complete initial or short word before deciding that it fits. Include spaces and punctuation in the dimensions. Very small alphabets can lose familiar letter features, making some characters difficult to distinguish. The alphabet guide and name maker help you compare actual layouts. If the lettering becomes unclear, a larger motif or a separate text line may produce a more readable result than squeezing it into every remaining square.
Keep special stitches explicit. Backstitch lines and raised knots are different from full crosses and need their own instructions. They can provide a useful detail, but they also alter the working method and finishing needs. Do not add an unexplained dot to solve a tiny design problem. The French knot guide explains how to test raised details with the actual thread and fabric before using them on a finished piece.
Calculate the actual stitched size
A motif 16 stitches wide and 20 stitches high measures approximately 1.14 by 1.43 inches on 14-count Aida when one cross occupies one square. The same chart measures 1 by 1.25 inches on 16-count fabric. Those dimensions describe the stitching, not the fabric piece or finished accessory. Use the fabric calculator to check the conversion and compare it with the visible space available in your planned construction.
Changing fabric count changes physical size without changing the chart's grid dimensions. It can help a design fit a smaller opening, but it also changes the working scale and may affect your preferred thread coverage. Test the intended combination rather than assuming a finer fabric automatically improves every miniature. The fabric guide helps distinguish fabric thread count from effective stitch count when the stitching convention differs.
Preserve finishing margins outside the motif
A miniature still needs material for its edge treatment, attachment or mounting. Do not cut close to the stitching merely because the image itself is small. A tiny patch, card insert or keychain has construction requirements beyond the chart. Mark the stitched boundary, finished edge and raw cut edge separately on a paper template. This keeps the decorative area from being accidentally caught in a seam or hidden beneath a holder opening.
Stitch a sample with the final materials
For a very small chart, stitching a complete sample may be the most useful test. It lets you review the silhouette, color contrast and physical size together. Use the intended fabric and thread coverage so the result represents the final project. The beginner guide covers the counted process if needed. Keep the chart centre and surrounding allowances clear before making the first stitches.
Inspect tension and counting as you work. A small motif may reveal a single misplaced square more readily than a large textured scene. Check important outline changes against the chart before filling adjoining areas. Keep top diagonals consistent where the design uses full crosses, and avoid pulling the fabric out of shape to make the stitches look compact. A clear chart still needs controlled stitching to preserve its planned silhouette.
Review the reverse before finishing. Secure thread ends appropriately and avoid unnecessary bulky clusters behind the tiny motif. A backing can conceal the reverse without removing its thickness. If the sample reveals a problem, identify whether it comes from chart design, color contrast, fabric count or stitching. Correct the relevant part and update the final instructions so the next version does not repeat the same uncertainty.
Choose the finish and keep the chart complete
Match the construction to the intended use. A greeting card insert needs a different edge treatment from a fabric patch or a keychain handled regularly beside other objects. Test the finishing method on spare materials before trimming the completed motif. Follow care instructions for the actual fabric, threads and any backing or hardware. A small object does not make those material requirements unimportant.
Save the final chart, key, fabric count, stitching convention and finished dimensions together. Record any changes made after sampling and identify the final version. If you share an original pattern, distinguish its stitched dimensions from the fabric size needed for the chosen finish. Successful mini cross stitch patterns preserve a clear idea through careful simplification. Their character comes from a readable silhouette, deliberate color choices and a construction that gives the small design enough space to work.
Choose an original chart from our free collection, or check your fabric measurements before you begin.
Free cross stitch patterns · Fabric calculator