
Getting started · 8 MIN READ
Printed cross stitch patterns: read symbols and mark progress
Read a paper chart and its key, distinguish stitch symbols, count reliable reference points and record progress without hiding instructions.
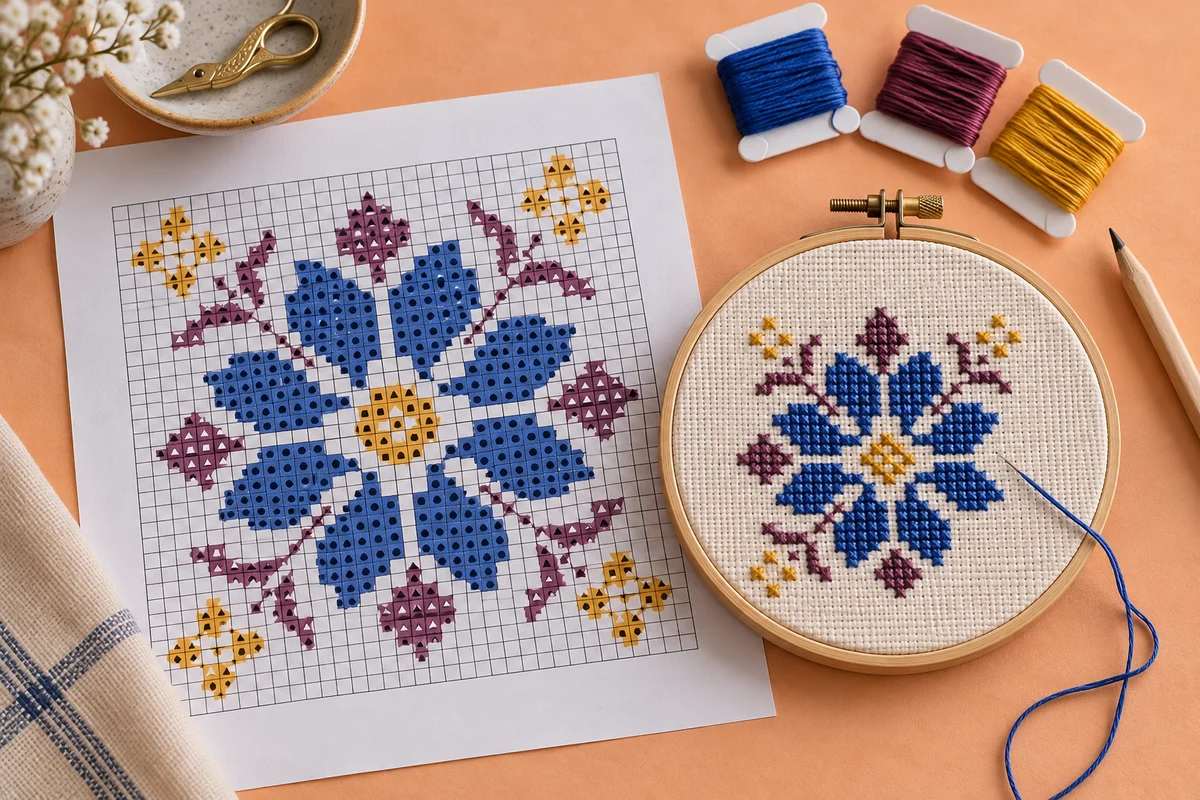
Identify what has actually been printed
Printed cross stitch patterns usually mean paper charts used to count stitches onto fabric, but the phrase can also be used for designs printed directly on cloth. Establish which type you have before starting. A paper chart gives coordinates, symbols and instructions that you transfer through counting. Printed fabric supplies a guide on the material itself and may have product-specific preparation and finishing directions. Those are different working arrangements, even when the finished illustrations look similar.
This guide focuses on reading a physical counted chart. Keep the complete pattern, key and instructions together rather than working only from the page with the picture. A clear chart explains the stitch types, thread references, dimensions and stitching convention. If you have printed fabric instead, read its supplied directions and consult the stamped cross stitch guide for the questions to check. Do not use a paper-chart method as a substitute for product-specific fabric instructions.
Separate the preview from the working chart
A finished-project photograph shows appearance, while a working chart describes placement. You cannot reliably determine every thread reference or special stitch from the photograph. Check that your paper copy includes readable symbols and a complete key. If it is only a preview or sample page, obtain the actual complete instructions before cutting fabric. An attractive image is not evidence that every necessary part of the pattern has been supplied.
Read the key before selecting thread
The key defines the meaning of the symbols in this chart. A square, dot or triangle can mean different things in different patterns, so do not carry assumptions from a previous project into a new one. Match each symbol to the listed thread reference and stitch type. Keep the key in a position where you can consult it without repeatedly moving the work or losing your place on the chart.
Read strand counts separately from color references. A pattern may use one coverage choice for full crosses and another for backstitch or knots. Check whether blended colors or specialty threads appear in the instructions. Those details are not established by the symbol's printed color alone. If the paper chart has several views, identify which key applies to the view you are following and keep that relationship clear.
Label the actual threads so the chart references remain available after the original packaging is removed. Similar shades can be difficult to distinguish under different lighting. Record substitutions explicitly, including the original reference and the replacement. The online supply guide explains how product specifications connect to a project list. A clear organizer lets you follow the chart's information without relying on memory of which shade looked closest.
Understand the grid and stitching convention
For a full-cross chart, a grid cell commonly represents one cross, but read the pattern's stated convention. Heavier reference lines may divide the chart into counting blocks, and those blocks are navigation aids rather than individual stitches. Identify the interval used by the chart before counting from a bold line. Coordinate labels and centre marks also provide context, so keep them visible when handling or folding the paper.
The physical size of a printed cell does not determine the size of the embroidered stitch. Enlarging the chart improves readability without changing its stitch count. Fabric count and the stitching convention determine the finished dimensions. A chart 84 stitches wide on 14-count Aida measures 6 inches across when each cross occupies one square. Use the fabric calculator to check the complete dimensions and add finishing allowances separately.
Check fabric threads versus completed crosses
An evenweave worked over two threads requires a different interpretation from Aida worked over one square. Read the fabric and stitching instructions together rather than using the count number alone. The fabric guide explains the relationship between fabric structure and effective stitch count. Keep that convention in your project notes so a later fabric substitution does not silently change the size or placement of the whole design.
Locate the centre and choose verified landmarks
Find the chart centre and identify the corresponding centre of the prepared fabric. Check the design's position within the allowances reserved for framing or construction. A centre mark is useful only when you understand which row, column or intersection it indicates. Compare the chart's labels and instructions rather than assuming that the middle of a folded paper page is the design's centre.
Choose landmarks that help you count reliably as stitching progresses. A checked outline, a completed motif or a known centre line can provide a reference. Verify the landmark against the chart before using it to position more work. If an early section is misplaced, repeating its relationship can spread the error. The beginner guide explains counted placement and why short checks are useful before filling larger areas.
Keep the visible fabric area separate from the chart's boundaries. A hoop edge or a scroll roller does not represent a row or page division unless you have independently counted that relationship. Repositioning the holder changes what you see without changing the pattern's coordinates. Record the current section and a verified reference point when pausing, especially if the next session will begin with a different part of the cloth exposed.
Read full crosses and special stitches distinctly
A filled symbol inside a cell may specify a full cross, while lines or other marks may identify a different technique. Read the key for each type instead of treating all visible marks as crosses. Fractional stitches, knots and embellishments can require particular entry points and strand counts. Their positions may not correspond to filling an entire square. Keep the relevant instructions beside the working chart when those details are reached.
Backstitch lines can run along edges or across cells according to the pattern. Follow the actual line coordinates and instructions rather than connecting shapes from the preview photograph. A knot may sit at an intersection or another specified point. The French knot guide explains why a raised dot needs its own placement and material tests. For beads, the beaded cross stitch guide covers planning around attachment and finishing.
Practise an unfamiliar mark on spare fabric
Use matching spare material to test a technique you have not used before. Follow the chart's thread and placement instructions, then compare the sample with the surrounding full crosses. This lets you learn the motion without risking the only prepared project piece. If the instructions remain unclear, obtain clarification before improvising a replacement. A technique sample solves a different problem from a chart-coordinate check, and both may be needed.
Record progress without hiding the original information
Choose progress marks that remain readable alongside the chart's symbols. A heavy opaque mark can make later checking or unpicking difficult because the original instruction disappears. Test your marking method on an appropriate working copy or permitted annotation system before using it throughout the pattern. Preserve the original information where practical, and follow the pattern's terms for copying or digital use.
Distinguish stitches completed from areas checked and details still waiting. A full-cross section can look finished while its backstitch or embellishments remain undone. The project tracker can record those separate stages and the current working color. A short note identifying the next task is more useful than a page number alone, particularly after a long break or a change in the visible fabric area.
If the chart covers several pages, use its page map and coordinates to identify joins. Some patterns repeat edge rows for context, and those overlap areas should not be stitched twice. The large PDF guide explains how to check those relationships. Physical paper edges are not enough to establish the join: use the chart's own instructions and matching coordinates before moving across a boundary.
Keep the paper readable during working sessions
Arrange the chart under lighting that allows you to distinguish every symbol comfortably. Check the printed page at your usual working distance rather than only close to your face. A faint copy or reduced page can turn distinct marks into ambiguous shapes. If necessary, obtain a clearer permitted print or adjust the viewing arrangement before stitching from uncertain symbols. More effort spent guessing the mark does not improve the underlying instruction.
Keep the chart away from spills, loose tools and thread that can obscure the active area. Fold or support it in a way that preserves labels and the key you need. If you use a protective sleeve or holder, check for glare and whether the page remains easy to navigate. A tidy storage method helps, but it should not make the active chart harder to read during the session.
When stopping, store the chart with its key, thread references and progress note. The project bag guide offers a practical arrangement for keeping a work in progress together. Inspect the paper before resuming if it has been folded or moved. Confirm that the active section and its coordinates are the same ones identified in your note rather than starting from whichever part of the picture is most visible.
Preserve the final chart and project decisions
Keep the pattern version, source information, material references and any corrections together. If the designer provides updated instructions, compare them with the copy already used and identify the affected area before changing your working chart. Avoid mixing pages from different versions without understanding their relationship. Notes about substitutions, fabric count and the stitching convention remain useful during finishing and future repairs.
Inspect the completed embroidery against the full chart before trimming or mounting it. Check special stitches, lettering, boundaries and thread ends beyond the section you worked most recently. Printed cross stitch patterns become practical instructions when their key, grid and coordinates are read consistently. A readable paper copy and a deliberate progress routine let you follow those instructions without turning each new session into another search for the correct symbol or starting point.
Choose an original chart from our free collection, or check your fabric measurements before you begin.
Free cross stitch patterns · Fabric calculator