
Projects · 8 MIN READ
Cross stitch keychains: make a durable miniature
Plan a readable miniature motif, measure its holder or fabric tag, and test the backing, edges and connection before assembly.
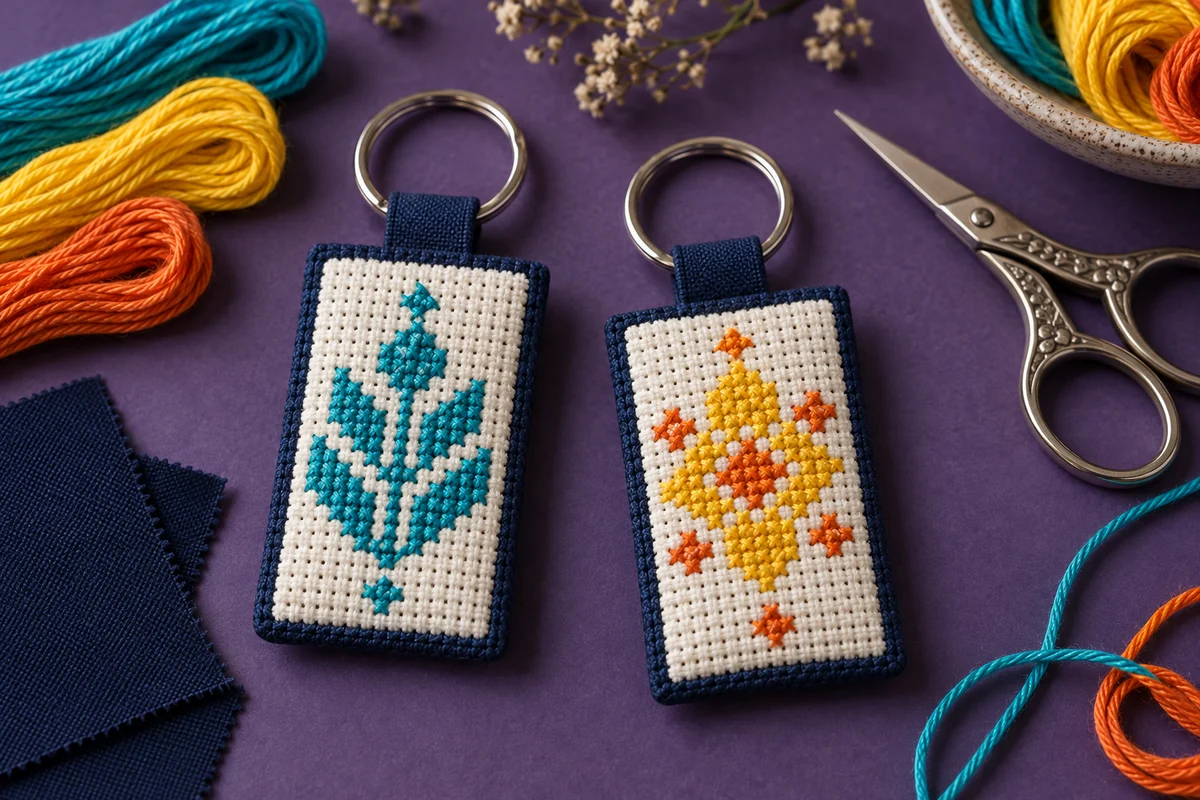
Plan the miniature and its attachment together
A cross stitch keychain is a small stitched object that faces frequent handling. It may sit beside metal keys, rub inside a pocket and be pulled by its ring several times a day. That makes the finishing method as important as the chart. Begin by deciding whether the embroidery will sit inside a protective holder, become a fabric tag with a backing, or form a rigid stitched shape. Each construction has different requirements for edges, thickness and attachment.
A tiny motif can take only a short stitching session, but the finished keychain still needs careful assembly. Do not choose the chart solely because it has few stitches. Check whether its outline fits the available insert or fabric area and whether the attachment leaves enough space above the motif. A beautiful small picture can be obscured by a tab or compressed inside a holder. Make a full-size paper mock-up before preparing the embroidery.
Separate the decorative front from the load-bearing connection
The stitches create the image; the connection to the ring keeps the object attached. A decorative thread tail is not a substitute for a properly constructed tab or suitable holder. Follow the assembly instructions for your chosen hardware and test the connection before regular use. For a fabric tag, plan the tab, seams and backing as a complete construction rather than adding a ring wherever it happens to fit after stitching.
Choose a construction that suits your tools
An insert holder can protect the front and back from direct rubbing, but it needs embroidery cut and mounted to the correct shape. Measure the usable insert space rather than the outer dimensions of the holder. Check the allowed thickness and closure method. A finished sample with fabric and backing tells you more than an empty holder, because the layers can prevent the closure from seating correctly. Do not force a thick insert into a case that is designed for a thinner material.
A sewn fabric tag offers more freedom in size and shape. Its backing hides the reverse stitching, and a border can provide space for the seams. It also leaves the embroidered face exposed to handling. Choose a relatively flat motif and an edge finish you can execute neatly at this scale. Sewing a small curved shape can be harder than sewing a larger rectangle, even when the stitched design itself is very simple.
Rigid counted materials provide another option when their construction instructions suit the intended object. Their cut edges still require attention, and an attachment hole must not leave a weak narrow bridge of material. Read the plastic canvas guide before planning a cut-out shape. Do not assume that every mesh or rigid blank can support the same connection merely because it looks similar in a photograph.
Draw a motif that reads at a small scale
A miniature needs a recognisable silhouette and enough contrast against its background. A geometric leaf, simple heart, initial or compact diamond can be clearer than a detailed scene with many isolated colors. Choose one main idea and build the chart around it. Each extra color change adds thread ends and finishing work on the reverse, so consider whether that detail contributes something visible in the completed keychain.
Use an original design or a pattern whose terms allow your intended use. A small size does not change the permissions attached to a chart, logo or character. If you are making keychains to sell or distributing a chart to other stitchers, check those permissions separately from your own personal crafting plans. A simple original motif can feel distinctive through its palette and finishing without reproducing someone else's recognisable design.
Test the silhouette before adding detail
Draw the motif in one color first and view it at approximately the finished physical size. If it is unclear, revise its outline before adding shading or decorative stitches. The grid designer can help with an original chart, while small cross stitch patterns discusses why stitch count alone does not describe complexity. Keep the chart's outer dimensions visible throughout the design process so an appealing revision does not quietly outgrow the chosen holder.
Calculate stitched size and finishing allowances
A motif 28 stitches wide on 14-count Aida measures 2 inches across when each cross covers one square. A height of 21 stitches measures 1.5 inches. These are stitched dimensions only. A sewn tag needs material for the border, seam allowances and any turn-under finish, while an insert needs the margins and shape required by its holder. Use the fabric calculator to check the motif dimensions, then calculate the construction separately.
Changing fabric count changes the physical size without changing the chart's stitch count. The same 28-stitch width on 16-count fabric measures 1.75 inches. That can help a motif fit a smaller holder, but the thread coverage and working comfort still need testing. Do not shrink a design by cutting away its required finishing margin. If the total construction is too large, revise the chart, fabric choice or holder before stitching the only final piece.
For a sewn rectangle, mark the finished edge, seam line and raw cut edge on a paper template. Include the attachment tab in the drawing and check how far it extends into the body. These lines represent different boundaries. Stitching that sits inside the raw cut edge can still be caught in the seam if it is too close to the finished edge. A template makes the relationship clear before you trim fabric.
Stitch with a tidy reverse and suitable coverage
Prepare enough fabric to hold comfortably while preserving the complete finishing allowance. Find the chart centre and fabric centre, then check the planned position against your paper template. Keep the grid aligned with the intended tag edges, especially if a rectangular border will surround the motif. The beginner cross stitch guide covers the basic counted process if this is your first miniature project.
Sample the intended thread coverage on spare matching fabric. A tiny object is handled closely, so uneven coverage or distorted fabric can be noticeable even when the design is uncomplicated. Keep tension controlled rather than pulling the crosses tight to make them look compact. Consistent top diagonals create a more even surface when the motif uses full crosses. Check the outline before filling a large block so a counting error remains easy to correct.
Avoid unnecessary bulky clusters of thread ends on the reverse. They can create lumps inside a holder or between the front and backing of a sewn tag. Secure the thread appropriately, keep carries deliberate and inspect the back before assembly. A backing conceals the reverse visually, but it does not remove its thickness. The goal is a stable, reasonably flat piece that fits the construction you planned.
Assemble a protected insert or sewn tag
For a holder, follow its instructions for preparing the insert and closing the case. Test the fit with spare materials of the same thickness before trimming the embroidery. Check that the motif is upright relative to the ring and centred within the visible opening. Inspect the closure after assembly rather than assuming that an audible click proves every edge is seated. If the case will not close correctly, reassess the layer thickness instead of increasing pressure on the finished stitching.
Prototype the fabric attachment first
For a sewn tag, make a spare prototype with the intended backing, tab and seam method. Turn and finish it completely, then compare the result with the planned dimensions. Small objects can lose usable space to bulky corners or seams. Check that the tab lies straight and that the ring has sufficient movement without dragging across the embroidered face. Adjust the prototype before repeating the construction with your finished motif.
Attach and close the layers using the tested method, keeping the stitching away from the seam path when your design calls for a separate decorative area. Inspect the edges for gaps, loose ends and uneven corners. Ensure that no pins or needles remain inside the object. If you use adhesive as part of a holder or backing system, follow that product's instructions and test its suitability for the materials; do not assume that any craft glue gives an equivalent result.
Inspect the connection and plan realistic use
Check the finished attachment gently and deliberately before adding it to a key ring. Inspect the tab, seam and hardware where they meet, then check again after a short period of normal handling. A miniature decorative project is not a safety device or a guarantee against losing keys. If the connection shifts, opens or shows wear, stop using it until the construction is repaired or replaced. Keeping the decoration separate from an essential identification tag can make maintenance easier.
Think about how the keychain will be carried. An exposed stitched surface may receive more rubbing in a crowded pocket than on an occasionally used bag. Raised knots, beads and long loose decorative stitches need different protection from a flat full-cross motif. Choose those details intentionally rather than adding them simply because the front has spare space. If you want raised embellishments, the beaded cross stitch guide helps you consider attachment and finishing before assembly.
Follow care instructions for the complete combination of fabric, thread, backing and hardware. A textile that can be washed does not establish that a closed holder or adhesive layer can be treated the same way. For a gift, include realistic care information based on the actual components used. Avoid describing the item as waterproof or machine washable unless its materials and construction genuinely support that claim.
Record the finished dimensions for a matching set
Keep the final chart, fabric count, thread list and assembly measurements together. Record the usable holder opening or the finished fabric-tag dimensions, not just the outside hardware size. Note any adjustments made after the prototype, including a longer tab, smaller border or different backing thickness. Those details let you repeat a successful keychain without rediscovering the same construction problems for every piece.
For a coordinated set, share the basic dimensions and finishing method while varying the original motifs or palettes. Check each new design against the same visible area rather than assuming it fits because its stitch count is similar. The project tracker can separate stitching, assembly and final inspection. A successful cross stitch keychain is a readable miniature with protected edges and a considered attachment. Careful planning gives this small project the attention its everyday handling deserves.
Choose an original chart from our free collection, or check your fabric measurements before you begin.
Free cross stitch patterns · Fabric calculator