
Projects & finishing · 10 MIN READ
Cross stitch quilts: plan panels, seams and washing
Plan embroidered quilt panels with measured motifs, clear seam boundaries, compatible materials and a tested approach to construction and care.
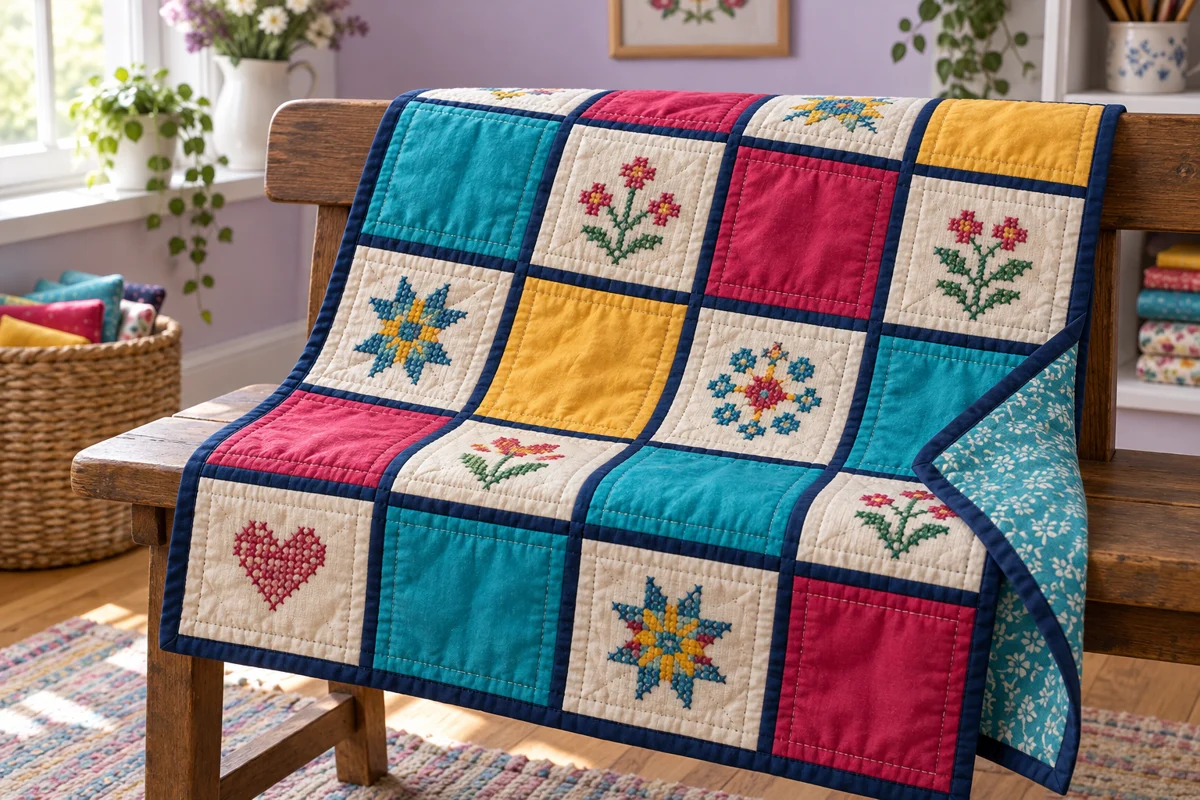
Choose the role of the embroidered panels
A cross stitch quilt combines counted needlework with the construction decisions of a layered textile. The embroidery may appear in a single central panel, several repeated blocks or a group of different motifs linked by plain fabric. Decide how you expect to use the finished object before charting the first panel. A decorative wall hanging and a quilt intended for regular washing place different demands on the materials, stitching and finishing. An attractive embroidery sample is a starting point, not proof that the assembled quilt will behave as intended.
Sketch the complete layout at a small scale. Mark the embroidered areas, plain blocks, joining strips and outer border so you can see where each motif belongs. You do not need to resolve every flower or letter immediately, but you do need to know whether the panels will share a size and orientation. A repeated block layout can simplify the planning, while a central panel gives more freedom to make one design the focal point. The sampler guide offers ways to organize different stitched motifs within a common visual structure.
Keep the pattern and construction plans connected
Record the stitch dimensions of each motif alongside its intended finished panel dimensions. These are different measurements, and both matter. A chart gives the occupied squares; the construction plan determines how much fabric remains visible around them after seams are sewn. Add a clear orientation mark to the layout, especially when motifs look similar upside down. If someone else will assemble the quilt, provide that person with the layout and panel measurements before embroidery begins so the two parts of the project agree.
Select materials with compatible care requirements
Choose the embroidery fabric, threads, plain fabrics, batting and backing as one intended combination. Their care requirements should be compatible with the way the finished quilt will be used. Do not infer the care of the complete object from one thread label or one cotton fabric description. DMC's needlework washing guidance explicitly asks stitchers to consider the properties of both thread and fabric. A quilt introduces additional materials and seams, so the assembly needs its own considered care plan and a representative sample.
Think about the differences between the panel fabrics before joining them. A firm counted fabric and a softer quilting cotton may handle and fold differently. Dense embroidery can also change the feel of a block compared with an unstitched piece of the same material. Place samples next to one another and examine their weight, flexibility and appearance. If you plan to stitch onto ordinary woven fabric using a removable guide, the waste canvas guide explains considerations for that separate technique; it does not establish that any chosen base fabric will suit every quilt.
Choose threads appropriate to the intended wear and care of the object. Decorative metallic effects, beads and raised details need particular thought when a quilt will be handled or washed. Their suitability depends on the specific material and use, so avoid treating them as interchangeable with ordinary flat crosses. Keep the thread labels and fabric information with your notes. When a material lacks reliable care information, resolve that uncertainty before committing many hours of stitching to panels that must later be joined and maintained together.
Separate stitched size, finished size and cut size
Begin with the dimensions of the stitched motif. Divide its stitch width and height by the number of stitches per inch you will actually make. A motif 56 stitches wide worked over one square on 14-count Aida occupies four inches in width. That measurement does not include the unstitched fabric around it. Use the size calculator to compare alternatives, and record the actual stitching method when the fabric's thread count differs from the number of crosses you make per inch.
Next decide the finished panel size, meaning the visible block dimensions after its joining seams are sewn. Leave a deliberate unstitched margin between the motif and the seam line. Then determine the cut size using the seam allowance specified by your selected construction plan. For example, a six-inch finished square with a quarter-inch seam allowance on each edge is cut as a six-and-a-half-inch square. This is a measurement example, not an instruction to use that allowance for every material or quilt design.
Draw the seam line before trimming
Mark the planned finished boundary on a paper layout or test block and compare it with the full motif, including backstitch, lettering and scattered accents. The seam allowance lies outside that boundary. It should not be confused with the decorative margin visible inside the finished block. Keep enough extra fabric for holding and stitching until the embroidery is complete and the panel is ready to be prepared. Cutting immediately to the final block size can leave too little working space for a hoop or frame and make later squaring more difficult.
Make a representative test block first
Prepare a sample that uses the same embroidery fabric, threads, plain fabric and intended seam construction as the finished quilt. Include a small stitched area with the kinds of color changes and thread ends the real motifs will contain. A blank fabric test cannot show how the embroidery behaves. If the construction requires backing or another support for a particular panel, include it in the sample according to that method rather than adding it after the test and assuming the results still apply.
Evaluate the sample at each stage you intend to use: embroidery preparation, joining, pressing and the relevant cleaning process. Follow the applicable material instructions rather than inventing a washing temperature from appearance alone. Measure and photograph the sample before and after the test. Look for color transfer, dimensional change, puckering, seam distortion and differences in how the joined fabrics lie. A sample cannot guarantee every outcome, but it gives practical evidence about the actual combination instead of relying entirely on assumptions about its separate parts.
If the sample changes, revise the plan before making all the panels. That may mean choosing another material, allowing a different panel arrangement or using a finish with different care expectations. Keep the revised decision explicit. Do not compensate for a distorted test block by forcing its corners into a square and treating the problem as solved. The goal is a combination that can be assembled predictably under the chosen instructions, with embroidery that remains suitably positioned and seams that do not need to disguise unresolved material behavior.
Plan a repeatable stitching workflow
Prepare the motifs with consistent center references and the intended unstitched margins. When several panels share a finished size, mark their orientation and identify each one in the layout notes. Work from the chart's references rather than measuring a guessed starting point from an unfinished fabric edge. That edge may not be square or may be trimmed later. The printed chart guide explains ways to keep symbols and progress marks readable, which becomes especially helpful when several related motifs use similar colors.
Keep the top leg direction of your crosses consistent within each panel, and consider using the same direction throughout a matching set. Differences can affect how the stitches reflect light. Record any thread substitutions immediately so later blocks do not depend on finding an unlabeled leftover strand. If color consistency matters across the quilt, organize enough of the intended materials before starting and check the actual skeins together. A repeated flower may look noticeably different when a substitution was chosen under another light without reference to the earlier panels.
Label completed panels without damaging them
Give each completed panel a temporary identification method suited to its material and keep that method away from the visible stitched area. A separate labeled bag or folder can be simpler than placing adhesive labels directly on the fabric. Include its chart, thread notes and orientation information. Do not attach pins through delicate stitches merely to keep a paper label nearby. The project bag guide offers ways to keep working materials organized while preventing loose tools and unidentified threads from spreading through a multi-panel project.
Prepare and arrange the blocks before joining
Finish the embroidery preparation specified for the materials before measuring and trimming the panels for assembly. If the plan includes cleaning and pressing at this stage, complete those steps using the appropriate care instructions. Then check the panel against the finished boundary and cut measurements you recorded. Counted fabric lines can help orient the motif, but they do not replace measuring the intended block. Keep the design centered according to your layout, including its irregular details, rather than relying only on the center of its largest color block.
Arrange all the panels and plain fabrics together before sewing long rows. Check color balance, motif orientation and the spacing created by the joining strips. Photograph the approved arrangement and label the pieces in a way that preserves their positions. This is a good moment to change an overly crowded border or move a visually heavy motif. Once several rows are joined, those decisions become more cumbersome. Look at the arrangement from a little distance as well as close up, because the whole quilt should read clearly beyond the individual stitches.
Join the blocks according to the selected construction pattern, using its specified allowances and sequence. Test the sewing and pressing method on the sample first if the embroidered panels require different handling from the plain fabric. Keep stitches and thick thread ends clear of the intended seam where the design permits. If dimensions do not match, identify whether the cause is cutting, allowance, preparation or the layout measurement. Pulling one block to fit another can hide the immediate mismatch while introducing distortion that becomes visible when the next row is attached.
Plan quilting around the stitched areas
The embroidered top still needs a plan for how it will be combined with batting and backing. Choose that process with the intended construction method and batting requirements in mind. Consider where quilting lines will run in relation to the motifs. Sewing across dense embroidery or raised details changes both the appearance and the handling of that area. Test the proposed approach on the representative sample instead of assuming that a line which looks good on paper will pass smoothly through every stitched section.
A layout with plain joining strips or surrounding blocks can provide places for quilting lines that visually support the embroidery. That possibility still needs to satisfy the chosen materials' requirements for holding the layers together. Avoid declaring that all quilting should remain outside embroidered areas without checking whether the resulting spacing is appropriate for the specific batting and construction. The decorative design and the functional layer attachment need to agree. Keep the embroidered pieces flat and appropriately supported while assembling the layers so they do not shift relative to the surrounding fabric.
Plan the outer edge treatment with the whole object in view. A binding or other finish should suit the selected method and leave the intended border visible. Confirm that the finished edge will not crowd a motif placed near a corner. Inspect seams and stitch ends before closing access to them, and address loose or missed areas at the appropriate stage. A neat edge cannot compensate for an unfinished internal step, so use the construction plan as a sequence of checks rather than rushing to the most visibly complete-looking finish.
Record care and assess the finished quilt
Inspect the assembled quilt in good light and compare it with the approved layout. Check motif orientation, unintended tucks, joined corners and the space around the embroidery. Measure the final dimensions and record them alongside the planned ones. Small differences may be acceptable for the intended object, but a recurring distortion deserves investigation before repeating the project. Use what the finished piece and sample show you to refine the next version rather than assuming that every adjustment belongs in the chart itself.
Write care instructions that reflect the full combination of materials and the process you tested. If the quilt is a gift, pass that information to its recipient along with any limits relevant to its intended use. Do not label the assembled object machine washable simply because one component permits machine washing. Likewise, do not claim that a decorative construction is suited to heavy everyday use without evidence. Clear practical expectations help preserve the work and are more useful than a broad promise unsupported by the particular fabrics, threads and finishing method.
Save the original charts, construction pattern reference, panel measurements, material labels and test notes together. Include photographs of the layout, sample and finished quilt. Those records make repairs or another matching panel easier to plan. A successful cross stitch quilt brings the counted design and the sewn structure into one coherent project: the motifs fit within their finished blocks, the materials work together, and the finishing and care choices are deliberate. Planning those relationships early protects the hours spent on embroidery and gives the assembled textile a clearer, more reliable purpose.
Choose an original chart from our free collection, or check your fabric measurements before you begin.
Free cross stitch patterns · Fabric calculator