
Getting started · 8 MIN READ
Needle minders for cross stitch: choose and use them carefully
Understand temporary magnetic needle parking, check the minder against your fabric and tools, and keep secure storage separate from active use.
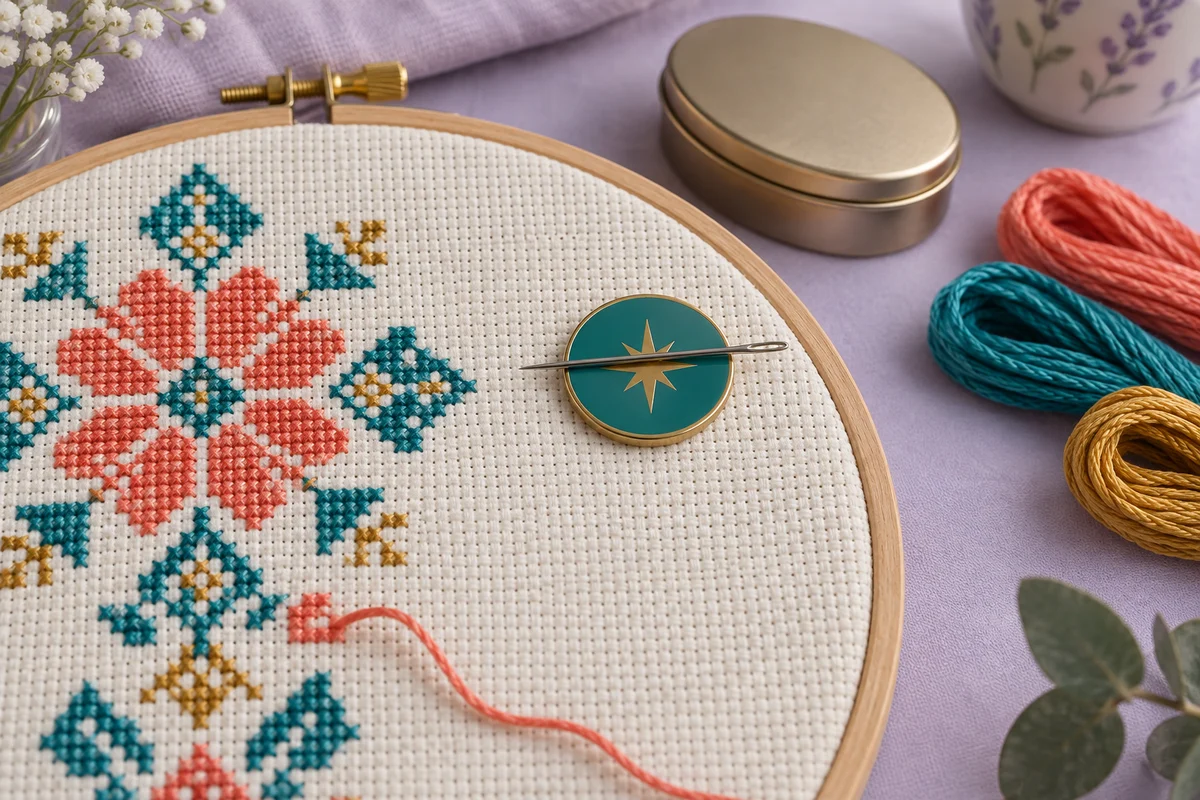
Understand what a needle minder does
Needle minders for cross stitch provide a convenient place to park a needle during an active stitching session. Many use a decorative magnetic front and a separate backing piece, with the fabric between them. The needle rests against the front rather than being pushed into the cloth whenever you pause. Read the instructions for your actual product, because the construction, materials and intended use can differ between accessories that share the same general name.
A needle minder is a working aid, not a guarantee that a needle cannot fall or become misplaced. You still need to know where the needle is and check it when moving the project. Treat temporary parking separately from secure storage. A closed needle case or other suitable container belongs in your put-away routine, especially when the embroidery will be transported. The project bag guide explains how needle storage fits into a complete packing system.
Decide which interruption you want to simplify
A short pause to read the chart is different from leaving the room or packing for a journey. Identify the task the minder will support before placing it on the work. Its convenient position during counting may be unsuitable when the fabric is rolled or placed inside a bag. A clear distinction between active use and storage helps you build a routine without expecting one small accessory to serve every purpose.
Inspect the product and read its instructions
Check the decorative front, backing and any connection between the magnet and its cover. Look for rough edges, loose components or damage that could affect handling or contact with the fabric. Follow the manufacturer's assembly and care guidance rather than trying to repair or modify an unfamiliar magnet arrangement while it is attached to the project. If a part is damaged or loose, stop using the accessory until the issue is resolved appropriately.
Read the product warnings as well as its decorative description. Magnetic accessories can have specific handling requirements, and their small parts need deliberate storage. For example, DMC's needle minder information describes its magnetic function and includes product warnings. Use that as a reason to read your own accessory's guidance, not as proof that every minder has identical dimensions, holding ability or requirements.
Choose an original or appropriately licensed decoration if you are making an accessory yourself. A familiar character or logo is not automatically available to reproduce on a craft product. This article focuses on choosing and using a completed minder, rather than instructions for building a magnetic object. Construction choices need their own suitable materials, attachment method and checks; an attractive front alone does not establish that those parts are secure.
Choose a position outside the active stitches
Place the minder where you can see and reach it without covering the area you are currently counting. A blank fabric margin can be useful, provided the accessory does not interfere with the hoop edge or the intended finishing allowance. Check the reverse as well as the front so the backing rests where you expect it. Avoid placing the accessory directly over raised embellishments or an area that is already bulky.
Consider the chart layout and your normal needle movement. A minder close to the active area may be convenient, but it should not obstruct thread travel or make it difficult to count the surrounding grid. Try the position during a short practice session and notice whether the thread catches around it. If it becomes an obstacle, move it rather than repeatedly working around an awkward arrangement. The beginner guide explains the counted references you need to keep visible.
Preserve access to the fabric holder
Leave clearance for the hoop, frame or adjustment controls. A position that works before repositioning can become trapped beneath an edge afterward. Before changing the holder's position, remove or relocate the accessory according to its instructions and secure the needle separately. Our hoop guide and scroll frame guide discuss how the visible working area changes as the project progresses.
Test with the actual needle and fabric
Use a matching spare fabric sample when the accessory or material combination is unfamiliar. Check how the front and backing sit together and whether their contact creates unwanted pressure or marks. Test the intended needle rather than assuming every metal needle behaves identically. Inspect the result under ordinary working conditions, including the orientation in which you normally hold the embroidery. A test on a flat table does not describe every movement of the project.
Park one needle deliberately and confirm that it is resting where you expect. Avoid loading the accessory with extra tools merely because a photograph shows a similar arrangement. Use it within the actual manufacturer's instructions. If the needle shifts or does not stay in place during the intended pause, reassess the product and setup rather than treating the decoration as proof of adequate holding ability.
Keep the test observational and modest. You do not need to swing or shake a mounted project to assess a temporary working aid, particularly with a loose sharp object present. Check the accessory before and after normal repositioning, with the needle secured separately when the project moves. Record a position that works for your materials so the routine can be repeated without guessing at every session.
Handle separation and movement deliberately
Follow the product's guidance when separating its magnetic parts. Keep the pieces controlled and avoid pulling on the fabric as though it were a handle for removing the accessory. Place detached components somewhere you can account for them. A backing hidden under the work can be easy to overlook when tidying the table. Check both pieces rather than looking only for the decorative front.
Secure the needle before relocating the minder. Moving the accessory with the needle still parked can change its orientation or make the needle less visible. Keep the thread clear too, especially if the needle remains threaded. A short pause to put the needle into suitable storage simplifies the movement and gives you a clear reference for where it is. Return to temporary parking only after the new placement has been checked.
Recheck after changing the working area
A hoop or frame adjustment changes the relationship between the fabric, accessory and active stitches. Inspect the new position before resuming. Confirm that the backing is not trapped beneath rolled fabric, the thread path remains clear and the accessory does not hide a chart landmark. A minder that was convenient at the beginning of a section may need a different position near its edge.
Troubleshoot slippage and obstruction
If the accessory moves on the fabric, check its components, intended material compatibility and position according to the instructions. Look for extra layers or raised stitching that prevent the parts from sitting as designed. Do not solve every problem by adding a stronger loose magnet or another improvised component. That changes the construction and handling requirements without establishing that the revised object is suitable for the project.
If thread catches around the decoration, inspect the shape and placement. A projecting edge can sit in the route you repeatedly use to pull the working thread. Moving the minder to a clearer margin may be more effective than altering your entire stitching motion. Choose an accessory that serves the work rather than accepting constant interference because you like its appearance.
If a needle becomes difficult to see, simplify the arrangement. Avoid placing several needles and tools together without a clear reason, and inspect the surface before reaching across it. A visually busy motif or decorative front can make a small metal needle less obvious. The purpose of the working aid is to reduce searching during a pause; if it makes the needle's position ambiguous, revise the setup or use another suitable storage method.
Follow magnetic-product warnings and keep parts contained
Follow the warnings for the actual accessory and any nearby equipment. Do not assume a universal distance or compatibility rule applies to all magnetic products or devices. If you use a medical device affected by magnets, follow its manufacturer guidance and obtain appropriate clarification before introducing a magnetic accessory. A craft article should not replace those product-specific instructions with a general assurance that a small magnet is harmless.
Keep small magnetic parts, needles and other craft tools away from children and pets. Store the components deliberately when the accessory is removed, and account for them during cleanup. Read the care instructions before exposing the minder to cleaning products or moisture. Removing it before treating the fabric can prevent the accessory from being included in a care process intended only for cloth and thread.
Inspect the working space after a session. Check the hoop or frame, the table and the storage location rather than assuming that everything is contained because the bag has been closed. If an item is missing, locate it before leaving the area accessible. Organization makes those checks easier, but it does not eliminate the need to perform them.
Build a clear end-of-session routine
Finish the current thread task, note your chart position and move the needle into suitable secure storage. Check the minder's front and backing, then decide whether it remains attached or is stored separately according to the product and project instructions. Pack the work without compressing raised details or catching fabric in a closure. The project tracker can hold the next-session note so you do not need to leave a needle as a physical reminder of your stopping point.
Review the routine after several sessions. Notice whether the accessory genuinely helps with short pauses and whether its placement stays clear as the stitching grows. Keep what works and revise what causes obstruction or uncertainty. Successful use of needle minders for cross stitch combines sensible placement, actual-material checks and deliberate storage. The decorative accessory can make an active session more convenient while a separate put-away routine keeps the whole project organized.
Choose an original chart from our free collection, or check your fabric measurements before you begin.
Free cross stitch patterns · Fabric calculator