
Techniques · 8 MIN READ
The cross stitch parking method explained
Keep several colors ready while working a dense chart in small sections.
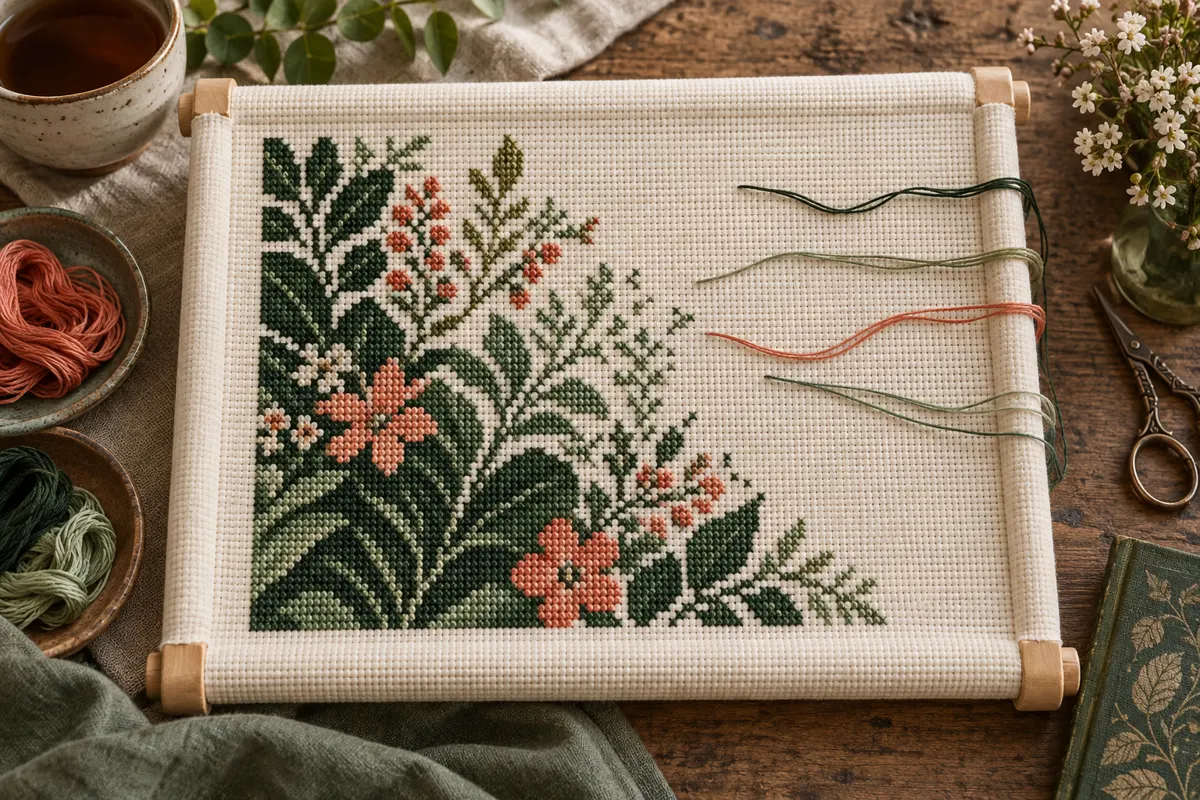
Understand what parking means
Parking means leaving a working thread ready at a planned future stitch position instead of finishing that thread immediately. You work another color, then return to the parked thread when you reach its recorded position. It can help organize a dense area containing several colors, but it also creates more loose working threads to identify and keep out of the way. The method is useful only when that organization remains understandable to you.
A parked thread is not a completed stitch. Its emergence point usually relates to the next cross you plan to make with that color, according to the system you have chosen. Record it separately from completed chart squares. Marking it as finished merely because the thread is present can cause a skipped stitch when you resume. The chart and your parking notes should agree about both color and location.
Scarlet Quince's illustrated parking tutorial demonstrates the idea using a small chart with several colors. It explains how parking can support orderly progress through an area rather than leaving unworked positions surrounded by completed stitches. Use its illustrations as an additional technique reference; the practical organization described below is a framework to test on your own small sample, not a promise that parking will always make a project faster.
Decide whether the project needs this method
A connected shape in one color may be straightforward to stitch without parking. A detailed full coverage chart with frequent color changes asks you to manage more starts, stops and positions. Parking can be one option in that situation, especially if you prefer completing a local area before moving on. Another option is to finish colors within manageable sections and anchor them again when needed.
Look at a representative chart block rather than the entire picture. Count the colors and note how many occur in small scattered groups. Ask whether you can identify those threads reliably under your actual work light. If the colors are hard to distinguish or the symbols are unclear, parking alone will not solve that problem. Improve the chart reading and labeling first.
Try a small comparison before adopting a method for a large project. Stitch one similar area with your usual approach and another with a simple parking plan. Observe counting errors, tangles, comfort and the surface appearance, not just elapsed time. The easy pattern guide explains chart structure, while the needle and thread guide helps you establish a workable basic setup.
Keep the first trial deliberately small
Start with a few distinct colors and a modest practice area. You do not need dozens of working needles to understand the principle. A limited trial makes it easier to see which thread belongs to which symbol and what happens when you change rows. Increase complexity only after you can resume the small sample accurately without relying on memory.
Choose a direction and a location rule
Decide how you will move through the practice area: for example, across a short row, then into the next row. Decide which corner begins each full cross and keep the upper diagonal consistent. Your parking point must be interpreted in relation to that movement. A thread emerging at a corner does not identify the whole square unless you know which starting corner your system uses.
Write a short rule in your project notes, such as the working direction and how you mark the next stitch for each color. Include any chart coordinate convention: whether columns start at one, how page numbers relate to the full chart and which repeated rows are only page overlaps. A consistent convention is more valuable than a complicated system that changes whenever the fabric is turned.
Check the fabric and chart grid before beginning. On Aida, count stitch blocks; on evenweave worked over two, count complete cross positions rather than confusing woven threads with chart squares. The fabric guide and gridding guide explain those relationships. Temporary guide lines can provide checkpoints, but verify them before using them as the foundation of a parking plan.
Keep thread identity attached to the chart symbol
Label each prepared color with its chart symbol and thread identification. Similar shades can be difficult to distinguish once several loose lengths lie across the fabric. A thread's current position is useful information, but it should not be the only way you know its color. If a parked strand is moved accidentally, its label or organizer should still let you identify it.
For blends, record the complete combination rather than only one component. A working pair of green and gold is not interchangeable with two strands of green. Keep prepared blends separate from plain colors and note the required working strand count. If the material has special handling requirements, keep those instructions with the thread as well.
You can use one working needle per color or another organization system appropriate to your method. The practical requirement is that you can select the intended thread without tangling or losing it. Store needles securely and account for them when you stop. Do not leave a collection of loose needles hidden among fabric folds or a pile of parked thread.
Make a simple position note
For the trial, a short list can record a symbol, its next chart square and whether the thread is currently parked or finished. Keep that list beside the chart key. The project tracker records total completed stitches, not individual thread positions, so it does not replace this location information. Use it for overall progress only if it helps your planning.
Work, park and return with a chart check
Work the chosen color according to the chart until the planned stopping point within the local area. Before parking, identify its next intended use and verify the count from a known reference. Bring the working thread to the starting position required by your system, leaving it available for later. Keep its loose length clear of the stitches you are about to make with another color.
When you return, identify the thread through its label and chart symbol, then confirm the parked square again. Do not assume that every strand lying nearby is exactly where it was left. Check both the horizontal and vertical relationship to completed stitches or verified grid boundaries. Complete the intended cross, update the chart marking and move or finish the thread according to the next planned use.
If a color has no suitable nearby future stitch, finishing it may be more sensible than creating a long carry. Parking is a method for managing work, not a requirement to keep every thread active indefinitely. Assess the reverse path, visible background and remaining working length. A fresh start can be cleaner and easier to organize than a worn strand carried through a distant section.
Manage the loose threads without changing their meaning
Arrange parked lengths away from the active needle path so you can see the fabric holes and move comfortably. Use an organizer or another suitable temporary arrangement that does not pull the parked stitch corner out of shape. Keep enough slack for the fabric to move without tensioning the thread unexpectedly. The arrangement should preserve both the color identity and the planned location.
Separate tangles before they become part of the next stitch. Pulling a working thread through a bundle of other strands can move their parking points or damage the floss. If the organization becomes confusing, stop and reduce the number of active colors. It is better to finish a few threads intentionally than to continue with a system whose labels or positions are no longer dependable.
Avoid stretching the fabric merely to create more storage space for loose thread. A hoop or frame should hold the weave appropriately for stitching, not distort it to accommodate an organizer. Check tension around the active area periodically. If the surface begins to pucker, inspect both the pull of completed stitches and any parked threads that have become tight during handling.
Watch carries and section boundaries
Every move to a future position creates a thread path on the reverse. On a dense area, later stitching may help keep some paths close to the fabric, but that does not make every carry appropriate. Across open background, a contrasting thread can show through or catch. Assess the actual distance and visibility rather than adopting one maximum travel rule for all materials and designs.
Working in small blocks can make chart reading manageable, but very rigid stopping habits may also change tension or thread paths at the same boundaries repeatedly. Inspect the surface as you progress and adjust the working plan if clear lines or unevenness develop. Consistent tension and sensible transitions matter more than completing a particular grid block at any cost.
Thread use can differ from an estimate based only on the front crosses because parking adds travel paths. The floss estimation guide explains measuring a representative sample with your own method. Use that sample when planning supplies for a detailed design rather than assuming that a neat-looking chart requires the same thread per cross as a connected single-color shape.
Treat page joins as chart information
Check whether adjacent printed pages overlap any rows or columns. A repeated section belongs to one location on the fabric, not a second set of stitches. Keep the full-chart coordinates or page join notes visible when parking near a boundary. If the next color position falls on another page, confirm its relationship before leaving the thread there.
Resume safely and correct a misplaced thread
At the end of a session, record the active area, completed row or section and every parked position that may be unclear later. Store the work so threads and needles cannot shift into a tangled mass. A quick reference photograph can help show the arrangement, but labels and chart notes remain the stronger record of what each thread means.
If a parked thread is in the wrong place, correct the position before using it to make another cross. Trace the path gently, protect the fabric and confirm whether any completed stitch must be removed. Do not stitch at the wrong point merely to avoid moving the parked strand. A small organizational correction can prevent a much larger counting error in subsequent rows.
Use your trial notes to decide whether parking suits the next section. You may prefer it for a shaded background and a simpler approach for an isolated motif. The pattern design guide explains why color structure affects workload, and the time calculator helps plan sessions from your observed pace. The useful method is the one you can maintain accurately, comfortably and with clear records of the remaining work.
Choose an original chart from our free collection, or check your fabric measurements before you begin.
Free cross stitch patterns · Fabric calculator