
Projects · 8 MIN READ
Cross stitch purses: design a panel for a useful accessory
Plan a stitched panel for a small purse, reserve seam and closure space, and test lining, attachment and care before assembly.
Choose the accessory before drawing its panel
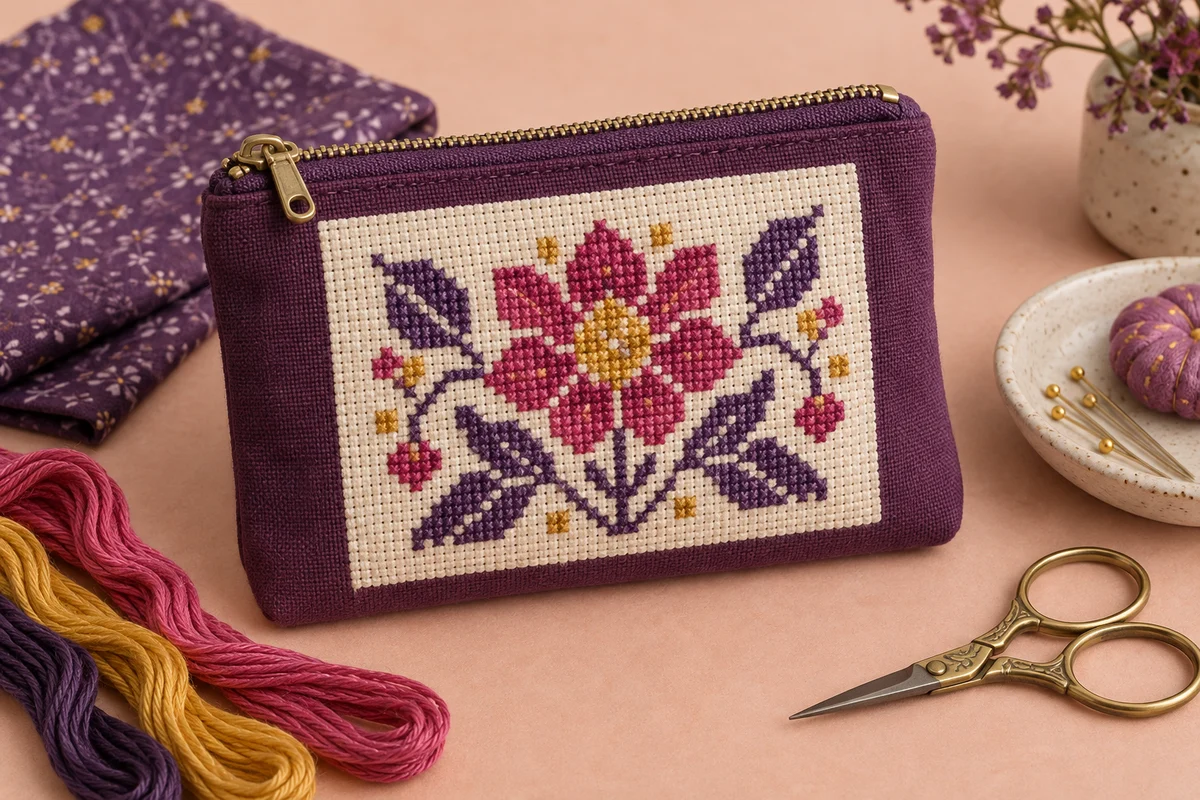
A cross stitch purse can be a small coin pouch, a compact fabric wallet or another lined accessory. Decide what yours will hold before choosing the embroidery. A narrow pouch for coins has different proportions from a purse that needs space for cards or a small phone. The contents influence the opening, lining and construction, while the decorative panel must fit the visible front without interfering with those features. Start with a sewing pattern or blank accessory whose assembly you understand.
Treat the embroidered front as part of that construction rather than a separate picture added at the last moment. A motif can appear well centred on flat fabric but move toward an edge when the purse is shaped or filled. Draw a full-size paper template of the visible front and place the proposed stitched area inside it. Include the closure, seams and any shaped corners. This gives the chart a practical boundary before you invest time in stitching.
Distinguish decoration from structural layers
The embroidery provides the visual detail; the purse fabric, lining, seams and closure provide its structure. Counted fabric alone does not establish how well an accessory will carry its contents. Follow the construction requirements of your chosen pattern and check how the stitched panel joins those layers. The cross stitch bag guide discusses decorative panels on larger bags, but a small purse needs particular attention to restricted space and access around its opening.
Measure the visible front and the opening
Identify the finished dimensions rather than measuring only the raw pattern piece. Seam allowances disappear into the construction, and curved corners can reduce the usable decorative area. A zipper or frame may occupy space near the top, while a gusset changes how the front behaves when the purse is filled. Mark each feature on your template. Keep the embroidery within the area that will remain visible after assembly, with enough surrounding fabric for the finish you intend.
Measure the usable opening as well as the purse body. An object can fit inside a compartment yet be difficult to pass through a narrow closure. Test the intended contents with a prototype before constructing the final accessory. This is particularly helpful for rigid items such as cards, which cannot simply bend to follow an awkward opening. If the purse is a gift, choose a realistic intended use rather than promising that an attractive small pouch holds every kind of item.
Check the orientation of the motif relative to the closure. A design that seems upright on a flat pattern piece may be rotated when the piece is folded or assembled. Label the top, bottom and right side on your paper template and construction notes. Keep those references available when attaching the finished embroidery. An early orientation check is much easier than correcting a securely sewn panel after the lining and closure are complete.
Design a readable small motif
Choose one clear main idea for the front: a simple flower, geometric shape, initial or compact botanical arrangement. Small accessories are often seen briefly or partly covered by a hand, so a recognisable silhouette helps the embroidery retain its character. Avoid filling the available space with several competing details. A quiet border around a clear motif can be more effective than a dense scene that reaches every seam.
Use an original drawing or a chart whose terms allow your intended use. A purchased chart and a freely downloadable image can have different permissions, and neither should be assumed to permit unrestricted commercial use or redistribution. Keep relevant permission information with your project notes. If you want a personal result, a simple original shape combined with a distinctive palette gives you useful design freedom without depending on a familiar logo or character.
Test the motif at its physical size
View the chart at approximately the size it will occupy on the purse. An enlarged screen preview can make tiny details look clearer than they will on the finished object. Check the outer silhouette first, then any lettering or interior marks. The grid designer can help you plan an original motif, while small cross stitch patterns explains why a compact chart can still be complicated to stitch.
Calculate fabric and seam allowances separately
A design 56 stitches wide on 14-count Aida measures 4 inches across when one cross occupies one square. If its height is 42 stitches, the stitched area is 3 inches high. Those figures do not describe the finished panel or the cut fabric. Add the blank border and edge treatment needed to attach the embroidery. Use the fabric calculator to check the chart size, then follow the sewing pattern for the purse's construction dimensions.
Keep the stitched boundary, finished panel edge, seam line and raw cut edge distinct on your template. They perform different jobs. A generous raw fabric piece can still leave too little visible border if the seam takes more space than expected. Similarly, an embroidery panel that fits within the pattern piece may overlap the zipper attachment area. Plan those relationships before trimming the counted fabric or altering the pattern.
If you change fabric count, recalculate the motif's physical size and test the thread coverage. A finer grid can make the same chart smaller, but it may also change the texture and your working comfort. Do not use a fabric substitution to solve an assembly problem without checking the resulting panel dimensions. Keep enough spare material for a small construction sample, especially if the counted fabric differs substantially in thickness from the purse fabric.
Stitch and inspect the decorative front
Find the chart centre and the fabric centre, then verify that the motif will sit within the finishing allowances you planned. Keep the grid aligned with the intended panel edges. A visibly tilted grid can make a rectangular patch look uneven even when the motif itself is correctly counted. Prepare the materials using the beginner cross stitch guide if you are still learning the basic counted process.
Work with controlled tension so the panel lies naturally. Pulling every cross tight can distort the fabric and make later attachment more difficult. Check important outlines before filling adjacent areas, and compare the actual thread palette against the purse fabric under normal lighting. A color that looks vivid on a white digital background may be less distinct next to a strong purple or blue outer fabric.
Inspect the reverse before assembly. Keep thread ends secure and avoid unnecessary bulky clusters beneath the panel. A lining hides the reverse visually, but it does not remove lumps or protect every loose carry from catching during construction. Finish any intended cleaning or pressing according to the actual material instructions before attaching the panel. Do not assume that the completed accessory will tolerate the same treatment as a loose piece of counted fabric.
Prototype the lining and closure
Make a spare version using the intended layer thicknesses and closure method. A prototype helps you understand seam bulk, turning access and the final usable space. Include the decorative panel's thickness, even if the trial panel contains only a small stitched sample. A test made from thin cotton alone may not reveal the behaviour of the completed front. Check the corners and opening after the prototype is fully assembled rather than judging the flat pieces separately.
Keep the lining clear of the attachment path
Plan when the embroidered panel is attached. Working on the outer front before assembling the purse often gives clearer access than sewing onto a finished lined object. Follow your chosen pattern's sequence and check that the attachment does not accidentally catch a pocket, lining or opposite side. For a ready-made purse, inspect the available access before committing to a panel. A decorative modification should not prevent the lining or closure from functioning.
Test the closure with the intended contents in place. Check whether a zipper moves freely, the opening provides enough clearance and the lining stays away from moving parts. Do not force a closure to compensate for an overfilled or poorly proportioned body. If the prototype needs adjustment, change the pattern or intended use before repeating the construction with your finished embroidery. Keep a record of the revised dimensions and sequence.
Assemble and check the finished accessory
Lay out the front, backing, lining and closure components before sewing. Confirm the motif orientation and the right sides of the fabric. Use the measured placement references rather than relying on how the pieces happen to sit on the table. Secure the panel with a method you have tested on matching materials, keeping the surrounding fabric smooth. Inspect the reverse attachment and visible edges before moving to the next construction stage.
After assembly, remove temporary tools and inspect every seam, corner and opening. Put the intended contents inside and hold the purse normally. Check whether the embroidery folds sharply, becomes hidden or rubs against the closure. The decorative front should support the finished accessory's appearance without obstructing its use. A small stitched object such as a keychain requires similar attention to everyday handling, although its attachment is a different construction.
Consider raised embellishments carefully. Beads, knots and other projecting details can rub against nearby objects inside a larger bag. A relatively flat full-cross design may suit regular handling more easily, but the choice depends on the intended use. If you include raised details, plan how they will be protected and inspected. The beaded cross stitch guide explains the questions to consider before adding texture to a finished textile object.
Record care and construction for later maintenance
Care depends on the combined materials: counted fabric, thread, outer fabric, lining, closure and any interfacing or trim. Follow their actual instructions and test spare samples where appropriate. A washable outer fabric does not prove that the entire assembled purse is machine washable. For a gift, provide practical care information based on the components used. Avoid unsupported claims about water resistance or durability simply because the finished accessory looks substantial.
Keep the chart, thread references, final measurements and construction notes together. Record substitutions and any adjustments discovered through the prototype. A photograph of the completed front and inside opening can help with future repairs or a matching accessory. The project tracker can separate embroidery, panel attachment, assembly and final inspection. A successful cross stitch purse combines a readable motif with suitable proportions and tested construction, so its decoration and everyday function work together.
Choose an original chart from our free collection, or check your fabric measurements before you begin.
Free cross stitch patterns · Fabric calculator