
Patterns · 8 MIN READ
Graph paper for cross stitch: draft and check an original chart
Draft an original counted chart on square graph paper, define symbols, check coordinates and calculate the fabric dimensions separately.
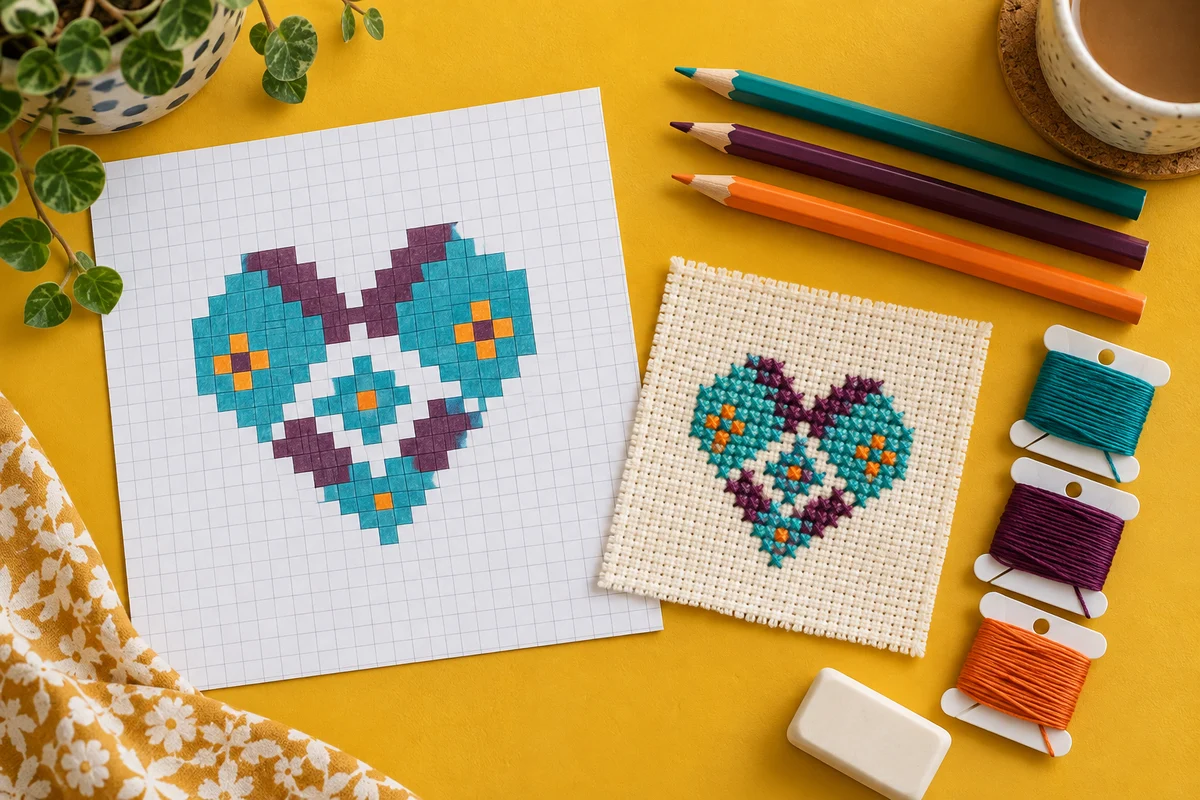
Define what one square represents
Graph paper for cross stitch gives you a simple place to plan a counted design. For a chart made entirely from full crosses, each filled square can represent one complete cross. Blank squares represent spaces without that stitch. This clear convention lets you draw a silhouette, count its dimensions and compare it with the fabric grid. Establish the convention before adding symbols or colors so the chart remains understandable when you return to it later.
Paper is a drafting surface, not a measurement of the finished embroidery. A large printed square makes drawing easier but does not require a large physical stitch. The fabric count and stitching convention determine the finished dimensions. Keep those two scales separate in your notes. You can use the graph paper tool to prepare a working grid and the fabric calculator to calculate the actual stitched size after the chart dimensions are known.
Distinguish full crosses from other marks
Backstitch is usually represented with lines, while knots or other details may use special symbols and specified positions. They do not automatically behave like a filled full-cross square. If your original design includes different stitch types, define each one clearly in a key. A colored mark without an explanation can become ambiguous later. Begin with full crosses if you want a straightforward first chart, then add other techniques only when you can describe their placement and materials accurately.
Choose a readable drafting grid
Use square cells that are comfortable to mark and count. Very small cells can make a large motif fit on one sheet, but they may also make the symbols difficult to distinguish. Larger cells help you draw and correct individual squares while requiring more paper for the same stitch count. Choose based on the detail of the design and how you will use the chart, rather than assuming the smallest printable grid is always more efficient.
Check that the cells are square if you are judging the silhouette directly from the paper. A distorted printout can make a heart appear stretched or a circle look oval even though the counted coordinates are unchanged. Printer scaling and page layout can affect the displayed grid. Keep the stitch counts as the authoritative dimensions, and use a full-size stitched sample when you need to confirm the physical appearance on your chosen fabric.
Decide whether to use heavier reference lines at regular intervals. They can make counting a larger chart easier, provided the interval is clear and consistent. Do not confuse a reference block with a single stitch. If you number rows or columns, keep the numbering outside the actual design cells or mark it unmistakably as a guide. The chart should separate the information used for navigation from the marks that represent embroidery.
Sketch the silhouette before developing the palette
Begin with a clear outline or filled shape in one color. A simple leaf, heart, geometric flower or diamond provides a manageable starting point. Check whether the shape reads at a small scale before adding interior detail. You do not have to reproduce every curve of a smooth drawing. The square grid introduces steps, and a deliberate geometric interpretation can be more readable than a crowded approximation of a photograph.
Choose an original motif or use source material whose permissions allow your intended adaptation. Finding an illustration online does not establish permission to turn it into a chart or distribute that chart. Keep relevant source information with your project. If you plan to share a pattern, make the origin of its components clear. Drawing your own compact shapes gives you useful freedom to change the layout and palette without depending on a recognizable commercial design.
Establish the centre and symmetry
Mark the chart's centre line or centre cell according to its dimensions. Odd widths have a central column; even widths have a centre between columns. Decide which arrangement suits the motif before mirroring the sides. Compare corresponding rows rather than checking only the widest section. The heart pattern guide explains why the top curves, central dip and lower point need separate attention when building a recognisable shape on a square grid.
Build a key that survives color changes
Assign each thread choice a clear symbol or other readable identifier. Color alone can be difficult to interpret in a photocopy, under different lighting or when two shades are similar. If you use both color and symbols, keep their relationship consistent throughout the chart. Record the actual thread reference separately from the pencil color, because a turquoise pencil does not establish an exact embroidery-thread match.
Make the symbols distinct at the size you intend to use. Two tiny marks that look different in a large drawing may become nearly identical on a reduced printout. Test a small section containing every symbol and read it without referring to the color. If you cannot identify a mark reliably, change it before filling the full chart. A useful key reduces uncertainty during stitching rather than adding another memory task.
Include strand counts and any special-stitch instructions alongside the thread references. If different areas use different coverage, label them clearly rather than assuming the stitcher will infer it from the image. Keep the key with every chart section that needs it. The grid designer offers another way to develop an original motif, but a digital chart still needs the same clear relationship between visible marks and the materials used.
Plan lettering and repeated motifs completely
Chart the whole word, name or date before placing it inside the design. Include the spaces and punctuation in the width calculation. A letter sample does not tell you the total dimensions of a complete line. Compare the lettering with the surrounding motif at normal viewing size. The name maker and alphabet guide help you plan a full text block and check how its visible shapes balance.
For repeated motifs, count the width of each repeat and the blank columns between them. Four motifs each 7 stitches wide with 3 blank columns between neighboring motifs occupy 37 columns: 28 for the motifs and 9 for the three gaps. Add any outer spacing separately. This calculation makes it easier to place a band within a border without discovering an awkward partial repeat after stitching most of the row.
Check corners and joins when a border runs around the whole composition. A repeat that fits one edge may not fit another edge of a different length. Draw the complete border or define its corner treatment before starting. The sampler guide discusses how individual bands and blank spaces combine into one overall chart. Keep the complete layout dimensions visible rather than measuring each attractive component in isolation.
Verify coordinates and record revisions
Choose a consistent way to describe row and column positions. You might count from the upper-left chart cell or use the centre as a reference, but record the method clearly. Check the outermost stitch in each direction and compare it with the planned dimensions. Review symmetrical areas, repeated elements and the spacing around lettering. These checks can reveal a single shifted row that is difficult to notice while concentrating on the drawing itself.
Keep versions rather than erasing every decision
Save a copy or photograph of useful drafts before making substantial changes to your original design. Label the versions in your notes with what changed, such as a narrower border or a deeper central dip. This allows a direct comparison after a break and prevents you from losing an earlier solution that worked well. When the chart is ready for stitching, identify one final version so you do not accidentally mix coordinates from several drafts.
Ask whether every visible mark has an unambiguous meaning. A correction that leaves a faint symbol beneath a new one can create uncertainty on paper. Redraw a clean final chart if the draft has become crowded with erasures and notes. Separate explanatory annotations from stitch cells and keep the key readable. The purpose of revision is not merely to improve the picture; it is to create instructions that can be followed consistently.
Calculate fabric dimensions independently of paper scale
Count the full chart width and height, including borders and any spaced components within the design. A chart 60 stitches wide and 45 stitches high measures approximately 4.29 by 3.21 inches on 14-count Aida when each cross occupies one square. Printing that chart with larger cells does not alter those stitched dimensions. Use the fabric calculator to check the conversion, then add the margins required for the intended finish.
If you change fabric type or stitching convention, recalculate. An evenweave worked over two threads needs the effective stitch count to be understood correctly. The fabric guide explains why the number of fabric threads and the number of completed crosses are not always the same. Keep that information beside the final chart so a future stitcher does not have to guess how the stated dimensions were obtained.
Draw a separate paper template at the intended physical size if you want to test placement in a card, frame or textile object. That template serves a different purpose from the enlarged working chart. Mark the visible area and finishing allowances, then check whether the composition fits comfortably. Do not cut fabric using the chart's printed size unless you have deliberately established and verified that physical scale for the construction task.
Stitch a sample and preserve the finished chart
Test a small representative area with the intended fabric and thread. Choose a section that reveals the silhouette, color contrast or unfamiliar detail rather than only a plain filled rectangle. Follow the beginner cross stitch guide for the counted basics if needed. A stitched sample helps you evaluate coverage and physical appearance, while the paper chart remains the reference for coordinates and stitch types.
Record any change discovered through sampling and update the final chart and key together. Save its dimensions, materials, stitching convention and version information alongside the drawing. If you share your original chart, provide clear instructions and distinguish stitched size from required fabric size. Graph paper for cross stitch is useful because it makes design choices visible and countable. A good chart turns those choices into a readable plan that can be checked before, during and after stitching.
Choose an original chart from our free collection, or check your fabric measurements before you begin.
Free cross stitch patterns · Fabric calculator