
Patterns · 8 MIN READ
Halloween cross stitch patterns: original pumpkins and autumn motifs
Plan original pumpkin, moon and house motifs with readable seasonal colors, measured spacing and enough time for finishing.
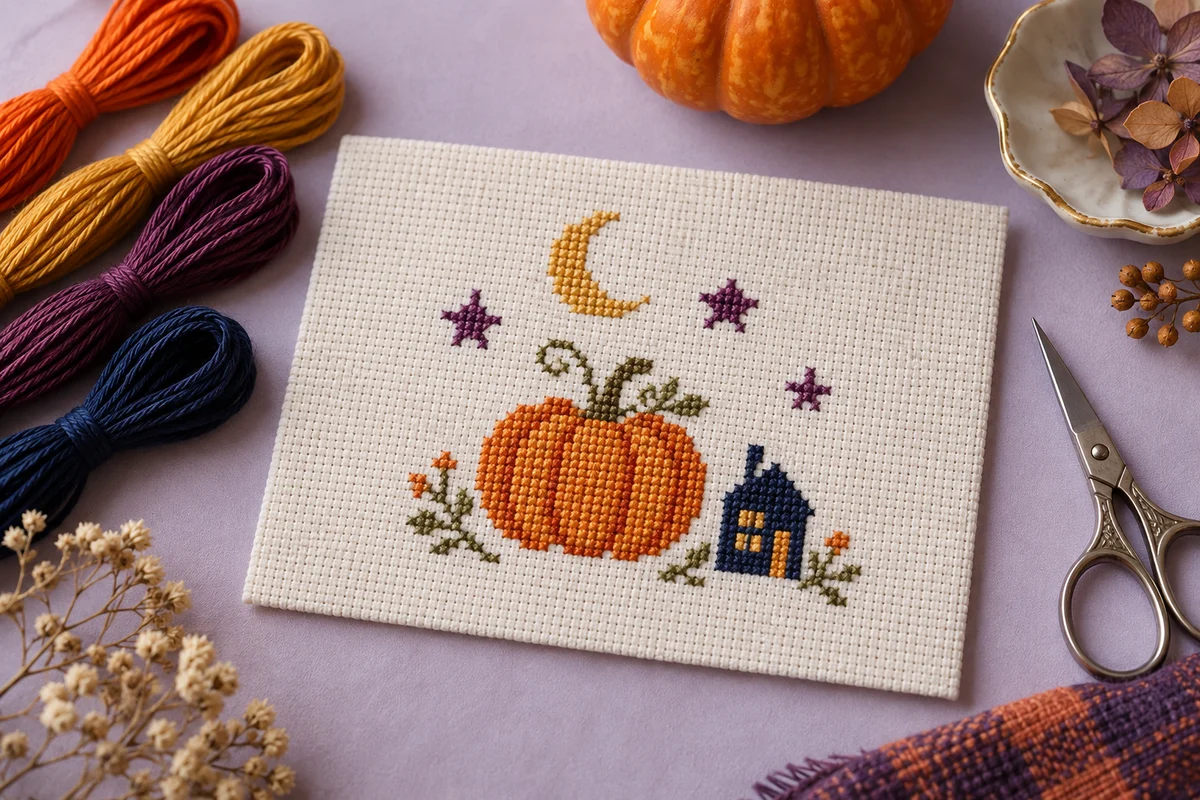
Choose one seasonal object and a clear visual mood
Halloween cross stitch patterns can be playful, quiet, or atmospheric without using a recognizable character. Begin with an original arrangement of ordinary seasonal shapes: a pumpkin, a little house, a crescent moon, or a few stars. Choose one main subject and decide how the finished piece should feel. This decision helps you control the palette and the amount of detail instead of collecting unrelated motifs until the chart is crowded.
Think about the final object before drawing. A small card needs a compact focal shape, while a horizontal shelf decoration can support a row of pumpkins. A framed square may suit a moon above a house. Each format has different space for the subject and its surrounding blank area. Sketch the outline of the intended display first, then place the embroidery inside it so the chart and finish develop together.
Keep the first design manageable if you want a seasonal finish by a specific date. A modest motif with a few connected colors can still have character. Dense full coverage, many scattered stars, or elaborate lettering add work that a small photograph may hide. Choose the complexity from the time and attention you want to spend, not simply from how dramatic a large chart looks in a preview.
Make a short design brief
Write a brief such as: one pumpkin beneath a small moon, mostly full crosses, four colors, framed as a square. That gives every added detail a test. If a second house, a long message, or several new shades do not serve the brief, save them for another chart. A focused design is easier to plan, stitch, and finish than a miniature scene trying to contain every seasonal idea at once.
Build original silhouettes before adding shading
Draw the pumpkin as an outline in a single color. Make its width, height, and stem readable before dividing it into shaded sections. A broad lower shape and a short angled stem can communicate the subject at small scale. If adding a face, test whether its eyes and mouth remain distinct from the pumpkin edge. Too many tiny gaps can make a small motif harder to recognize.
For a house, establish a clear roof and walls before adding windows or decorative details. Decide whether the building is symmetrical or intentionally uneven. A stepped roof can suit the grid, while a slight lean can create a playful mood if it is deliberate. Review the silhouette without its colors. If it looks like an accidental counting error, refine the outline before relying on shading to explain it.
For moons and stars, simplify the shape to fit the available squares. A small crescent does not need the same curvature as a large drawing. Use graph paper to compare several versions at the same stitch dimensions. View them at the intended physical size, because a shape that looks clear when enlarged on a screen may become indistinct in the finished embroidery.
Use a seasonal palette that remains readable
Choose colors by role. Orange can define a pumpkin, a deeper rust can suggest its shadow, a warm yellow can supply a window or star, and a dark blue or purple can anchor the design. You do not need all of these in every chart. A small motif may work with three strong colors if each has a clear purpose and remains distinct from the fabric background.
Compare actual thread lengths on the selected cloth where possible. Orange on cream fabric behaves differently from orange on a purple or dark blue background. Pale moon and star shades can disappear on a light cloth unless their shapes or edges remain clear. The unstitched material is part of the palette, so choose it alongside the threads rather than as an unrelated final purchase.
Use the image palette tool for inspiration from a photograph you own or are permitted to use. Treat its screen colors as planning references, not exact matches to physical thread. Keep a written key with each selected shade and symbol. If substituting a color during stitching, record the replacement so a second pumpkin or companion piece does not accidentally use a different shade.
Test the darkest area on the fabric
A deep shade can make a roof or outline clear, but it may also dominate a small composition. Stitch a short sample when you are unsure about contrast or coverage. Compare it with the orange and yellow accents from normal viewing distance. If the dark mass draws all the attention, reduce its area or adjust the composition rather than automatically adding more bright details to compete with it.
Calculate the size before cutting or buying a finish
Find the chart's stitch width and height and calculate the embroidery's physical dimensions for the intended effective count. A design 56 stitches wide at 14 stitches per inch measures four inches across. That is the stitched width, not the fabric cut or the frame's outer measurement. Include working and finishing margins separately and check the actual display opening before deciding that the chart fits.
Use the fabric calculator to plan the cloth and the fabric count converter to compare scales. If changing the count, review tiny faces, windows, and lettering at the new physical size. The same chart remains the same number of squares, but its small details become larger or smaller. Raised embellishments also need another fit check if the stitch scale changes.
Make a paper mock-up of the stitched area and place it in the intended card, hoop, or frame. Add the blank space you want around the motif. A pumpkin that nearly touches a circular hoop on both sides may technically fit while looking squeezed. Adjust the chart or choose another finish before cutting the fabric, when the change is still straightforward.
Space stars, borders, and lettering deliberately
Use small accents to guide the eye rather than fill every blank square. Three stars can establish a gentle rhythm around a house; a dozen scattered dots may create more thread handling without improving the composition. Remove the accents from a preview, then restore the ones that give the design balance. A clear patch of empty fabric can make the main subject feel more intentional.
If creating a repeating pumpkin border, draw several repeats on paper before stitching. The gap after one motif must work with the gap before the next. Check corners separately if the border surrounds a square. A straight repeat rarely turns neatly without an adjustment. A small corner leaf, a plain gap, or a separate corner motif may produce a cleaner transition than squeezing another pumpkin into the remaining space.
For an original short message, chart the actual characters and spaces before placing them around the image. Use the name and alphabet maker to explore lettering size and the alphabet guide for spacing considerations. Keep words readable and leave room between letters and nearby stars so decorative marks do not look like punctuation or part of the text.
Preserve the center of attention
View the complete design as a small thumbnail. Check what you notice first and whether the intended subject remains clear. A heavy border or long phrase can overpower a modest pumpkin even when each element is attractive on its own. Adjust the proportions until the image, words, and blank areas support one another rather than requiring the viewer to untangle several equally strong focal points.
Stitch a confirmed section and check progress often
Establish the chart and fabric centers or another measured starting reference. Count horizontally and vertically before beginning away from the center. Verify the first small connected area against the chart before building the surrounding sections from it. A correctly placed stem or roof corner can serve as a useful reference, while an uncertain first row can spread an error into the whole composition.
Keep the upper diagonals of full crosses consistent and the thread tension controlled. The beginner cross stitch guide explains the basic sequence if you need a refresher. Check the shape after a few rows, especially around small facial gaps or a narrow crescent. It is easier to correct a missing square while the surrounding section is still accessible.
Mark completed areas on a permitted working chart and record the current color when pausing. The project progress tracker can help organize totals and sessions, while chart markings locate the exact stitches completed. Avoid relying only on memory for scattered stars or repeated border elements. Those details can look similar enough that it is easy to skip one or stitch a position twice.
Plan finishing time before the seasonal deadline
Estimate the remaining embroidery from your own pace on comparable work. A pattern with many isolated accents can require more starts, stops, and checks than a broad block of color. Use the stitching time calculator to explore a realistic schedule, then add time for preparation, corrections, and construction of the final object. Do not give the last available evening every finishing task.
Check the necessary materials early. A card needs a suitable opening and attachment method, an ornament needs backing and a hanging arrangement, and a framed piece needs support and measured placement. A complete embroidery can still miss its intended deadline if its finish has not been planned. Gather the components before the final stitching session so the object can move smoothly into its last stage.
Follow the care directions for the actual fabric, thread, and added details if cleaning or pressing is required. Do not assume every seasonal piece can be treated identically. The framing guide offers considerations for alignment and support when a flat display suits your design. Keep raised details clear of glazing or other surfaces that could press against them.
Keep the chart and finished decoration ready for another season
Inspect the embroidery against the chart before backing or mounting. Look for missing stars, incomplete border sections, and accidental changes in lettering. Check the visual center inside the chosen finish and confirm the hanging position if the object needs one. A small decorative piece is often viewed closely, so neat edges and a secure reverse contribute as much as the main stitched motif.
Save the final chart version with the palette, fabric count, strand count, and any changes made during stitching. Record how the piece is finished and any care requirements that will matter later. Store the decoration in a way that protects its shape and surface rather than leaving it crushed beneath unrelated items. Keep the project information accessible if you plan a matching piece next year.
Original seasonal design can develop through ordinary shapes, thoughtful color, and measured spacing. A familiar pumpkin or moon gives you a starting point, while your own silhouette and arrangement make the chart yours. Choose a focused object, leave time to finish it, and let a few well-placed details carry the mood. The result can be cheerful or atmospheric without requiring a crowded scene or borrowed commercial character.
Choose an original chart from our free collection, or check your fabric measurements before you begin.
Free cross stitch patterns · Fabric calculator