
Patterns · 9 MIN READ
Cross stitch bookmarks and simple borders
Turn a repeating motif into a small project with a practical finish.
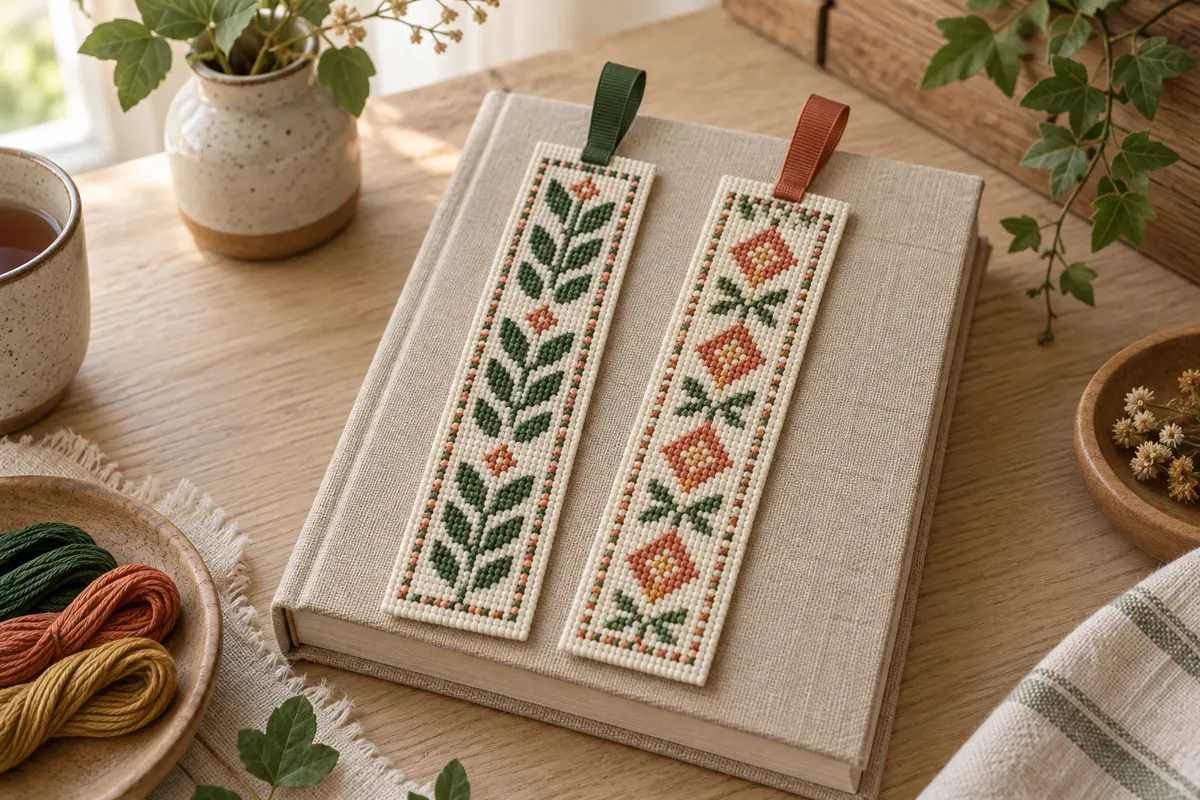
Plan a narrow design and its finished edges
A cross stitch bookmark is a small project with a specific job: it should fit comfortably between pages and survive ordinary handling. Start with the finished width, length and thickness, then choose the stitch layout and construction. A motif that fits a rectangular chart is not automatically ready to become a bookmark. The edge treatment, backing and any decoration need space and can change the usable shape.
Decide whether you want a repeated geometric border, a short vertical arrangement of motifs or simple lettering. A narrow layout works best when its details remain readable without requiring many isolated shades. Choose a manageable design if this is your first finish. The easy pattern guide explains how connected color areas and clear chart symbols can keep a small project comfortable to count.
Avoid adding bulky beads, thick knots or a hard decoration to the part that will sit between pages unless that is an intentional choice for the object. A flat stitched piece with a secure edge is often more practical than an elaborate miniature picture. Test the thickness with a scrap of the intended fabric and backing before spending time on the final embroidery.
Calculate the stitched rectangle separately from the object
Fabric count converts chart squares into physical dimensions. A twenty-column by eighty-four-row chart on 14-count Aida occupies about 1.43 by six inches before any finishing allowance. If the chart contains open background, the outermost filled squares may occupy less space, but the planned rectangle still helps you position the whole design. Keep those chart dimensions distinct from the fabric piece you must cut.
A fabric-backed construction may need seam allowance outside the intended finished edges. A fringed edge needs enough material for the fringe and a secure boundary that prevents further unraveling. A folded construction consumes fabric in the folds. Choose the method first and calculate its particular allowance rather than applying one margin number to every bookmark. The fabric calculator handles the chart size and your selected extra fabric, but it does not choose a sewing construction for you.
Draw the entire object at its intended size on paper and place a rectangle for the stitched area inside it. Mark the top, bottom, edge treatment and any visible background. This paper plan reveals whether a border or name sits too close to a seam. It also helps you decide whether a chart needs to be shortened before the fabric is cut.
Check the actual fabric piece before stitching
Measure the usable fabric, including any irregular cut edges. Identify the center or another reliable starting point and confirm that the planned finish fits around the chart. Keep the piece's orientation clear, especially when the narrow width and long height are easy to confuse. A small amount of preparation protects the edge space you will need at the end.
Build a border from a repeat unit
A repeat unit is a small shape that can be copied at regular intervals. It might be a diamond, leaf, stepped line or a pair of alternating geometric marks. Draw the unit on a grid and identify its full allocated width and height, including any blank spacing needed before the next copy. A predictable unit makes counting easier and keeps the border rhythm consistent.
For a horizontal example, four eight-square-wide motifs separated by two blank squares occupy thirty-eight squares: thirty-two for the motifs and six for the three internal gaps. If you allocate ten-square blocks to each motif, the total planning area is forty squares because the final block also includes trailing space. Decide whether your stated dimensions describe the occupied shape or the full chart area, and use that distinction consistently.
On a narrow bookmark, you may repeat the same unit vertically rather than horizontally. Count the gap between motifs as carefully as the motif itself. A missing blank row shifts every later repeat even if the individual shapes are correct. The graph paper generator supplies a blank numbered grid for planning the repeat before transferring it to fabric.
Decide how the border ends and turns corners
A repeating border needs an ending that feels intentional. If the available length does not fit a whole number of units, you can adjust spacing, choose a different unit or add a separate end motif. Do not stitch repeated units until you run out of fabric and then cut the last shape in half unless that is the deliberate design. Chart the complete sequence first.
For a rectangular border, design the corners before stitching the straight sides. A straight repeat may not turn neatly through ninety degrees. A corner can be a dedicated shape or a carefully planned junction between two sides. Count the corner's occupied squares once in the overall dimensions so the top and side calculations do not accidentally overlap or leave an unexplained gap.
Check symmetry from the same central reference. A border surrounding a name should have balanced space around the lettering, even if the letter line has a different width from the repeat unit. The alphabet and names guide explains fixed-width lettering, spaces and odd or even centers. Plan the text and border together instead of treating the name as a late addition.
Preview the final unit at both ends
Look at the first and last repeat on the completed chart. Are they both whole? Do they face the intended direction? Does the spacing beside the edge differ from the spacing between motifs? Small end adjustments are easy to make on the chart. Once the fabric is stitched, they may require removing several repeats to restore balance.
Choose colors that stay clear at a small scale
A limited palette can make a tiny border easier to read and organize. Choose enough contrast between adjacent shapes and the fabric. A pale motif on pale Aida might look softer than intended, while two close shades can become indistinguishable at a small stitch size. Place the physical threads against the fabric and stitch a short sample of the most important combination.
If you alternate two colors, write down the sequence and its starting point. An odd number of repeated units will end with the same color it starts with; an even number ends with the other. Decide whether that suits the layout before changing colors on the fabric. The counting pattern and color rhythm are related, but they are not the same thing.
The blank grid designer lets you draw full-cross motifs with generic RGB colors and export a symbol chart. Match those digital references to physical thread before stitching. Save the editable project file while working because the design is not automatically stored. If your finished border needs backstitch, provide separate clear line instructions instead of assuming the filled-square export describes them.
Stitch one verified unit before repeating it
Start with a unit whose position you can check from the chart and planned margins. Complete it carefully, then compare its width, height and outline against the grid. Count the next gap in two directions when practical. Repeating a unit before confirming it can reproduce the same mistake throughout the border and make the finished pattern difficult to correct.
Use connected stitches as reference points, but do not rely entirely on their appearance. Two similar diamonds can look correct while one is shifted by a row. Check the starting square of each new repeat against the previous one and a larger chart boundary. The gridding guide describes verified temporary guides that can help on a longer piece.
Keep tension even and the upper diagonal consistent across full crosses. A narrow strip can show distortion clearly because its long edges give the eye a straight reference. If the fabric begins to pucker or twist, pause and reassess how it is held and how hard you pull. The beginner guide covers the basic movements before you add a repeated layout.
Plan the reverse and backing
A bookmark is handled from both sides, so consider how the reverse will be protected or presented. A backing can cover thread carries and add structure, but it also adds thickness. A deliberately visible reverse needs secure endings and a construction that does not leave loose threads to catch. Choose what you can finish neatly with the materials and skills available.
Avoid long carries across bare background when they could show through or snag. Secure thread beginnings and endings appropriately for the method and chart. If two distant motifs share a color, it may be better to finish and restart rather than stretching a loose thread along the entire strip. The needle and thread guide explains testing thread handling and anchoring choices.
Test the backing color against the actual fabric. A dark backing behind pale open-weave cloth can alter the visible background, while a pale backing may reveal contrasting carries. Make a small layered sample before choosing the final combination. Keep seams, folds and any adhesive product appropriate to the materials and outside the visible embroidery as required by the chosen construction.
Finish the edges before calling it complete
Follow a complete construction method suited to your fabric and backing rather than mixing partial instructions from different finishes. If you sew the piece, check seam placement and allowance on a scrap first. If you choose a fringe, make sure the remaining woven edge is secured so ordinary use cannot continue the unraveling into the stitched area. The exact method depends on the material and intended shape.
Inspect the finished bookmark for sharp or loose items, open seams and thread tails. Remove all temporary pins and needles used during construction. Try it in a book with a similar page size and binding to the one it will be used in. Check whether the top decoration or length protrudes in the intended way without pulling on the fabric.
For a gift deadline, include construction time as well as crosses. The time calculator estimates stitching from your rate but does not automatically include backing, edge work or drying. A small border may take only a few sessions to stitch and still need a separate evening for a careful finish. Plan those stages before deciding how many bookmarks to make.
Save a reusable plan for the next piece
Record the repeat dimensions, gaps, number of units, fabric count and actual finish method. Keep a chart showing the complete final border, not only the isolated repeat. These notes let you adapt the design to another name or length without rediscovering which measurements refer to stitches and which refer to seams. Photograph the finished front and reverse as an additional reference.
If the first piece felt too crowded, add more blank space or choose a simpler unit for the next one. If the construction was bulky, test a thinner suitable backing before changing the embroidery itself. Improve one decision at a time so you can tell what made the object more useful. A small original motif from the free charts can provide a starting point for your own compact arrangement.
A well-planned bookmark combines readable stitches, deliberate spacing and secure edges. The same repeat calculations can support a sampler border or a decorative strip, but the finish requirements will change with the object. Use the pattern design guide when adapting the layout, and confirm the complete physical size before cutting another piece of fabric.
Choose an original chart from our free collection, or check your fabric measurements before you begin.
Free cross stitch patterns · Fabric calculator