
Patterns · 9 MIN READ
Small Christmas cross stitch ornaments: plan the finish first
Make a star, a geometric keepsake or a personalized ornament with room for backing.
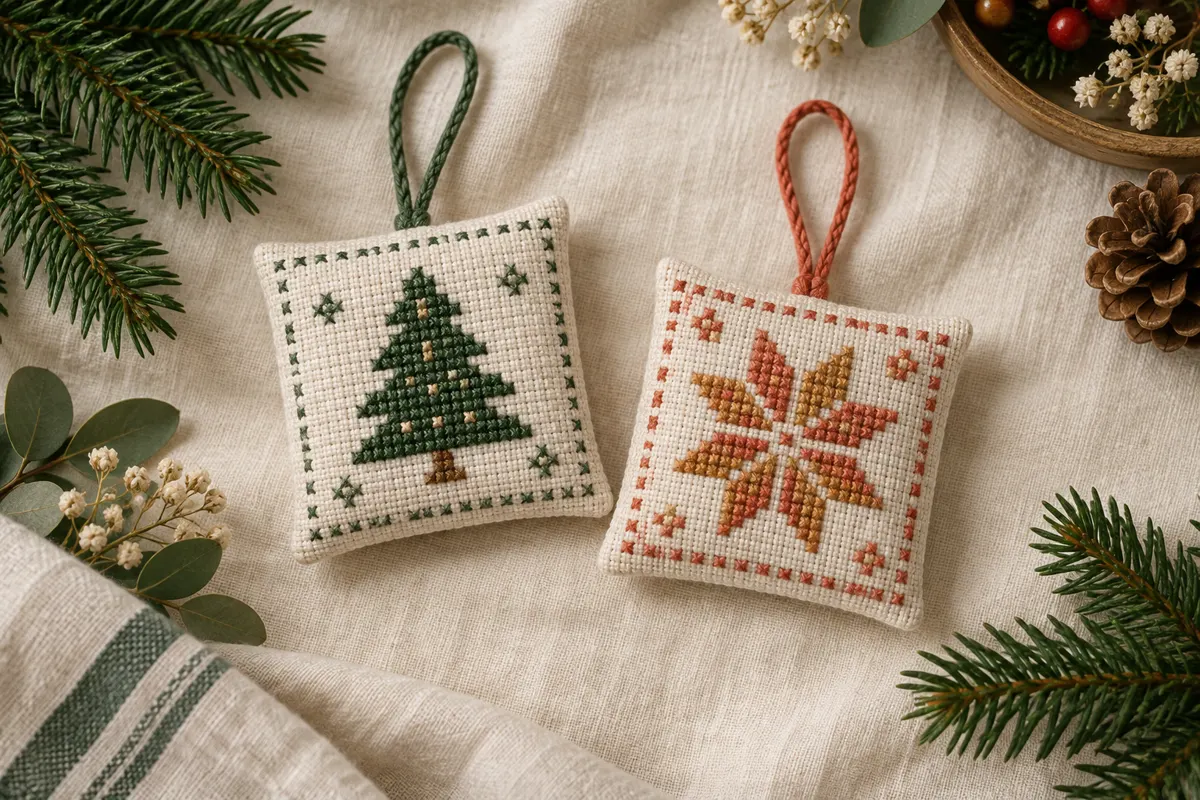
Choose the ornament shape before the chart
A Christmas cross stitch ornament is a small stitched object with a planned edge, backing and hanging point. Decide whether you want a square, circle, small hoop or another manageable shape before choosing the motif. The finish sets the available space and can affect how the design sits when hanging. A chart that fits on the fabric may still be too large once seams, folds or a hoop's visible opening are considered.
Start with generic seasonal shapes such as a star, tree, heart, snowflake or geometric wreath. They offer many ways to vary colors and proportions without depending on a branded character. Our original free chart collection includes a winter star that you can inspect as a small starting project. Read the included usage terms before sharing a chart file or making items for sale.
Choose a design with a clear outline and a manageable number of colors. A very detailed scene can become hard to read at ornament size. If the finish is meant to be viewed from across a room, an obvious shape and useful contrast may matter more than tiny shading changes. The easy pattern guide explains how to evaluate the actual chart rather than relying only on a festive photograph.
Calculate the motif and finishing space
Divide the stitch width and height by the effective stitches per inch to estimate the motif's physical size. A twenty-eight-square design on 14-count Aida measures two inches across. A twenty-one-square height measures one and a half inches. Those dimensions describe the chart area before any fabric allowance for holding, construction or the background you want visible around the shape.
A sewn ornament needs the allowance required by its chosen construction. A hoop finish needs enough fabric for positioning and securing the back. A circular opening can hide the corners of a rectangular chart even when its diameter seems large enough. Make a paper template of the visible opening and compare it with the complete design before cutting the fabric or stitching a border.
Use the fabric calculator for the chart arithmetic and add an allowance suited to the actual finish. Keep the planned top clearly marked in your notes. If you change from 14-count to 18-count, the same chart becomes smaller, but its construction allowances do not automatically shrink in the same proportion. Recheck the whole object, including ribbon placement and background space.
Keep the hanging point outside the motif
A hanging loop or ribbon needs a secure position that suits the ornament's structure. Plan it before closing the backing so it does not have to be attached through the finished design afterward. Check whether its placement changes the way the object hangs. A loop placed off-center can tilt an otherwise symmetrical ornament, which may be attractive or unintended depending on your plan.
Design a star or snowflake with a clear center
Symmetrical motifs are easier to plan when you choose the center deliberately. An odd-width chart has a central column, while an even-width chart has a center between columns. Decide which arrangement fits the shape and any surrounding border. Copy each arm or point from the same reference instead of drawing similar-looking parts independently and hoping they align.
For a simple original star, sketch one point and reflect its structure around the chosen center. Count the empty spaces between points as well as the filled squares. Narrow gaps help separate the shape from the background, but a single isolated square can become an extra thread start. Inspect the design at a small viewing size to see whether the points remain distinct.
The blank grid designer supports full-cross motifs and undo, making it useful for simple seasonal geometry. Its SVG export includes symbols and a generic color key. Save the project file while editing because the design is not automatically stored for a later visit. Our pattern design guide explains how to review the chart's workload before choosing the final version.
Plan a small tree or wreath with connected shapes
A small tree can be built from stepped rows, a compact trunk and a deliberately spaced top detail. Chart the rows so the shape widens predictably, and compare the two sides around the center. If you add isolated decorations, count how many different colors and starts they introduce. A simple tree in one or two colors can be more readable at a small scale than a crowded miniature scene.
A wreath needs a clear inner opening and an outer boundary. Avoid filling the center accidentally when placing leaves or berries. A tiny bow may require more chart detail than the surrounding ring, so decide whether it is essential to the silhouette. If the design uses backstitch for a bow or stem, provide the line endpoints and strand count rather than expecting the full-cross squares to describe it.
Compare the motif with the intended fabric color. A pale snowflake on white fabric may need a stronger shade or outline to stay visible. A dark green tree can read clearly on a light background, while a similarly dark backing or fabric may reduce its contrast. Test the important colors physically; the maker's digital palette is a reference rather than an exact thread match.
Add names and dates without crowding the layout
A short year or set of initials can personalize an ornament, but it adds real chart width and height. Plan it with the motif as one arrangement. Confirm the text before stitching and check whether there is enough background between the lettering and the border. A name added after the picture is complete can force the finish into a larger size than originally intended.
The name maker produces uppercase block lettering with a limited supported character set. Preview the full text and spacing, then calculate its dimensions at your selected fabric count. It creates one line, so a multi-line arrangement needs separate planning. The alphabet and names guide explains how to center text and keep word gaps distinct from letter gaps.
For a set of ornaments, decide whether the date or name appears in the same place on every piece. Keep a written list of recipients and approved text, then check each chart against it. Use a private project note rather than including personal details in a publicly shared download unless the person wants them shared. Consistent preparation can prevent a small spelling error from becoming a repeated mistake.
Test the smallest lettering first
Stitch a short representative part of the text on the intended fabric. Check it from the distance where the ornament will be seen. If the letters blend together, change contrast, spacing or the alphabet before committing to the whole set. Increasing thread thickness alone may crowd small holes without making the message clearer.
Prepare thread and stitch the motif in verified sections
Sort the actual colors and keep their labels with the chart symbols. If you are making several ornaments from the same pattern, prepare a repeatable setup and note substitutions. A color that looks close in evening light may be different from the one used in the first piece. The needle and thread guide explains strand preparation and coverage tests for the chosen fabric.
Check the first motif's placement carefully before stitching several identical copies. Compare the start with the planned margins, center and top orientation. For repeats on a larger fabric piece, calculate the space between complete finished objects, including their separate construction allowances. Do not place the stitched motifs so close that there is no fabric left for cutting and backing them individually.
Use a loop start when the plain thread and even working strand arrangement suit it, or choose another appropriate anchor. Keep the top diagonal consistent and avoid long loose carries behind visible background. Complete any outlines according to the chart and inspect the motif before moving on to the edge construction.
Choose a finish you can repeat neatly
For a sewn fabric ornament, use a complete construction method suited to the materials and intended shape. Test it on a scrap before using the embroidery. Check seam placement, turning space, backing orientation and the hanging loop arrangement. A square finish may be a simpler first lesson than a sharply pointed shape whose corners require careful handling.
A hoop display needs enough surrounding fabric for a tidy back and stable positioning. Decide whether the hoop is part of the permanent finish or only a working tool. If you remove it after stitching, ensure the final backing provides the required support. A frame-like finish should not press the embroidery into an opening that crops important stitches or forces the weave out of shape.
Keep added decoration proportional to the object. A large bow or heavy embellishment can tilt a light ornament or hide the design. Check the finished balance while holding it by the actual loop, and inspect for loose parts or exposed pins. Treat it as a decorative object and choose materials appropriate to where and by whom it will be handled.
Schedule a batch with time for the finish
Estimate the number of filled crosses in one ornament and time a representative stitching session. Multiply carefully for the planned quantity, then add separate time for outlining, construction and any material-appropriate cleaning or drying. The time calculator turns your own rate into a planning schedule; it does not include every finishing task automatically.
Make one complete prototype before beginning a large batch. The first finish can reveal that the chosen ribbon needs a different length, the backing is too thick or the border sits too close to the edge. Adjust the plan once, record the change and repeat the improved version. Completing all the embroidery before testing the construction can reproduce the same fitting problem across every gift.
Use the project tracker to record totals if it helps organize the batch, and export a backup because it saves only in the current browser profile. Keep construction notes separately from stitch counts. A project can be fully stitched while still needing backing and hanging loops; label that stage clearly in your own list so nothing is packaged prematurely.
Review, label and store the finished ornaments
Check each finished piece for accurate text, secure thread ends, sound edges and a properly attached loop. Remove all temporary pins or needles from the construction. Compare the set together if consistency matters, while allowing deliberate color differences. Include a short care note for the actual fabric, thread and decoration rather than assuming every ornament can be washed in the same way.
Store completed pieces clean and dry, with support that prevents hard decorations from snagging another ornament. Keep the final chart, material labels and any editable project files for repairs or future matching pieces. A photograph of the front and back is useful, but it does not replace the instructions needed to recreate the finish.
Choose a manageable number of gifts and leave room for the final checks. A compact seasonal motif can feel personal through thoughtful colors, a well-spaced date and a neat backing. The bookmark and border guide offers more repeat-layout ideas, while the framing guide explains measured centering for flat display finishes. Plan the whole object, then stitch one verified part at a time.
Choose an original chart from our free collection, or check your fabric measurements before you begin.
Free cross stitch patterns · Fabric calculator